Meet the Experts Behind Premier Group NZ
When it comes to choosing the right bricks for your home or project, there’s more to consider than just colour and cost. Bricks impact your build’s durability, weather resistance, thermal performance, compliance, and even your home’s resale value.
That’s why thousands of Kiwis turn to Premier Group NZ, home to some of the most experienced and respected brick consultants in New Zealand—trusted not just by homeowners, but by builders, architects, and industry professionals across the country.
🧱 Why Expert Brick Advice Matters
From efflorescence and mortar stains to insulation and aesthetic coordination, the decisions you make early can save (or cost) you thousands down the track.
Our brick consultants don’t just know Premier Brick inside and out—they are often called in to advise and troubleshoot brick jobs supplied by other companies. That’s how respected they are.
🧠 A Team Trained by the Best in the Business
Every one of our consultants has undergone extensive training under John Oliver, one of New Zealand’s most respected brick authorities. This training dates back years and is ongoing.
They’ve also logged countless hours of on-site consultation, walking builds, identifying risks, solving issues, and supporting projects both big and small.
It’s not theory. It’s real-world learning earned the hard way—one brick at a time.
🔍 Top Brick Topics Kiwis Are Searching (and How We Help)
We’re proud to support customers researching topics like:
- House bricks NZ
- Brick suppliers New Zealand
- Brick veneer homes NZ
- Brick cladding options NZ
- Brick vs weatherboard
- Bricklaying services
- Brick colour and mortar advice
- Brick maintenance
- Brick energy efficiency and resale value
- Brick matching and renovation help
Whether you’re choosing cladding for a new build or fixing issues in an existing home, our team has the answers.
👷 Meet New Zealand’s Leading Brick Experts
🔧 Bernard Powell – Founder & Strategic Consultant
A visionary leader who brings strategic thinking and product innovation to every conversation. Bernard has helped shape the evolution of brick design and selection in NZ and continues to support clients on both technical and visual aspects of their projects.
🧱 Isaac Clare – Brick Consultant with 10+ Years in Sales & Advice
Isaac helps homeowners and builders make confident decisions with bricks. From colour matching to cavity wall setups, his advice prevents issues and ensures your build is both beautiful and durable.
🧱 Jackson Powell – Brick Consultant with 10+ Years Experience
Known for his steady guidance, Jackson supports customers in choosing the right brick for their location, build style, and long-term performance needs. He works closely with architects to align aesthetic goals with product compatibility.
🛠️ Joshua Robinson – Brick Consultant with Residential Building Experience
Josh brings a practical lens from years in the building trade. He helps clients with site prep advice, cavity detailing, and product suitability based on region and build style. Builders appreciate his down-to-earth, get-it-done support.
🧰 Billy Gibbs – Brick Consultant with a Commercial Construction Background
Billy advises on larger-scale builds and commercial jobs. He’s regularly called in for site reviews, installation troubleshooting, and compliance support—even on jobs not supplied by Premier.
🧼 Matt Clare – Customer Advisor with a Commercial Cleaning Background
Matt helps customers with ongoing brick care and maintenance. From efflorescence prevention to long-term appearance retention, his product knowledge ensures your bricks stay looking their best for years to come.
They are all technical experts in their own right so are all willing and able to help in almost any situation involving brick problems or challenges.
💡 What Makes Premier Group Brick Consultants Stand Out?
- We consult on all brick types, not just Premier Brick
- We are called in weekly to investigate and report on issues with jobs supplied by other brick companies
- Our advice is trusted across the entire building industry, from first-home builders to large commercial developers
- We work closely with architects, designers, engineers, and builders to help them get the most from brick systems
- Our consultants have trained under New Zealand’s top expert, John Oliver, and logged countless hours of on-site problem solving
- You’ll get honest, practical advice backed by real-world experience—not just a product brochure
🧠 Technical Tips That Save You Thousands
- Use dark mortar with mid-tone bricks to reduce visual staining
- Always install weep holes and DPCs behind brick veneers
- Choose bricks rated for your climate zone—especially for coastal or high-wind areas
- Understand joint styles and how they affect appearance and maintenance
- Store bricks off the ground and covered to prevent water absorption before laying
- Use our guide to match mortar types and joint finishes to your brick colour for the perfect finish
🔥 Popular Product Highlight: The Vintage Collection
The Vintage Brick Collection gives you a high-end handmade look without the imported price tag:
- Made locally in NZ
- Incredible natural variation in tone and texture
- Engineered for easier, faster laying
- Save $7,000–$14,000 or more compared to imported bricks on a typical home!
📞 Let’s Talk Bricks
Want to avoid mistakes, delays, or expensive rework? Get the right advice from day one.
📧 Email: sales@premier-group.co.nz
📞 Freephone: 0800 22 22 98
🌐 Visit: www.premierbrick.nz
Prefer a virtual walkthrough? We offer free video consultations—fast, friendly, and tailored to your home.
🎁 Download Your Free Brick Buyer’s Guide
This must-read resource includes:
- Tips for choosing brick colour and mortar
- Brick vs weatherboard vs stone comparisons
- Joint style diagrams
- Installation tips for builders and homeowners
- Questions to ask your builder before you commit
🎯 Click here to get your FREE guide now.
🧱 Final Thoughts
There are lots of places to buy bricks. But very few places where you’ll find a team of experts who’ve been trained by the best, tested in the field, and trusted by the industry.
Many brick sales people from other brick suppliers come and go but at Premier Group NZ we are all here for the long haul. Brick making and advice is in our DNA.
Premier Group NZ isn’t just the place to buy bricks—it’s the place to get the right advice, every time.
Written by Bernard Powell – Brick Consultant
Premier Group NZ
Give Your New or Old Bricks a Fresh, Rustic Vibe with This DIY Game-Changer
Keen to create that earthy, lived-in look that’s full of charm and character? A bagged finish is a seriously underrated way to transform your brickwork—and the best part? You can do it yourself!
Whether you’re working on a brand-new build or want to breathe fresh life into tired, old bricks, this technique is simple, affordable, and super effective.
🧱 What’s a Bagged Finish Anyway?
A bagged finish (also called “bagging”) is where you apply a light mortar mix over your bricks using a hessian sack, sponge, or cloth. It gives that beautiful, raw, and rustic texture—kind of like a halfway point between paint and full render.
You still get to see the brick’s personality coming through, but with a softer, weathered vibe.
💥 Why Bagging is a Winner
✅ Looks epic on new or old bricks
✅ Easy DIY with minimal gear
✅ Budget-friendly makeover
✅ You control how rustic or refined it looks
✅ Adds instant street appeal and texture
🔧 What You’ll Need
- Cement + sand mix (6:1 ratio) or pre-mixed mortar
- Water
- Bucket
- Hessian sack, sponge, or cloth
- Gloves, goggles, mask
- Stiff brush (for prep)
- Drop sheets or tape to protect surfaces
- Optional: bonding agent or oxide tints for custom colour
🔨 How to Bag Your Bricks (Like a Pro)
- Clean It Up
Scrub your bricks down—no dust, dirt, or flaky bits. A stiff brush or pressure washer works wonders. - Mix It Right
Your mix should be thick and sludgy—like porridge. Add a bonding agent if you’re working on older bricks for better grip. - Test Before You Go Wild
Do a little patch first to see how it dries. Tweak your mix until you’re loving the look. - Get Bagging!
Dip your sack or sponge into the mix and start rubbing it on. Circular, patchy, or smooth—it’s your call! Go light for a vintage feel or heavy for a bolder, creamy texture. - Leave It or Smooth It
Want it rough and raw? Leave it. Want a cleaner look? Lightly smooth it out with a sponge or trowel. - Let It Cure
Give it a few days to dry properly—especially if it’s damp or chilly. Keep the area dry while it sets.
🎨 Hot Tip: Add a Colour Twist
Mix in some oxides or go with a lime wash for a unique colour tone. White, off-white, or warm greys look stunning.
🏡 Real Talk from Premier Brick Customers
We’ve seen our Vintage Bricks absolutely pop with a bagged finish. It’s a clever way to blend old-school charm with modern vibes—and it works just as well on a sleek new build as it does on a reno.
🎁 FREE Brick Buyer’s Guide
Building soon? Don’t make decisions in the dark. Grab your FREE Brick Buyer’s Guide—it’s loaded with inspo, tips, and everything you need to make your brickwork shine.
👉 Email us here to request your copy and for other helpful resources! sales@premier-group.co.nz
Ready to Get Started?
Want bricks that look epic with or without bagging? Chat with our friendly team today.
📞 0800 22 22 98
📧 sales@premier-group.co.nz
🌐 www.premierbrick.nz
Written by Bernard Powell – Brick Consultant
Premier Group NZ
NZ-Made. Stunning Look. Half the Price.
At Premier Brick, we believe every Kiwi should be able to build a beautiful home without blowing the budget. That’s why our Vintage Texture brick range has been an absolute game-changer for builders, architects, and homeowners across New Zealand.
If you’re chasing that reclaimed, recycled, or handmade brick look, most alternatives come from—you guessed it—Europe. Fancy? Maybe. But also crazy expensive. Some of these imported bricks cost double or even more per m² compared to our Vintage Texture range.
🔥 Why Kiwis Are Making the Switch
Since launching the collection, we’ve seen a massive wave of architects, designers, and builders ditch imported bricks in favour of Vintage Texture. Why?
✅ It looks incredible – with rich textures and colour variation that screams “character”
✅ It’s made right here in NZ – so you’re supporting local
✅ It costs up to 50% less – that’s thousands of dollars back in your pocket
✅ It’s available now – not sitting in a shipping container for months
🧱 Why Vintage Bricks Are So Hot Right Now
There’s a growing trend in New Zealand design: people want warmth, charm, and timeless materials that tell a story. Whether you’re renovating a villa, building a new farmhouse, or adding an industrial-style feature wall, Vintage Texture bricks deliver that handcrafted, aged look that brings a space to life.
And here’s the best part—you get all that without paying overseas prices.
🎥 Want to see them in action?
👉 Check out our Vintage Brick Playlist on YouTube
Watch builds, close-ups, interviews and inspiration—all in one place.
💰 Real Savings You Can Take to the Bank
Let’s talk cold, hard cash.
Choosing Premier Brick’s Vintage Texture range over imported handmade or reclaimed alternatives can save you serious money.
| Brick Area Needed | : Average Saving : (vs. Imported) |
| 100m² | $7,000 |
| 150m² | $10,500 |
| 200m² | $14,000 |
| 250m² | $17,500 |
| 300m² | $21,000 |
That’s money back in your budget—which could go toward landscaping, better fittings, or just keeping the mortgage down.
🧱 Same handmade charm. Half the price. And your dollars stay right here in Aotearoa.
Why overpay for imported bricks when you can achieve the same look for much less?
💸 What Makes Premier Brick’s Vintage Texture Range Better?
| Feature | Imported Handmade Brick | Premier Brick Vintage Texture |
| Price | $$$$ | $$ |
| Style | Reclaimed/Handmade | Reclaimed/Handmade |
| Origin | Europe | 🇳🇿 New Zealand |
| Lead Times | Long delays | Fast delivery |
| Availability | Limited | In stock |
| Local Economy Support | ❌ | ✅✅✅ |
You don’t just save money—you do good. When you buy NZ-made bricks, you’re supporting Kiwi businesses, local jobs, and our economy. That’s something we can all feel proud of.
You’re not just saving thousands—you’re a superstar backing the NZ economy.
Good on ya, mate!!
🛠️ How to Choose the Right Brick for Your Build (Without Blowing the Budget)
When choosing bricks, consider:
- 🎨 Design Style – Match the tone of your home
- 💰 Budget – Set it early and stick to it
- 🕐 Lead Times – Avoid long waits on imported products
- NZ Local Value – NZ-made bricks = better support, faster delivery
- 📸 Visual Impact – Pick a brick that delivers real “wow” factor
Vintage Texture bricks tick every one of those boxes.
❓ Frequently Asked Questions
Q: Are Vintage Texture bricks really made in NZ?
Yes! 100% locally manufactured. You’re backing Kiwi jobs and avoiding massive import costs and the huge carbon footprint of shipping!
Q: Do they look like reclaimed or handmade bricks?
Absolutely. They’re specifically designed to mimic the charm and imperfection of aged or handmade bricks—without compromising structural quality.
Q: Can I use them for interior walls or fireplaces?
Yes! They’re perfect for both internal and external use. Think rustic feature walls, fireplaces, or entryways with real character.
Q: Can I see them in person?
Of course! Visit one of our display rooms or contact us to book a look.
👏 Build Beautiful. Spend Smart. Back NZ.
If you’re planning to build and love the look of handmade or reclaimed bricks, there’s only one smart choice: Vintage Texture by Premier Brick.
✅ Looks incredible
✅ Saves you thousands
✅ Supports New Zealand
👉 Explore the range at www.premierbrick.nz
👉 Or give us a call today—we’d love to help you get started
🎥 And don’t forget to watch our builds here: Vintage Brick Playlist on YouTube
Proudly NZ Made. Proudly Helping Kiwis Build Better.
Written by Bernard Powell – Brick Consultant
Premier Group NZ
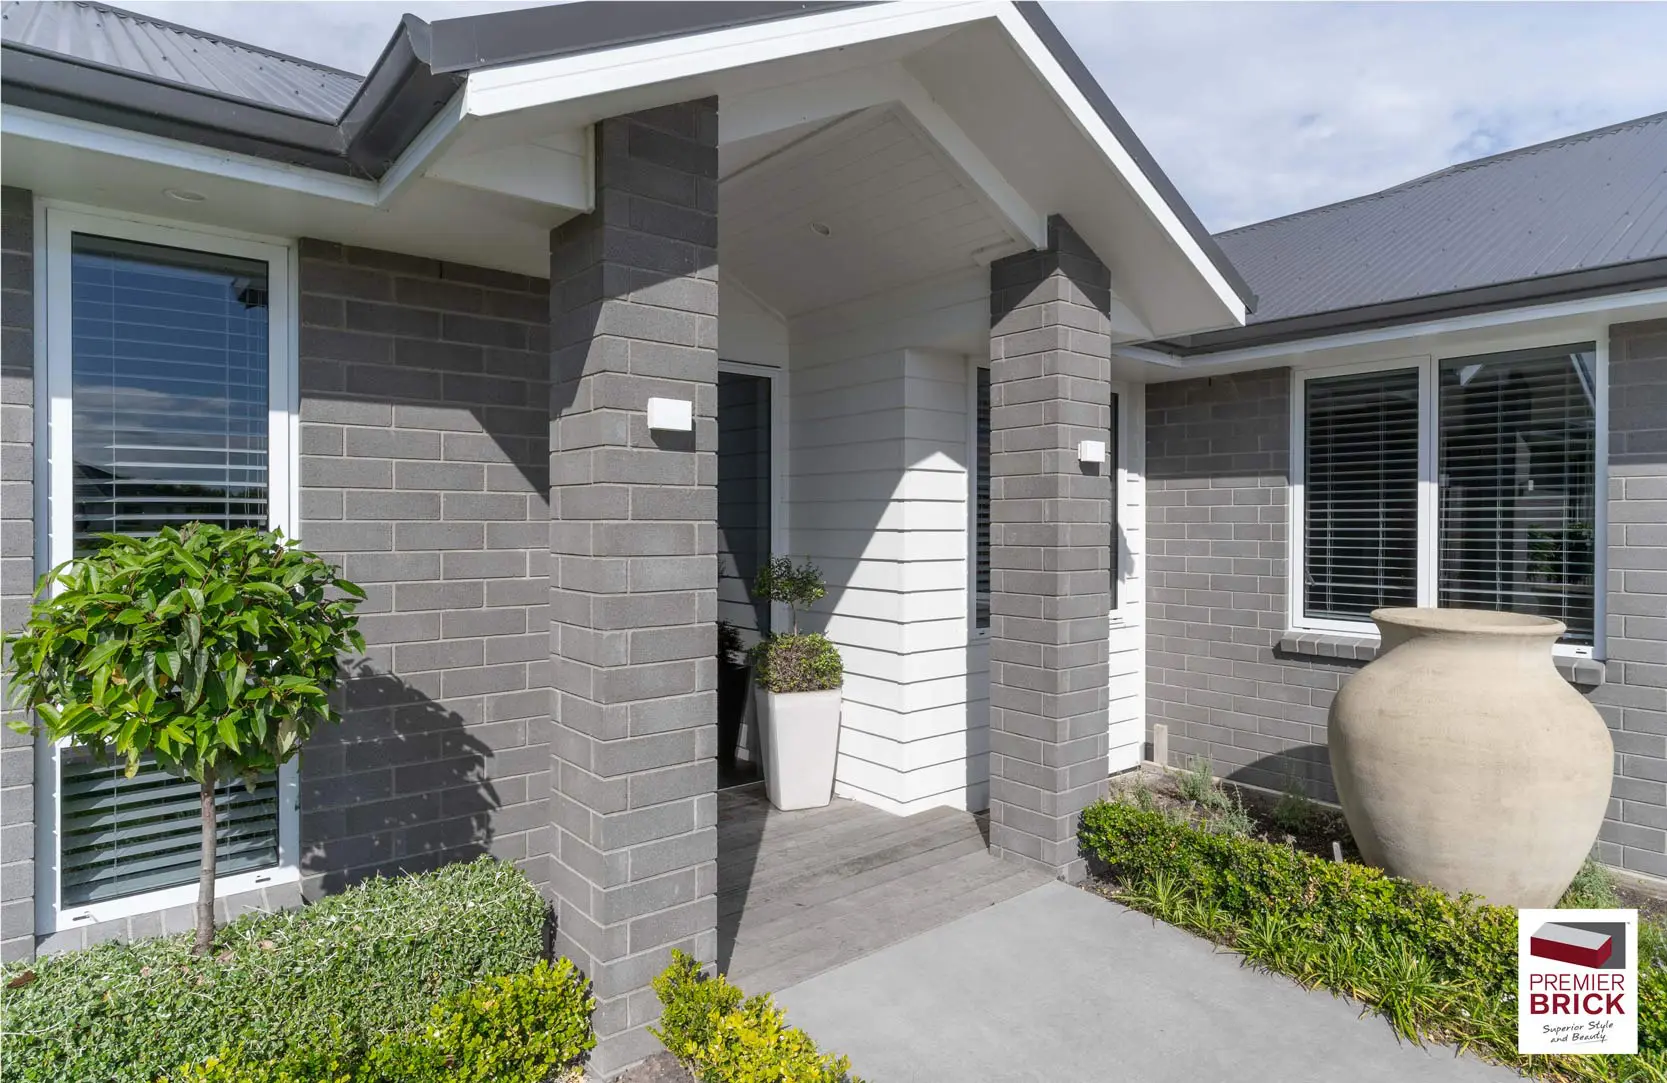
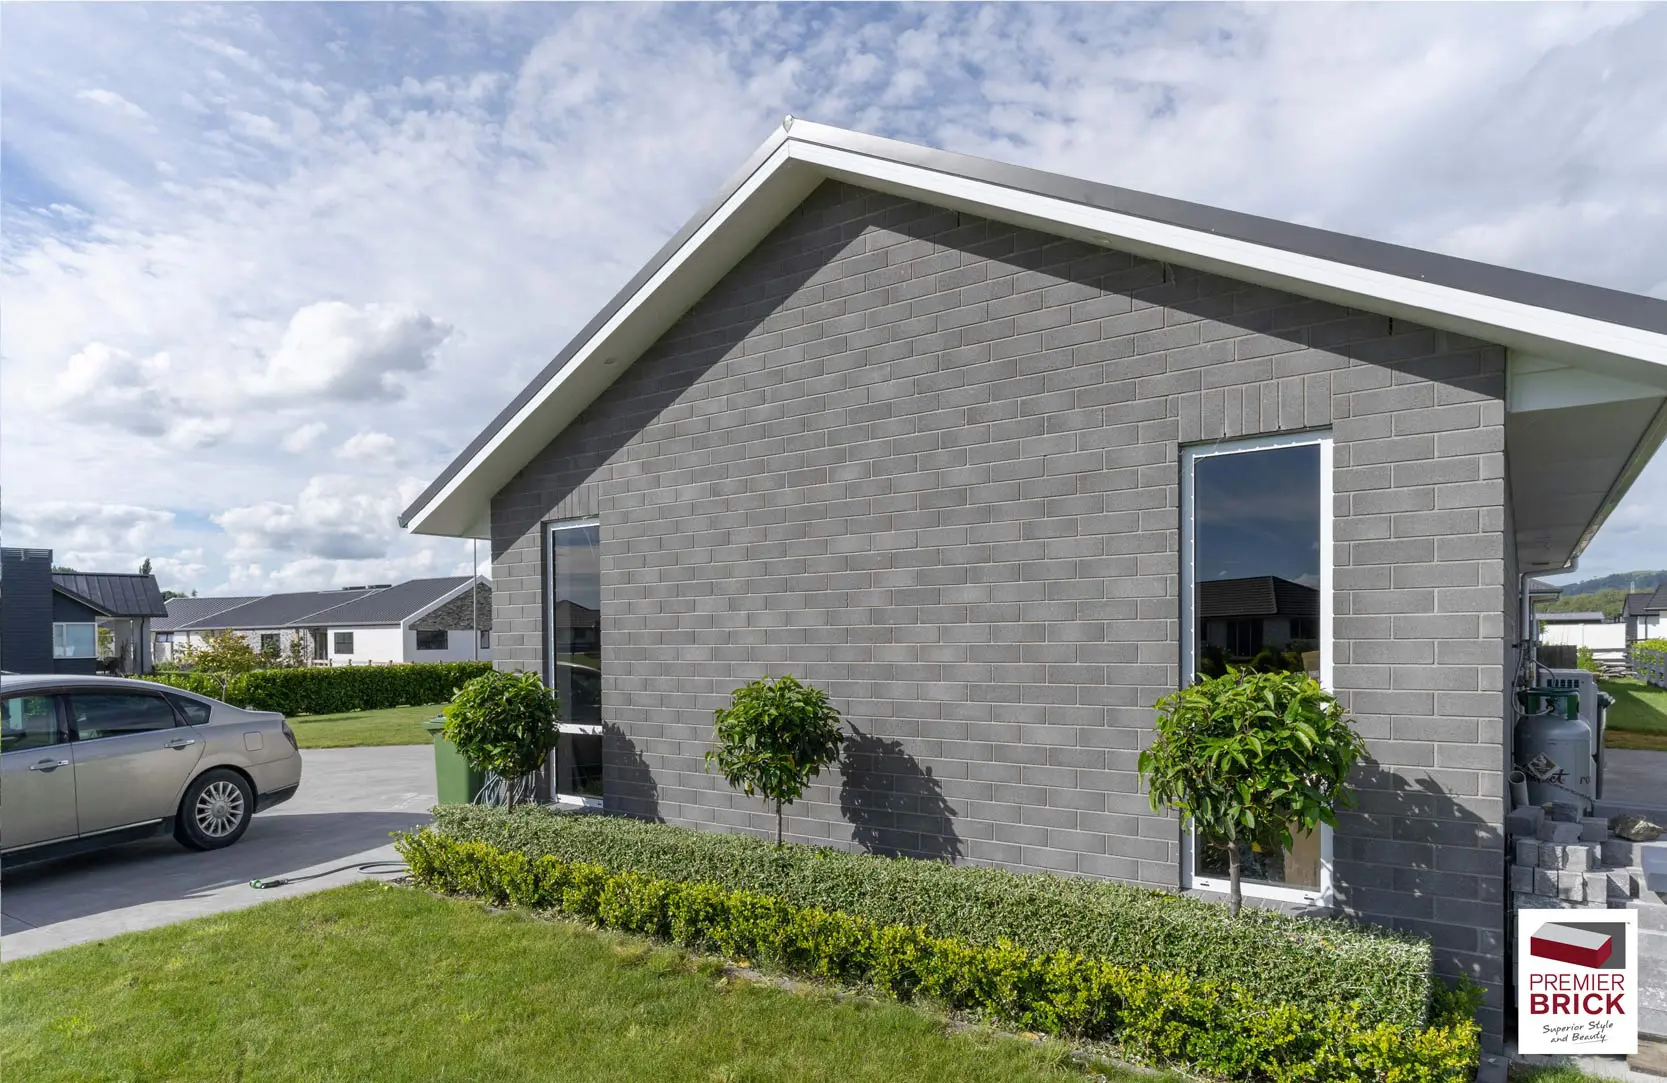
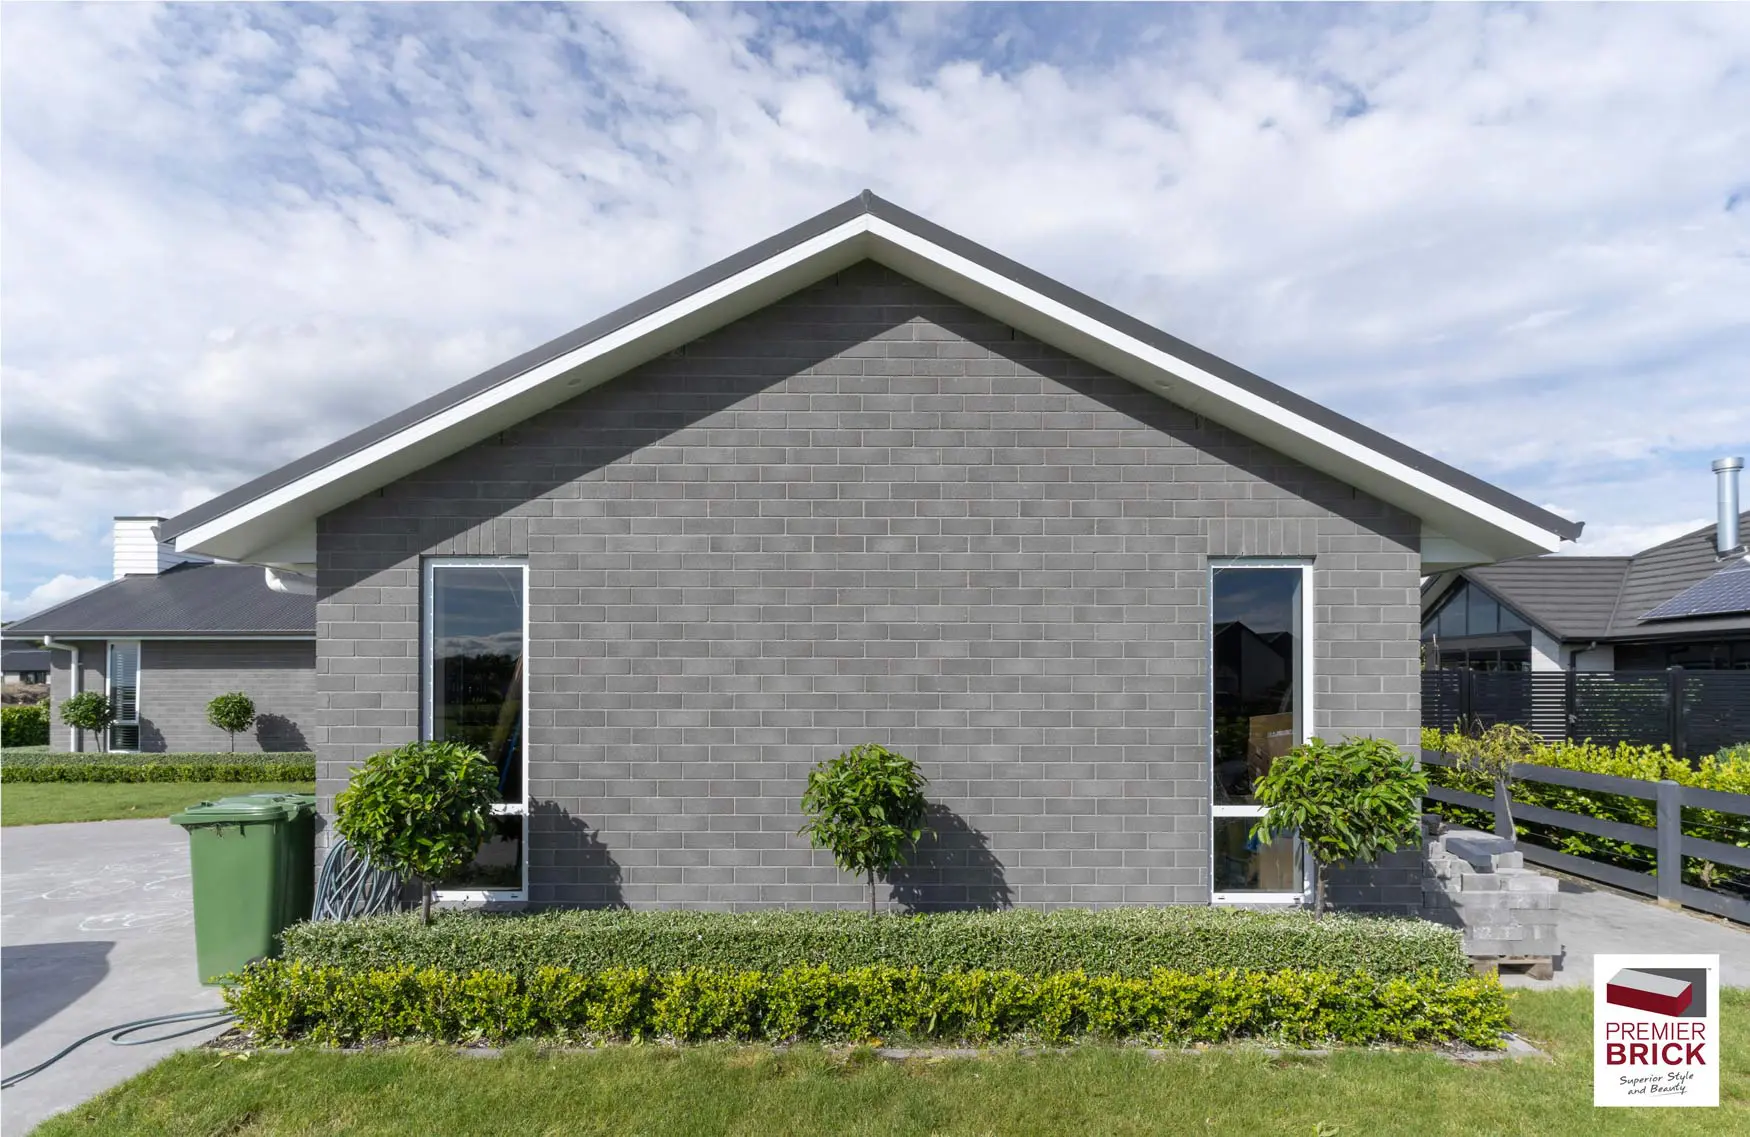
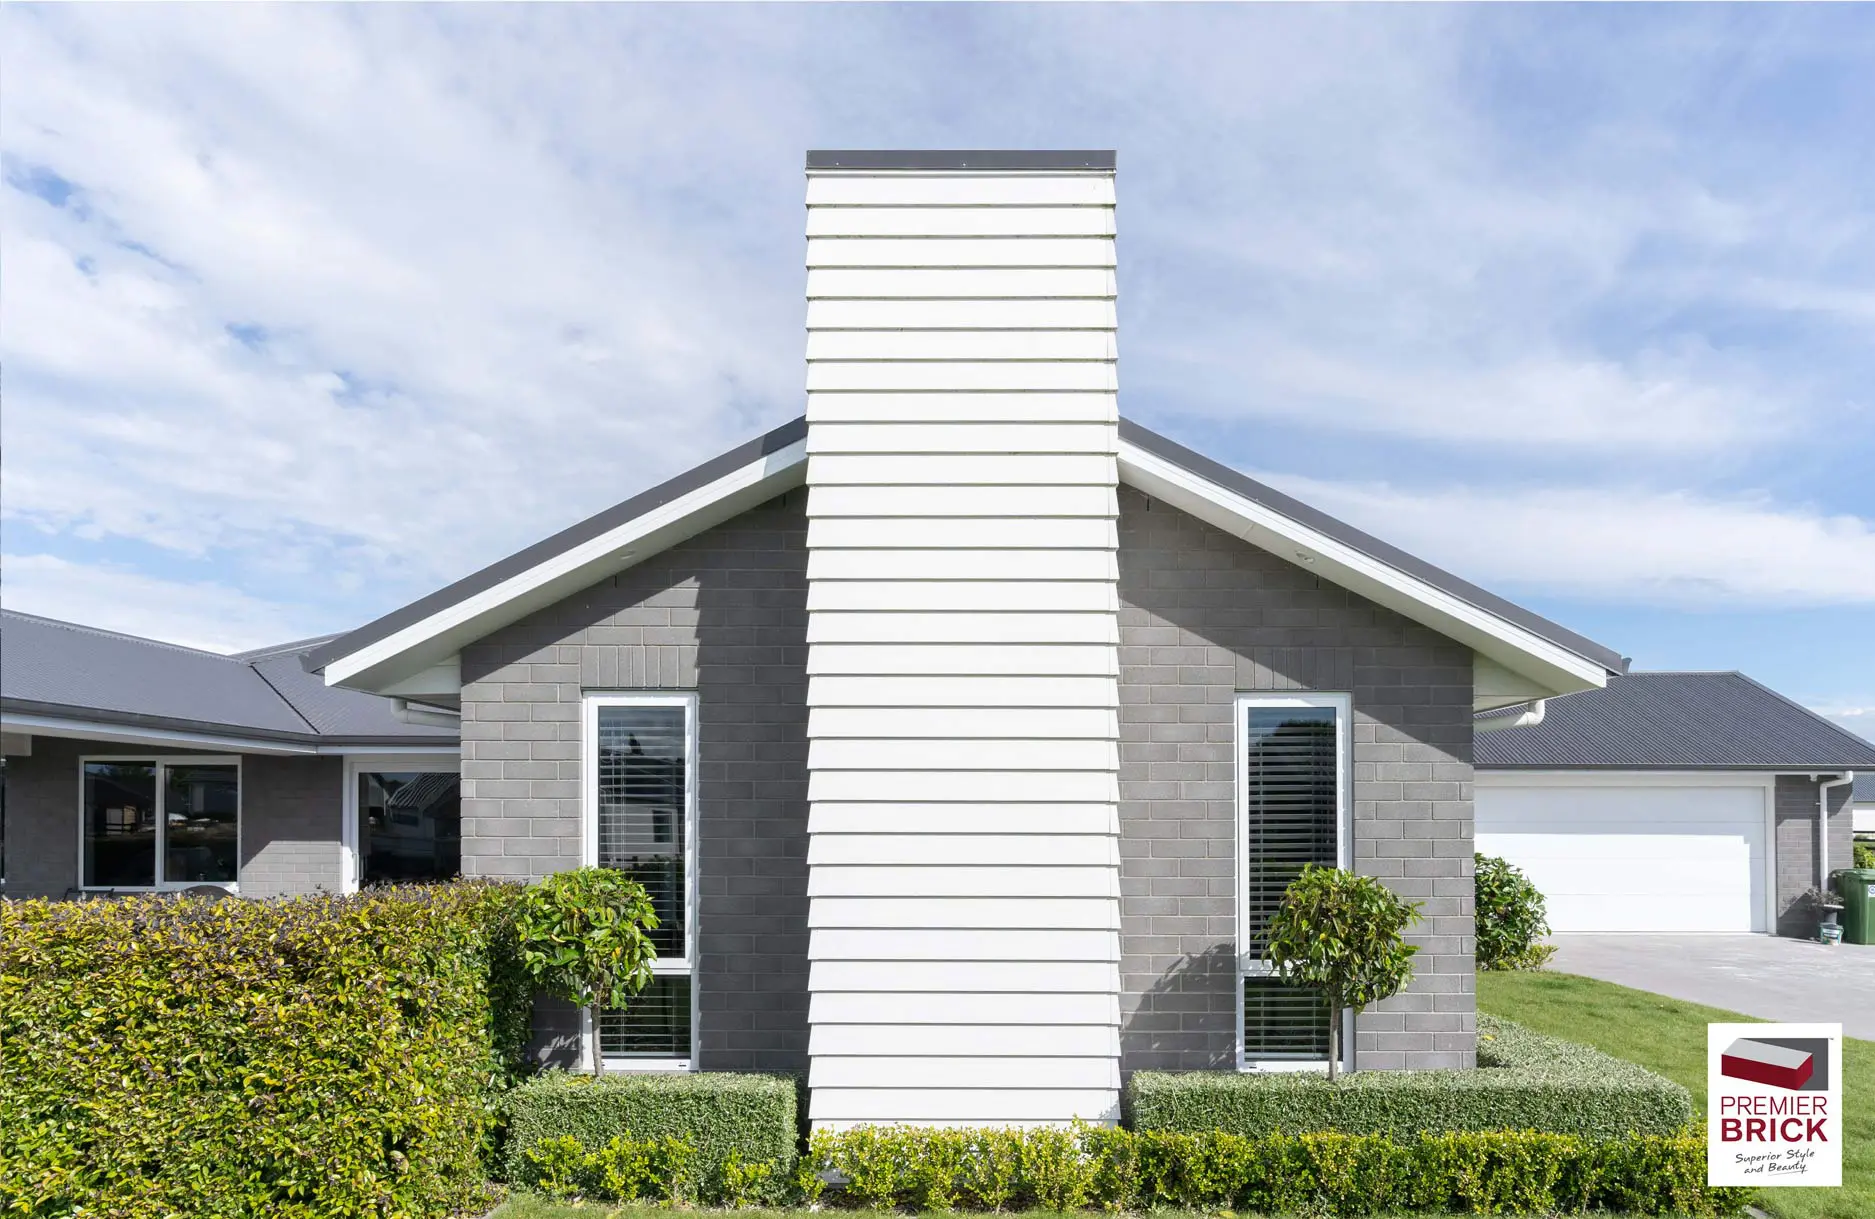
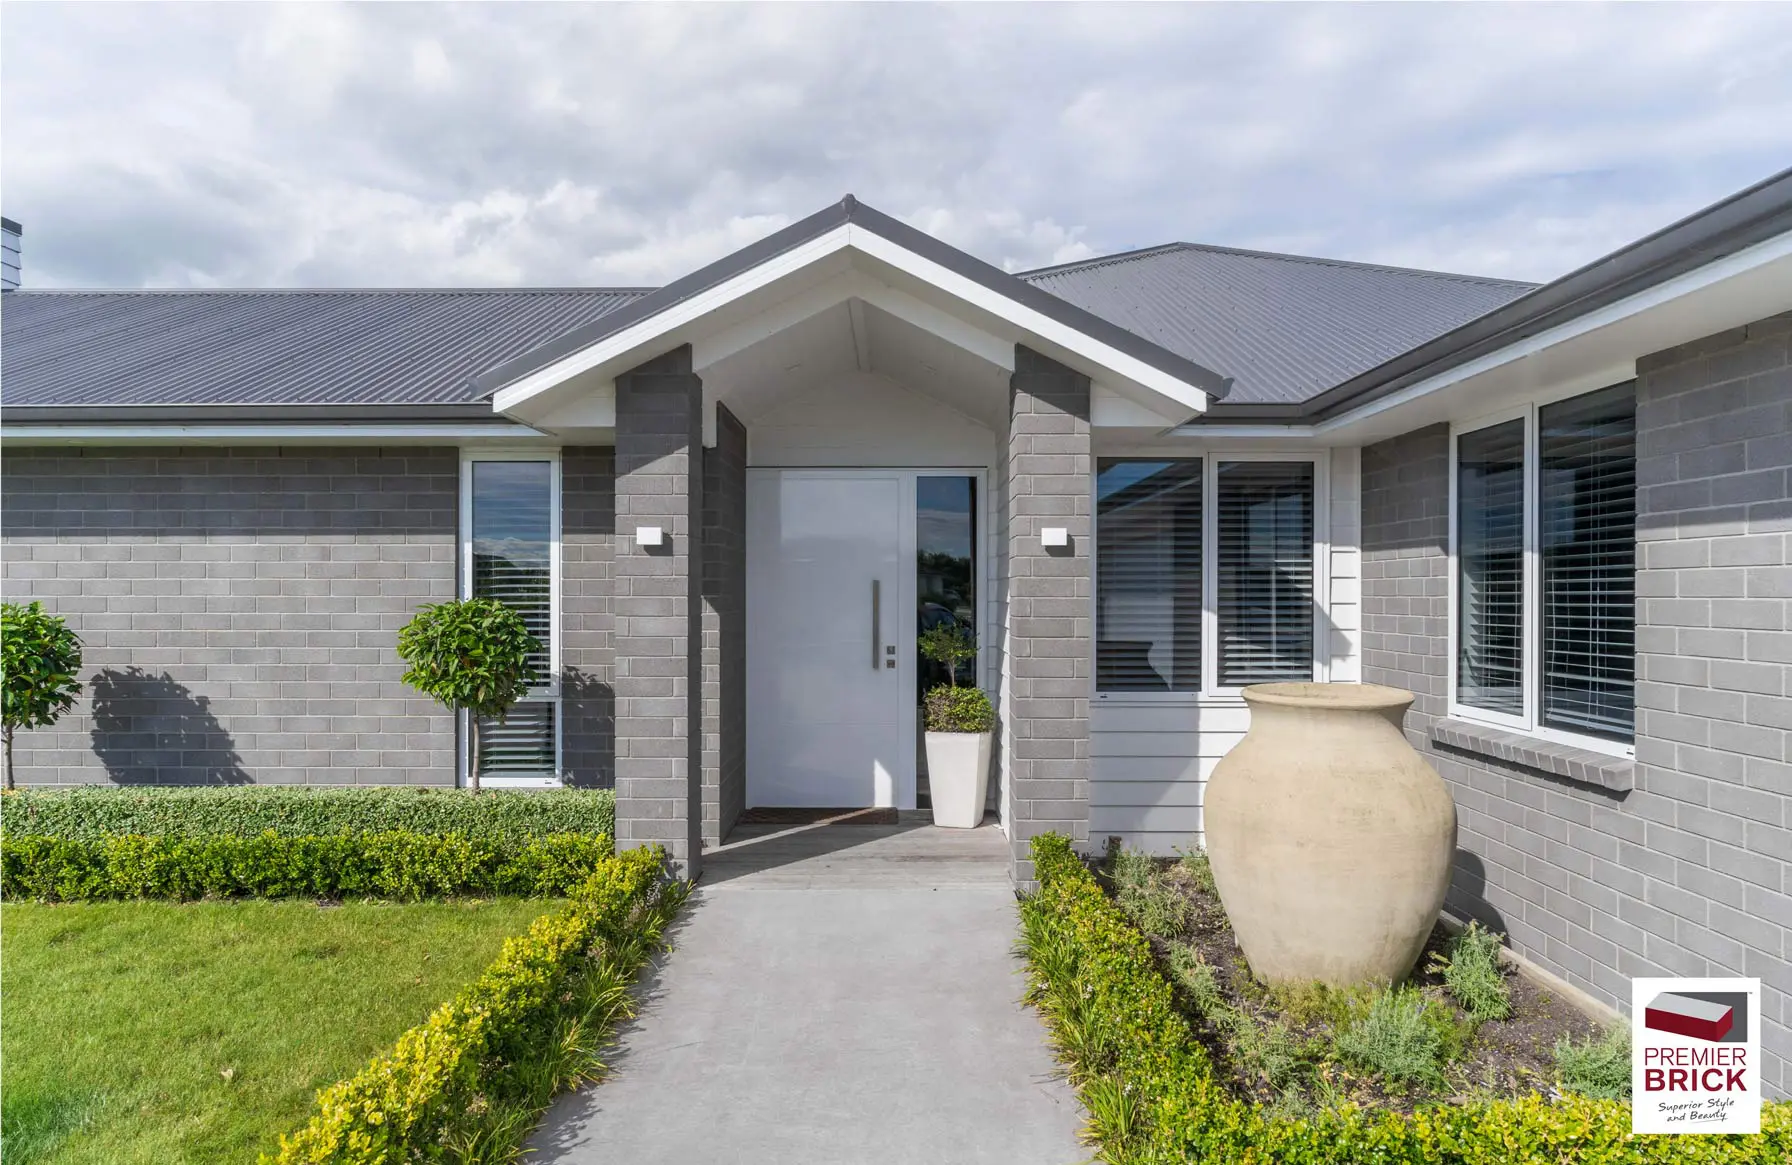
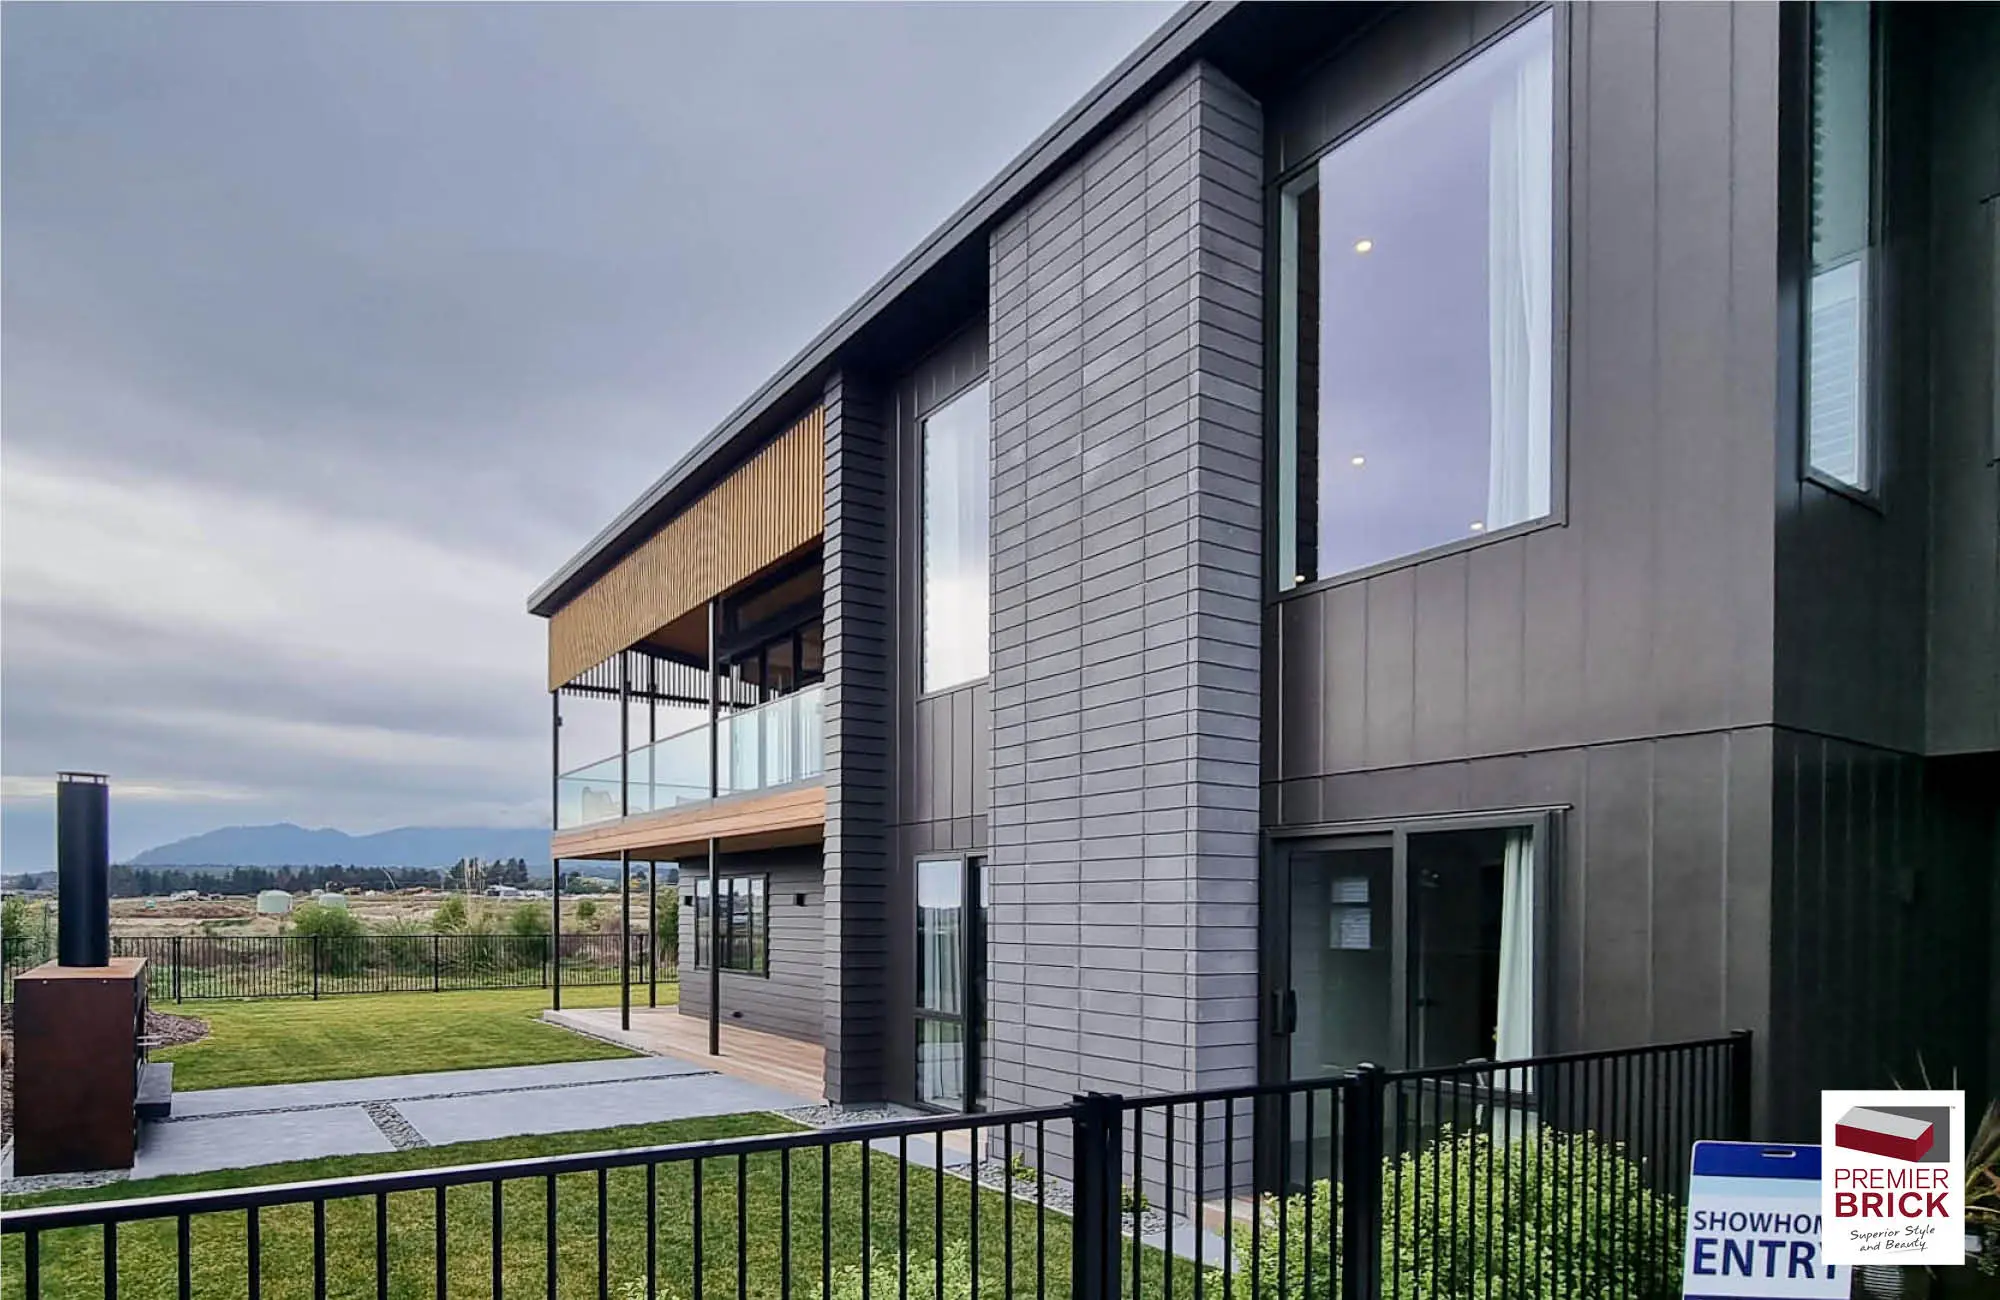
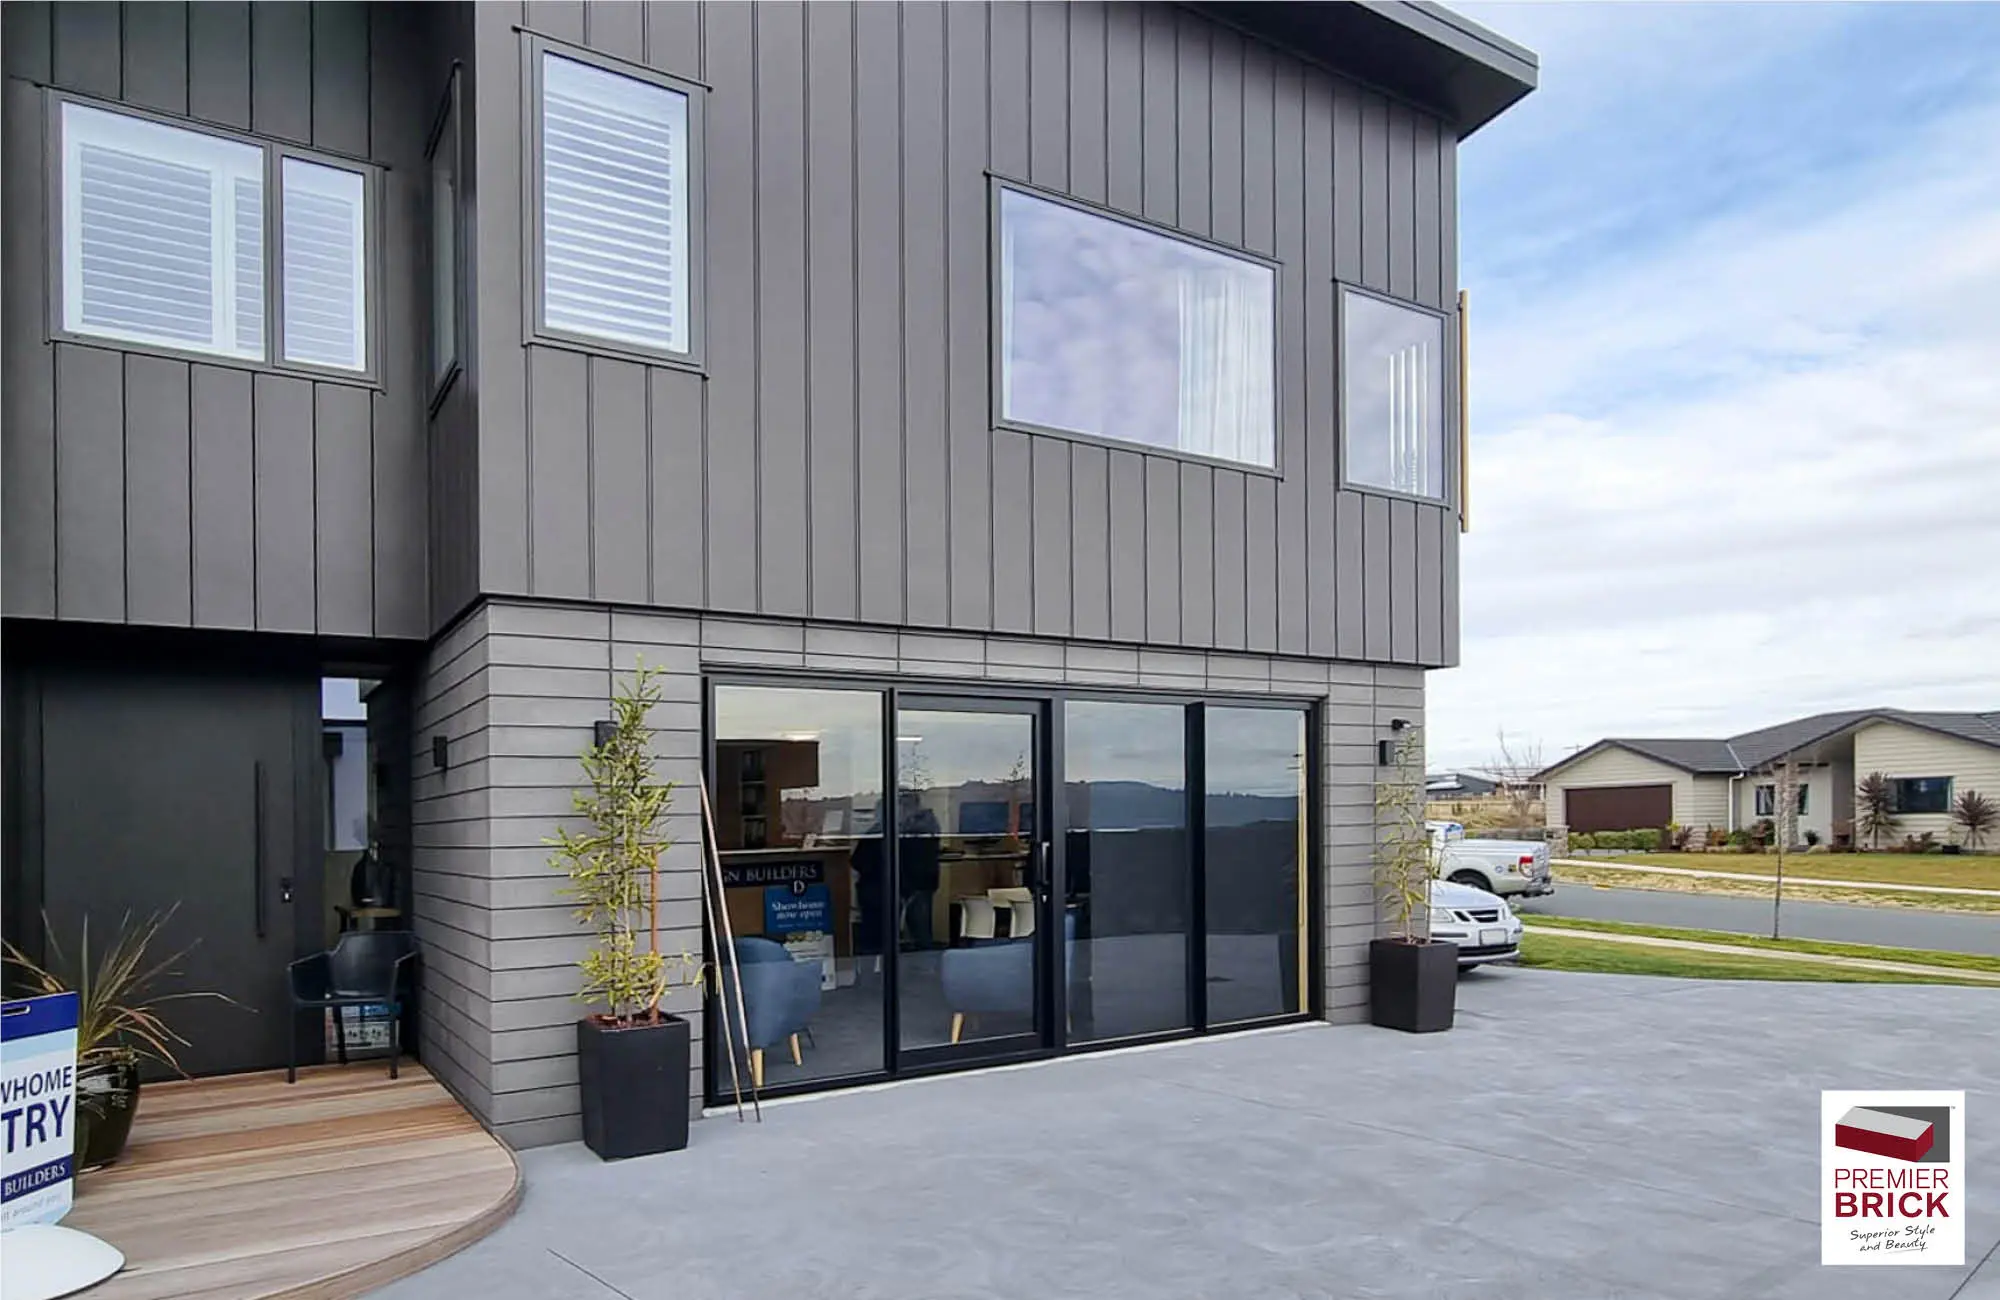
If you’re looking for a modern, stylish, and timeless brick colour for your new home, Iron Stone from our Premier Brick range is a standout choice.
What Makes Iron Stone Special?
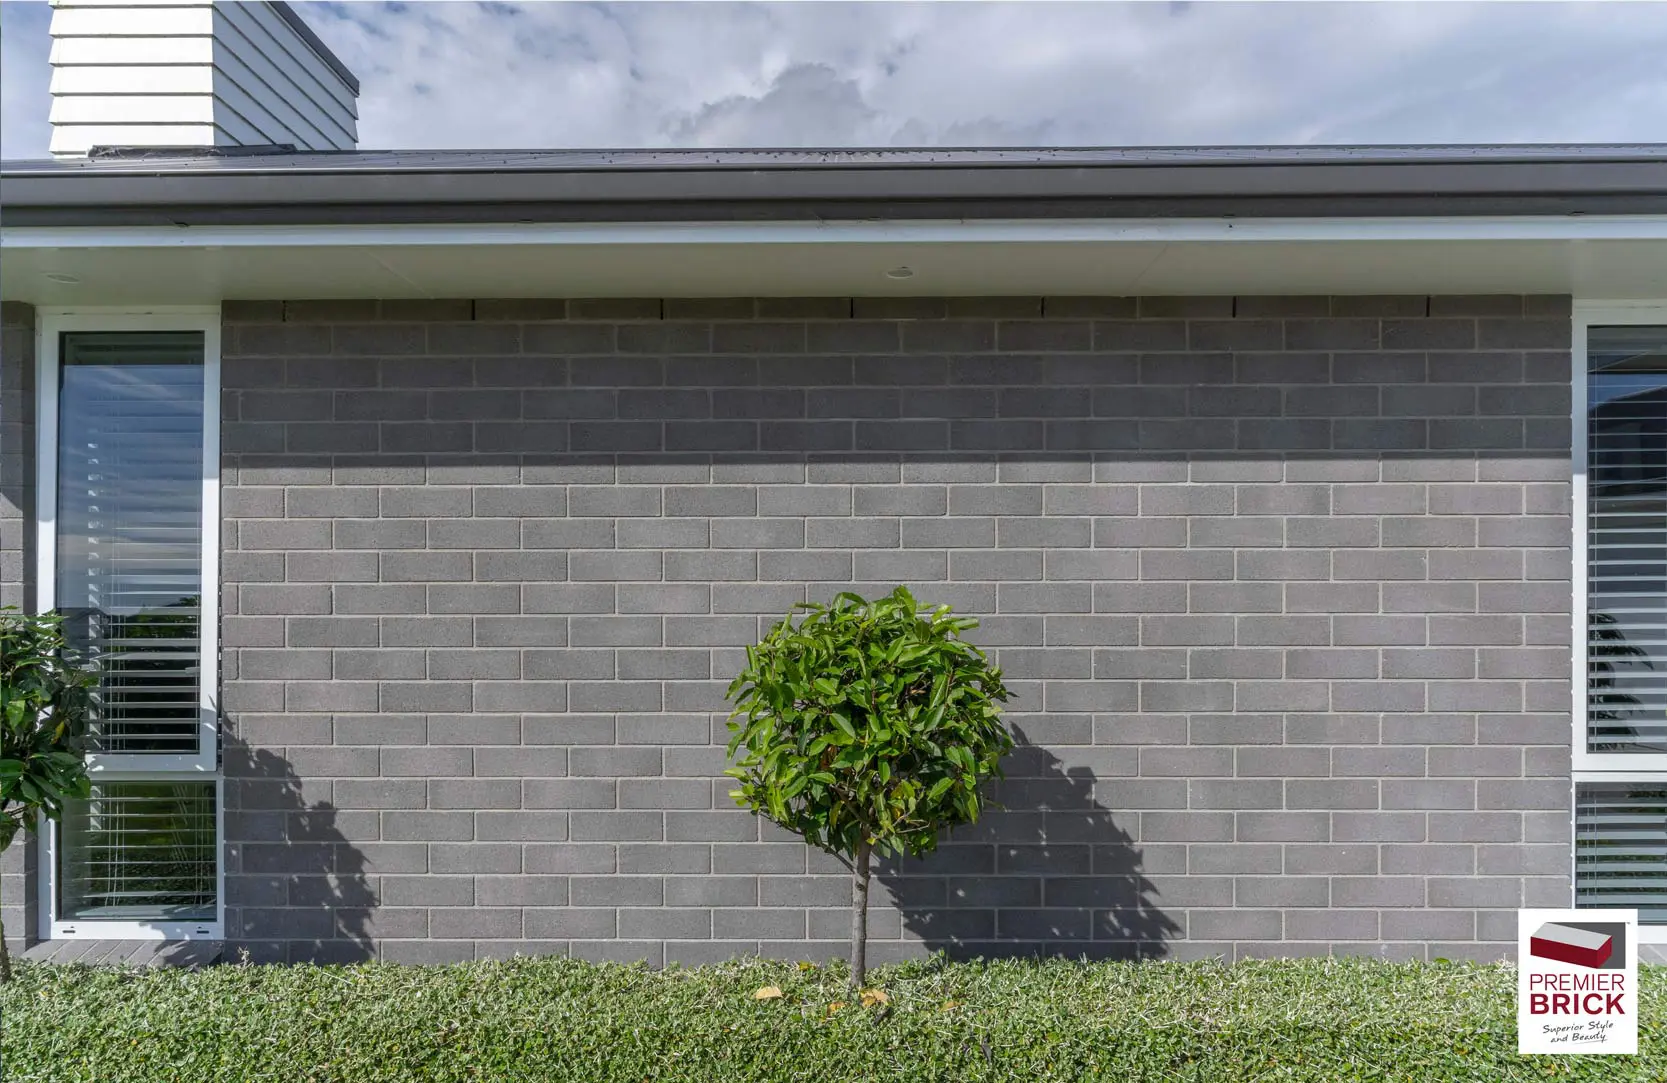
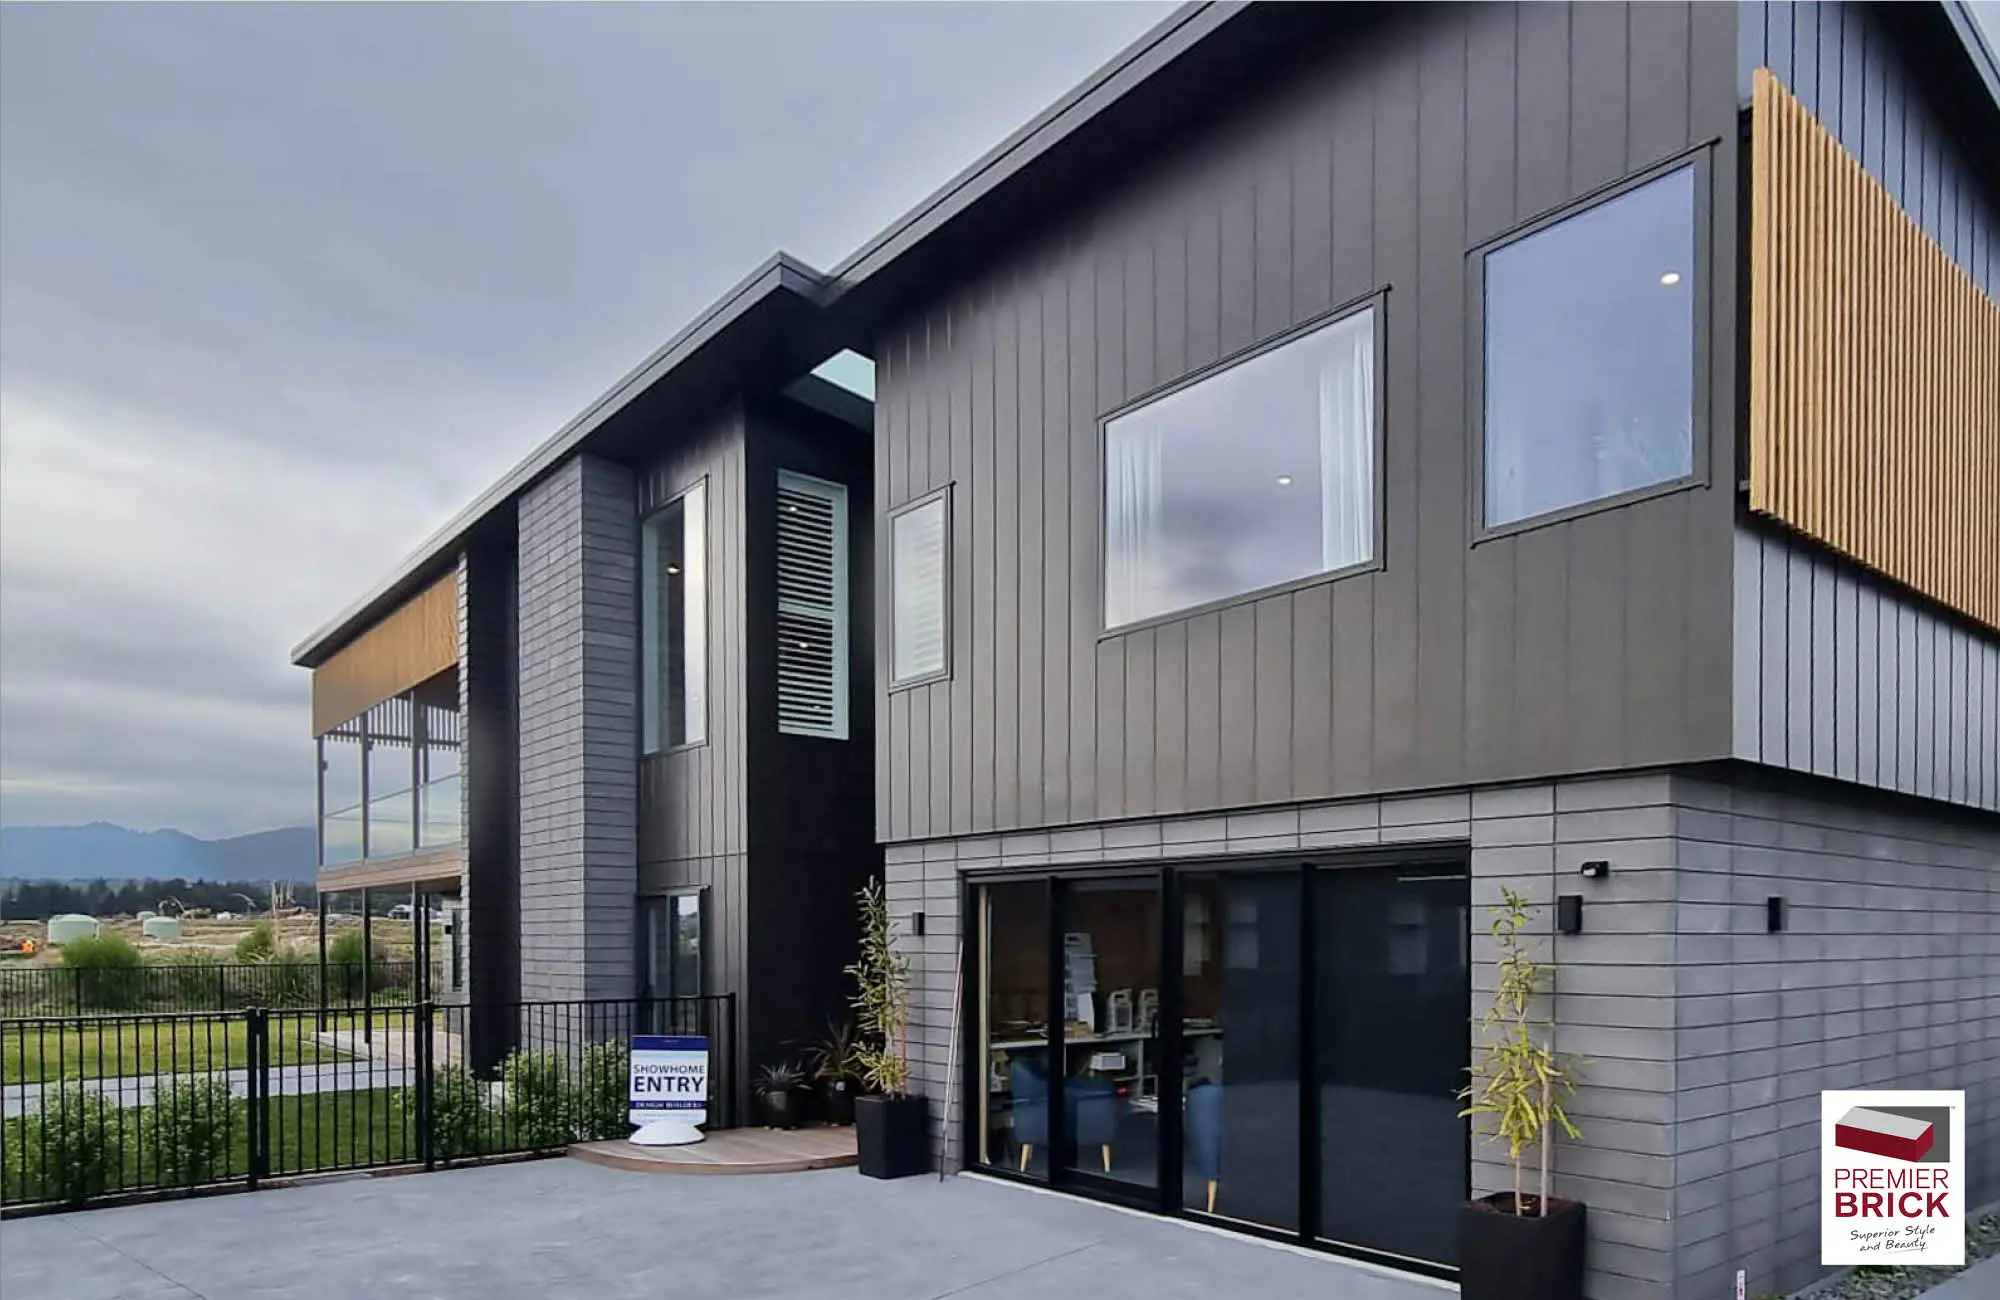
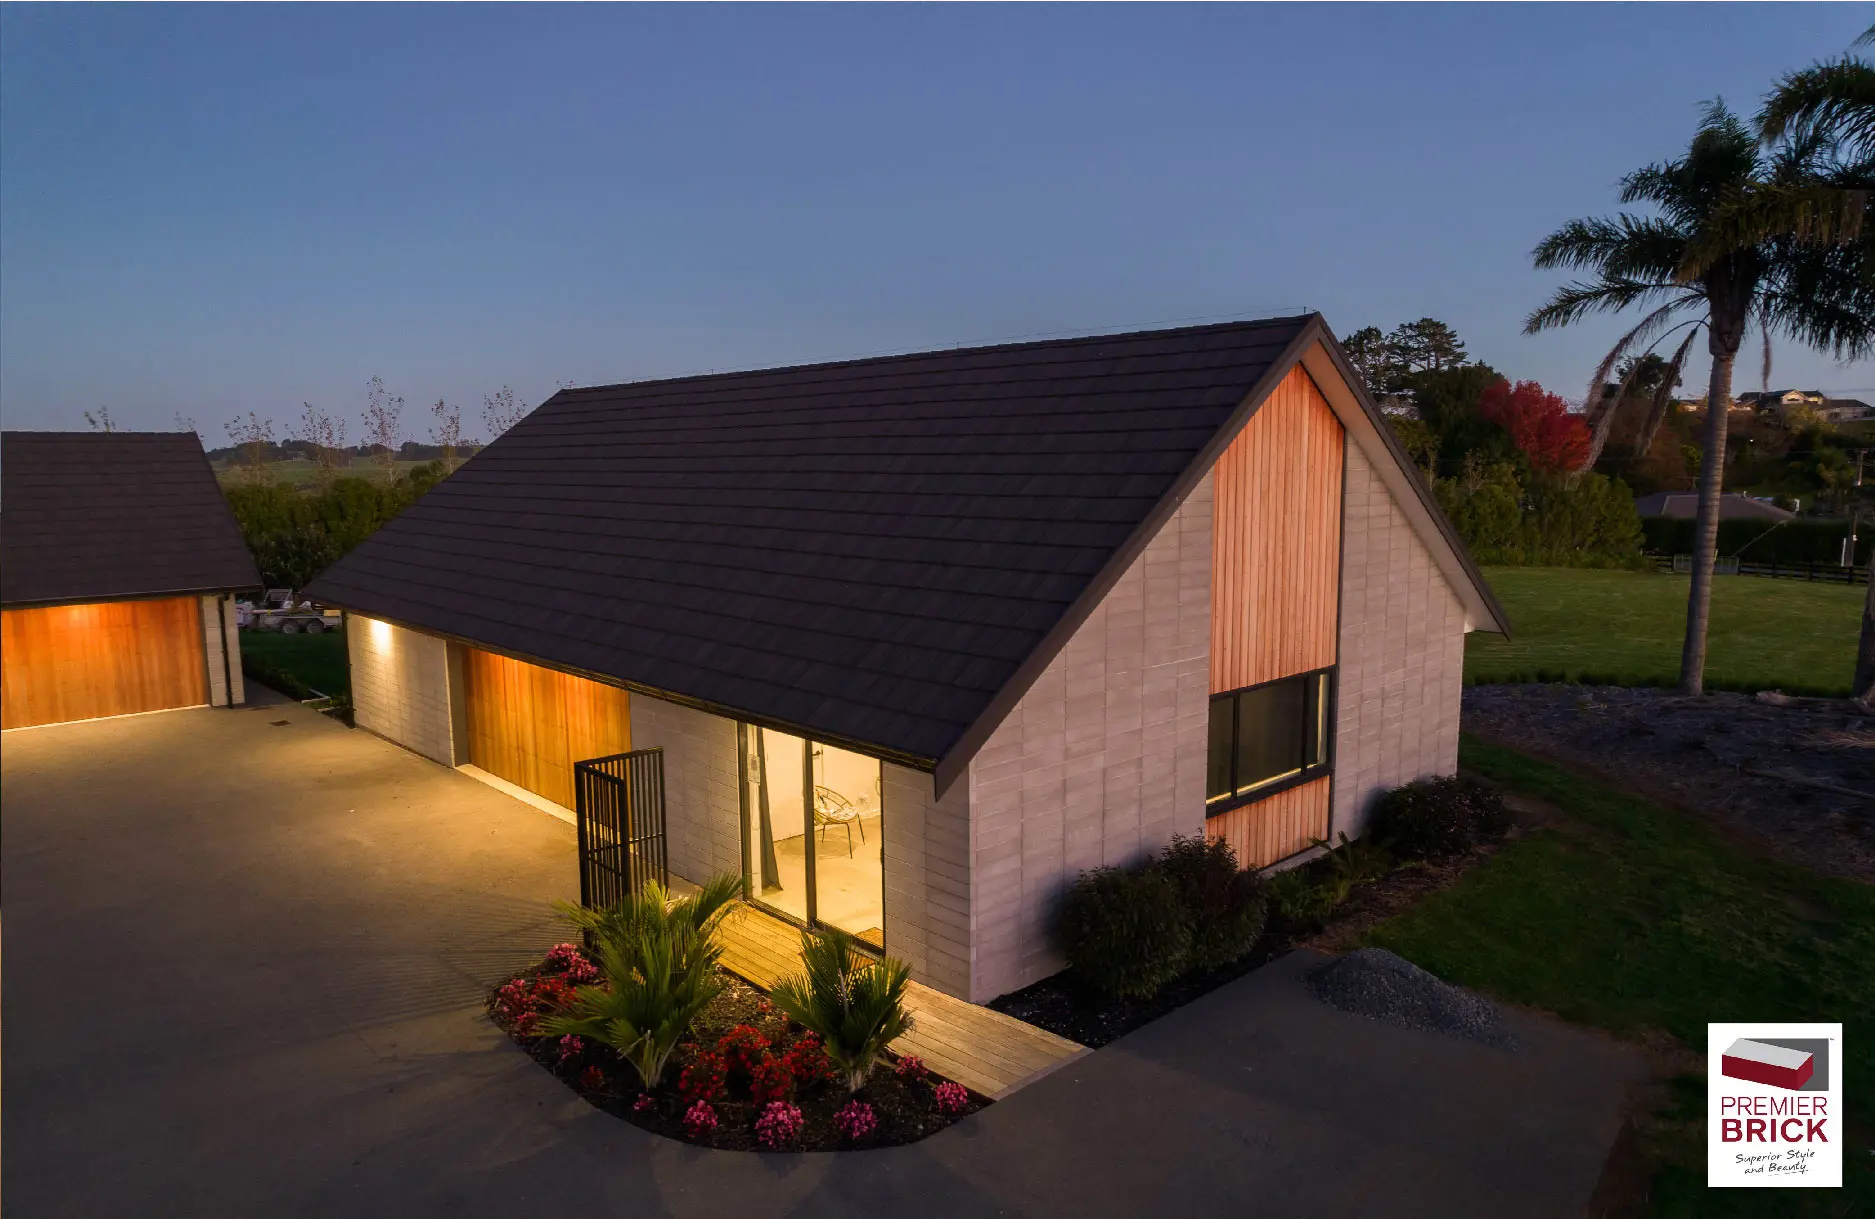
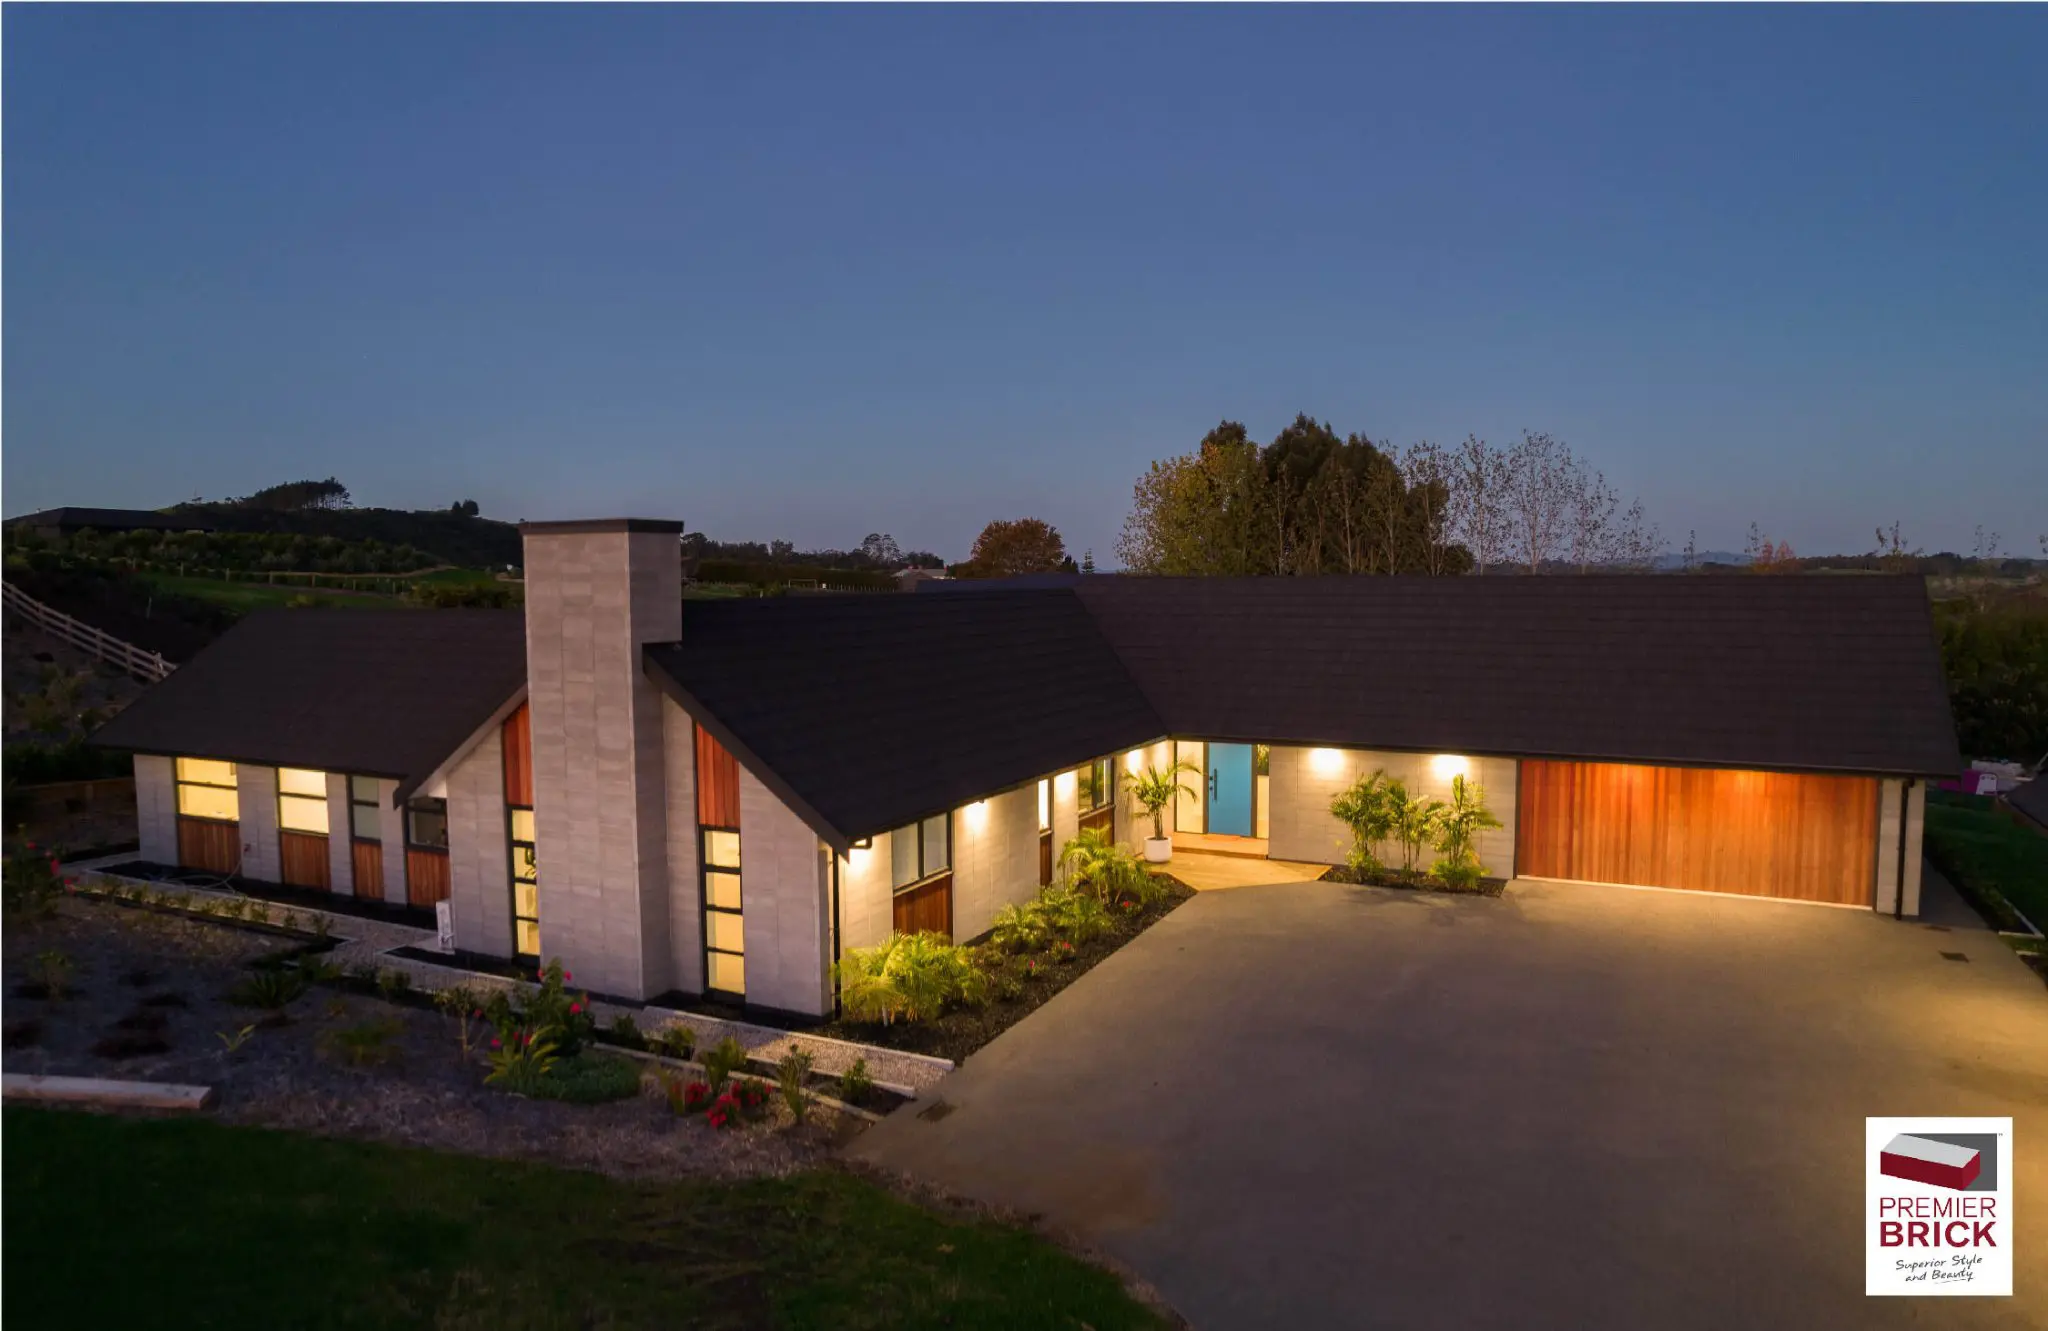
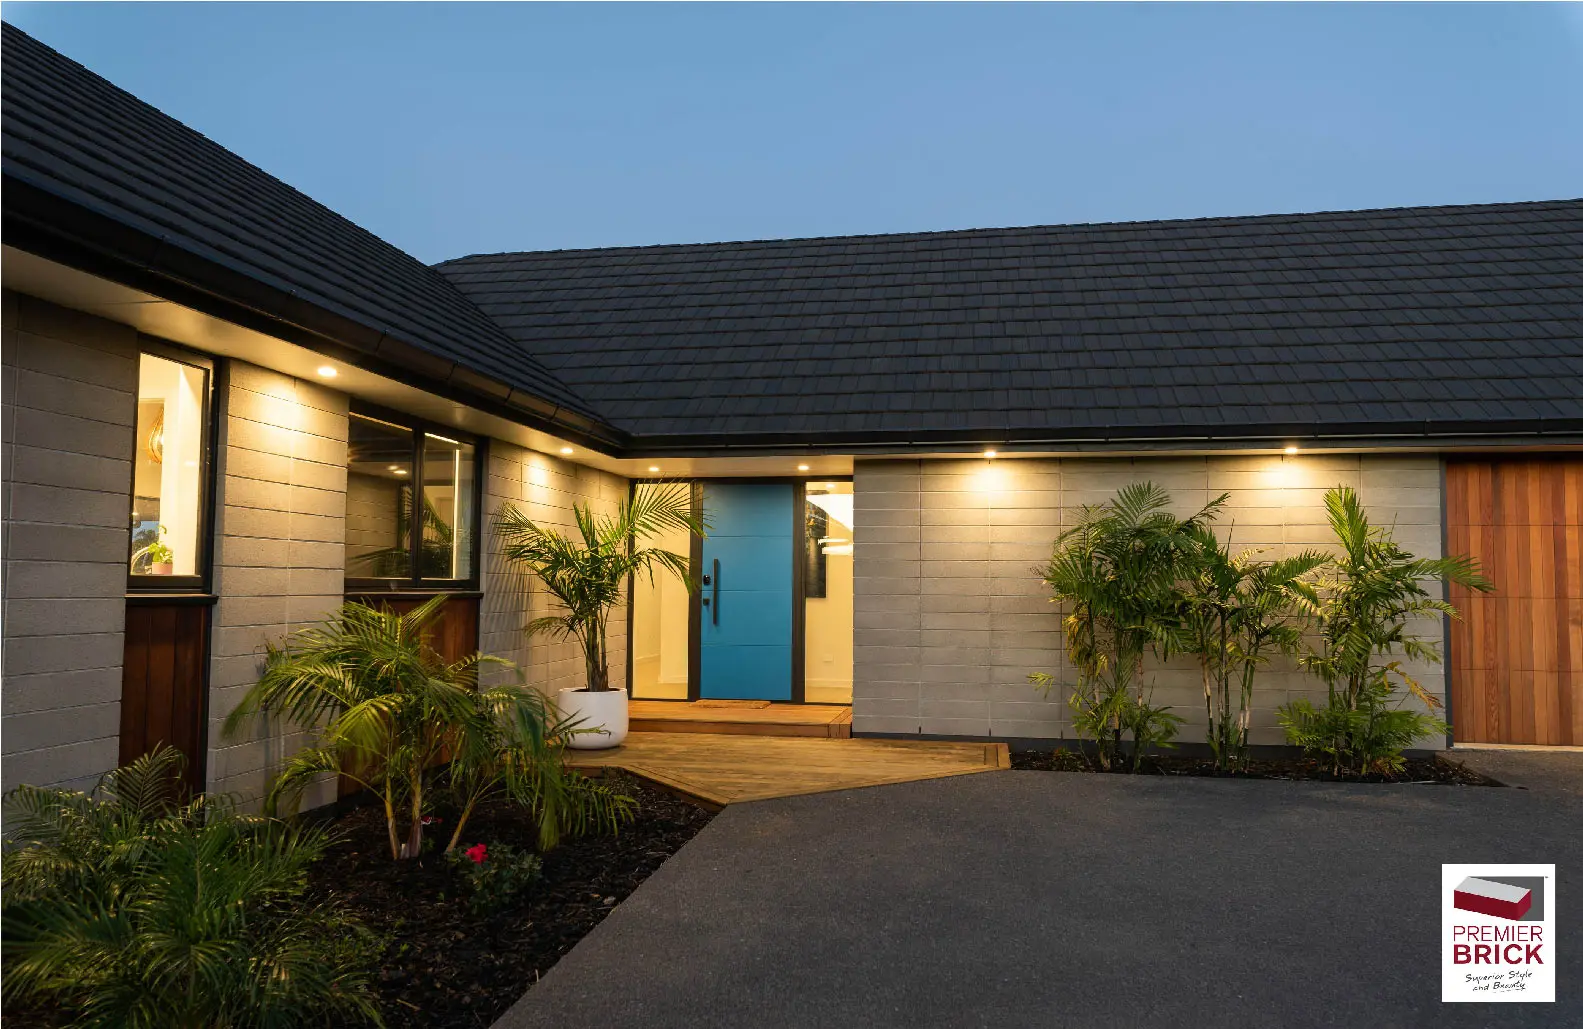
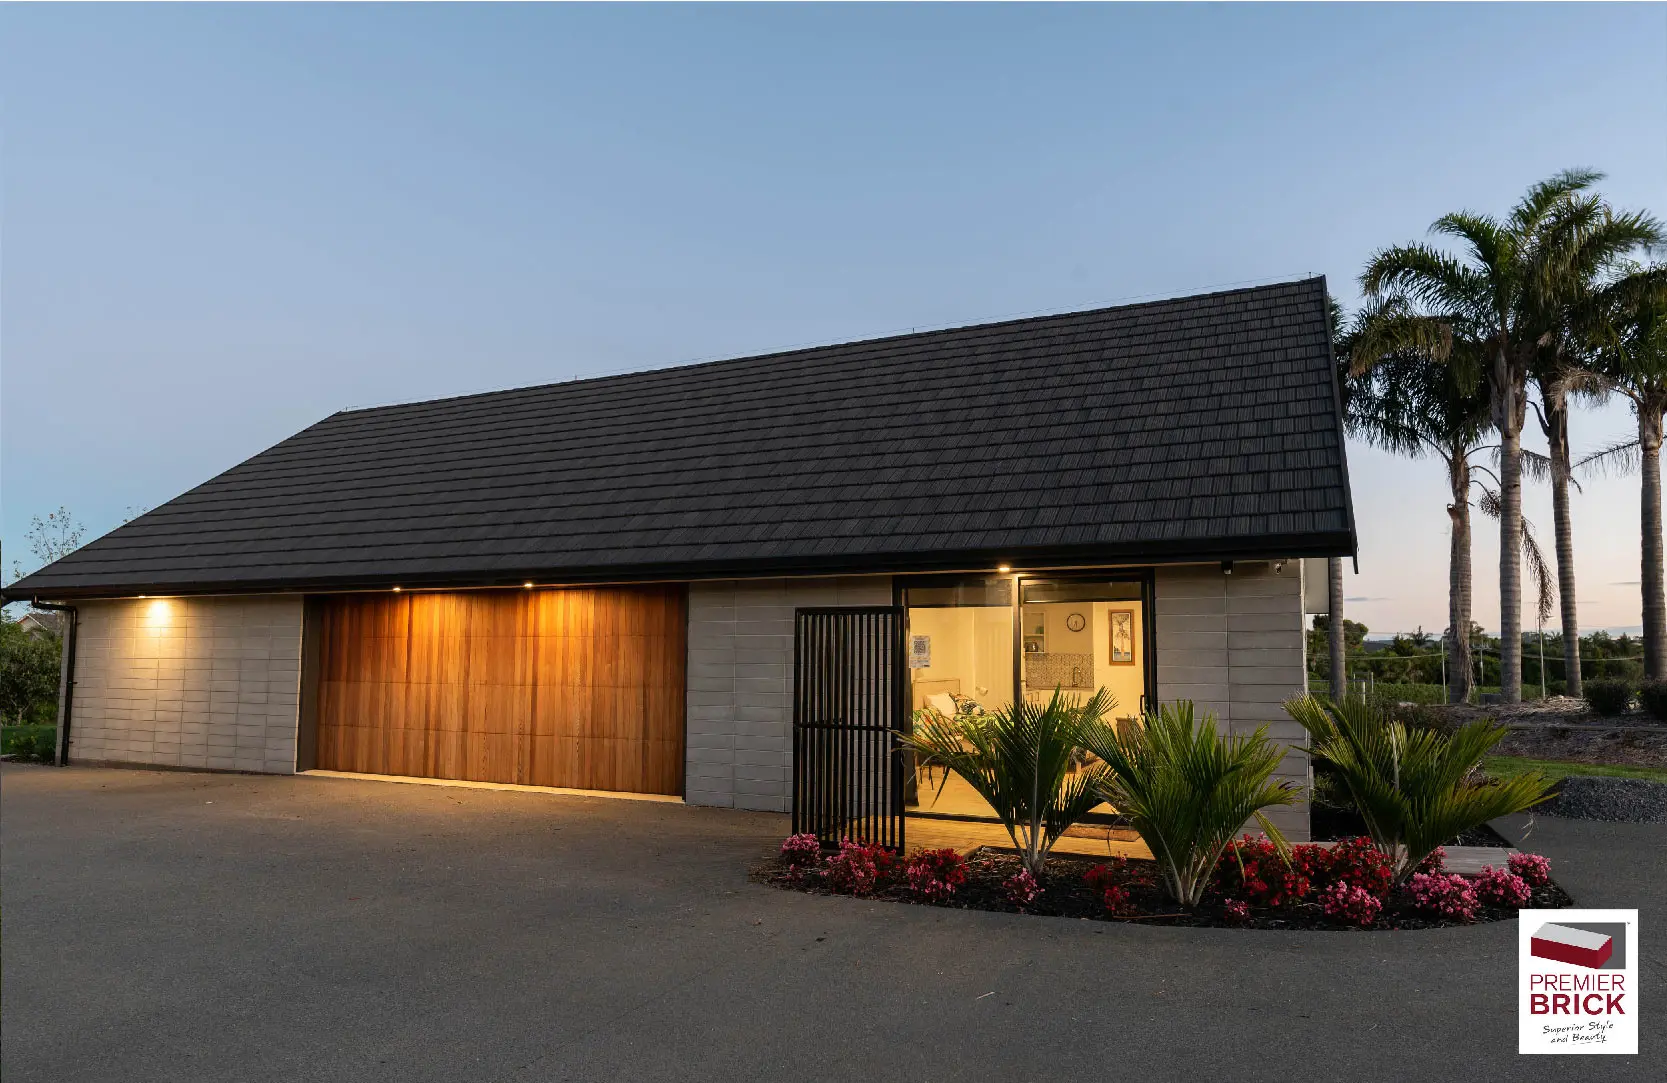
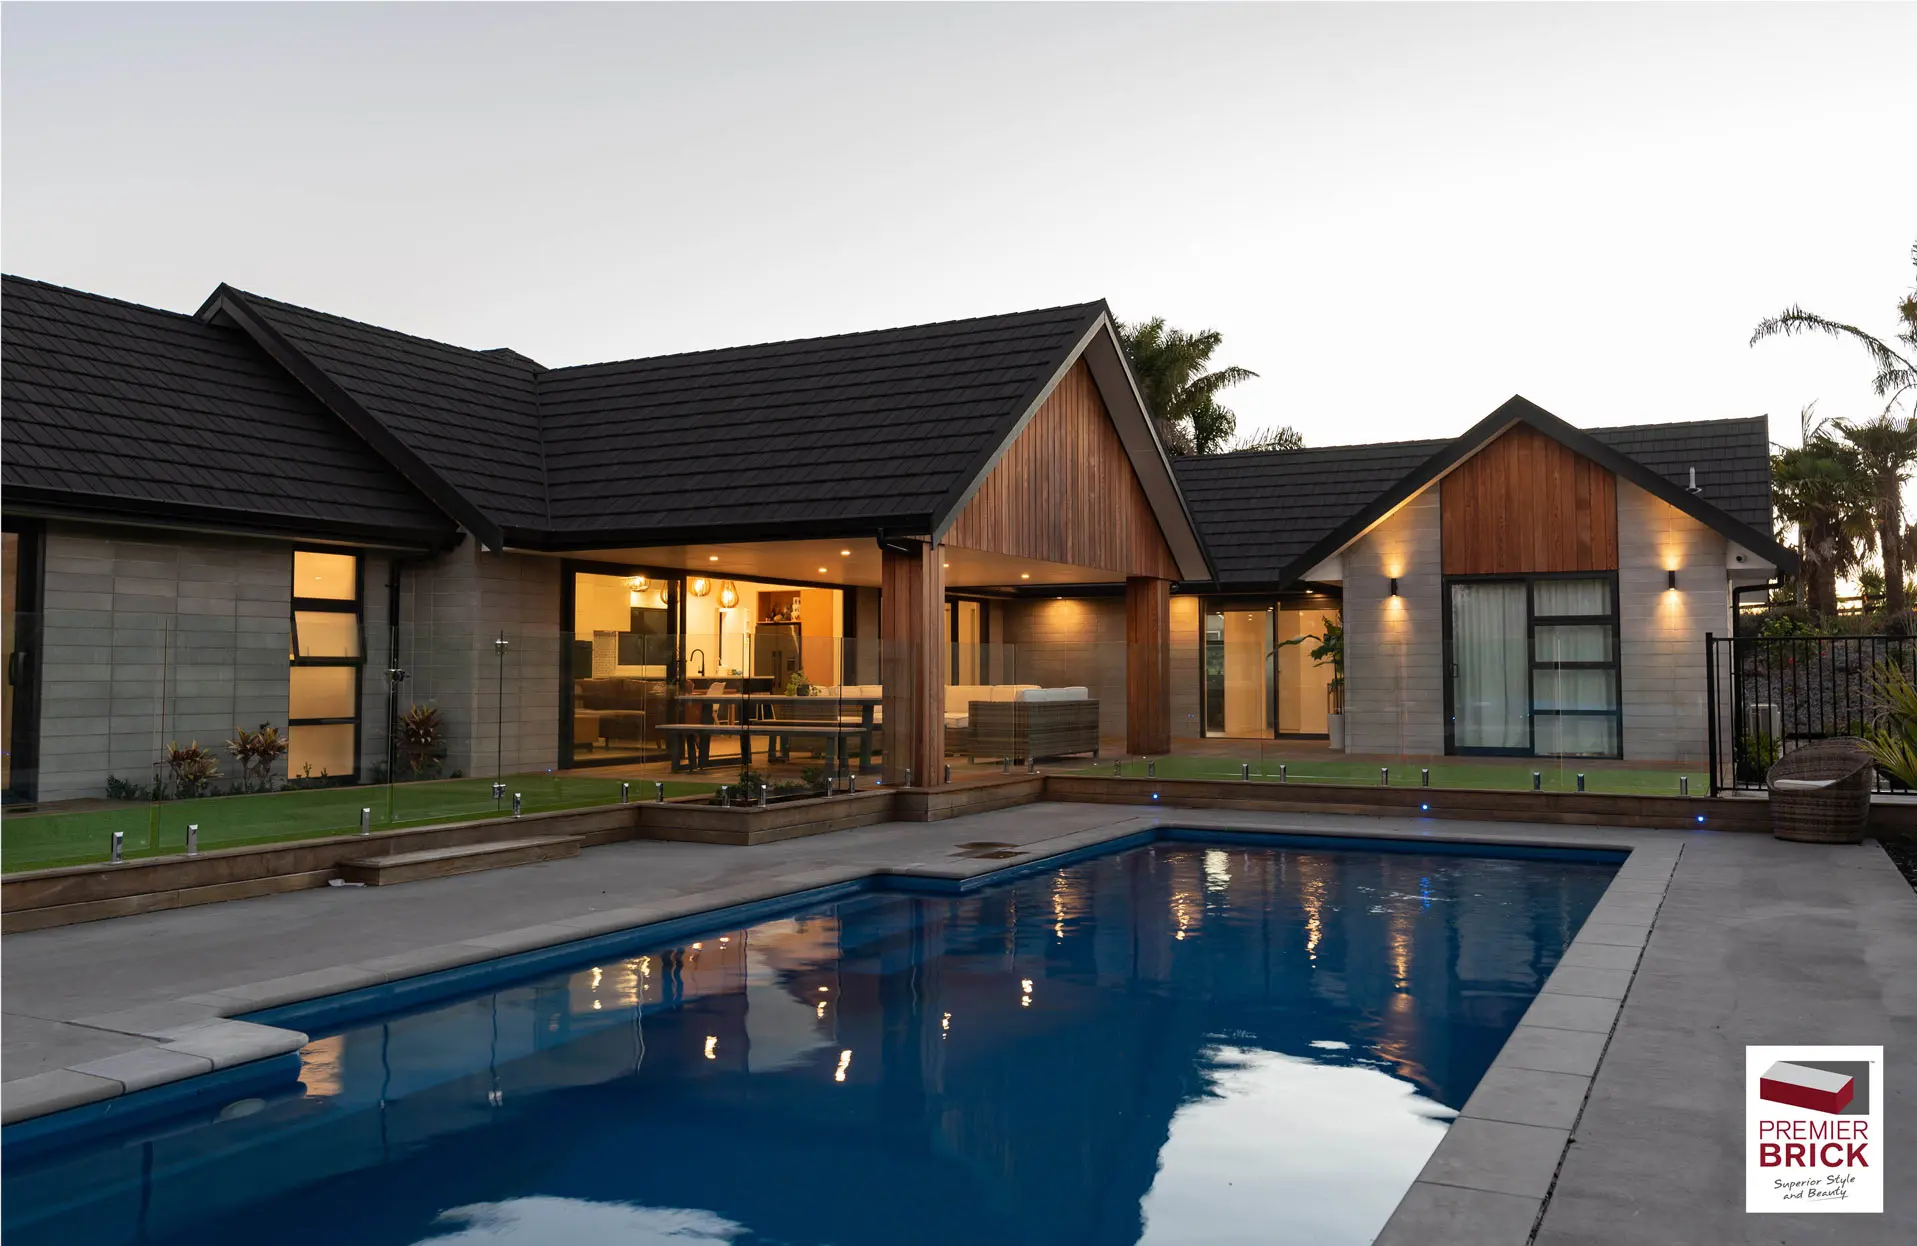
Iron Stone is a mid-grey brick that delivers a sleek and contemporary look. Whether you’re building a new home or enhancing an architectural project, this colour pairs beautifully with a range of design styles—from modern minimalism to industrial chic.
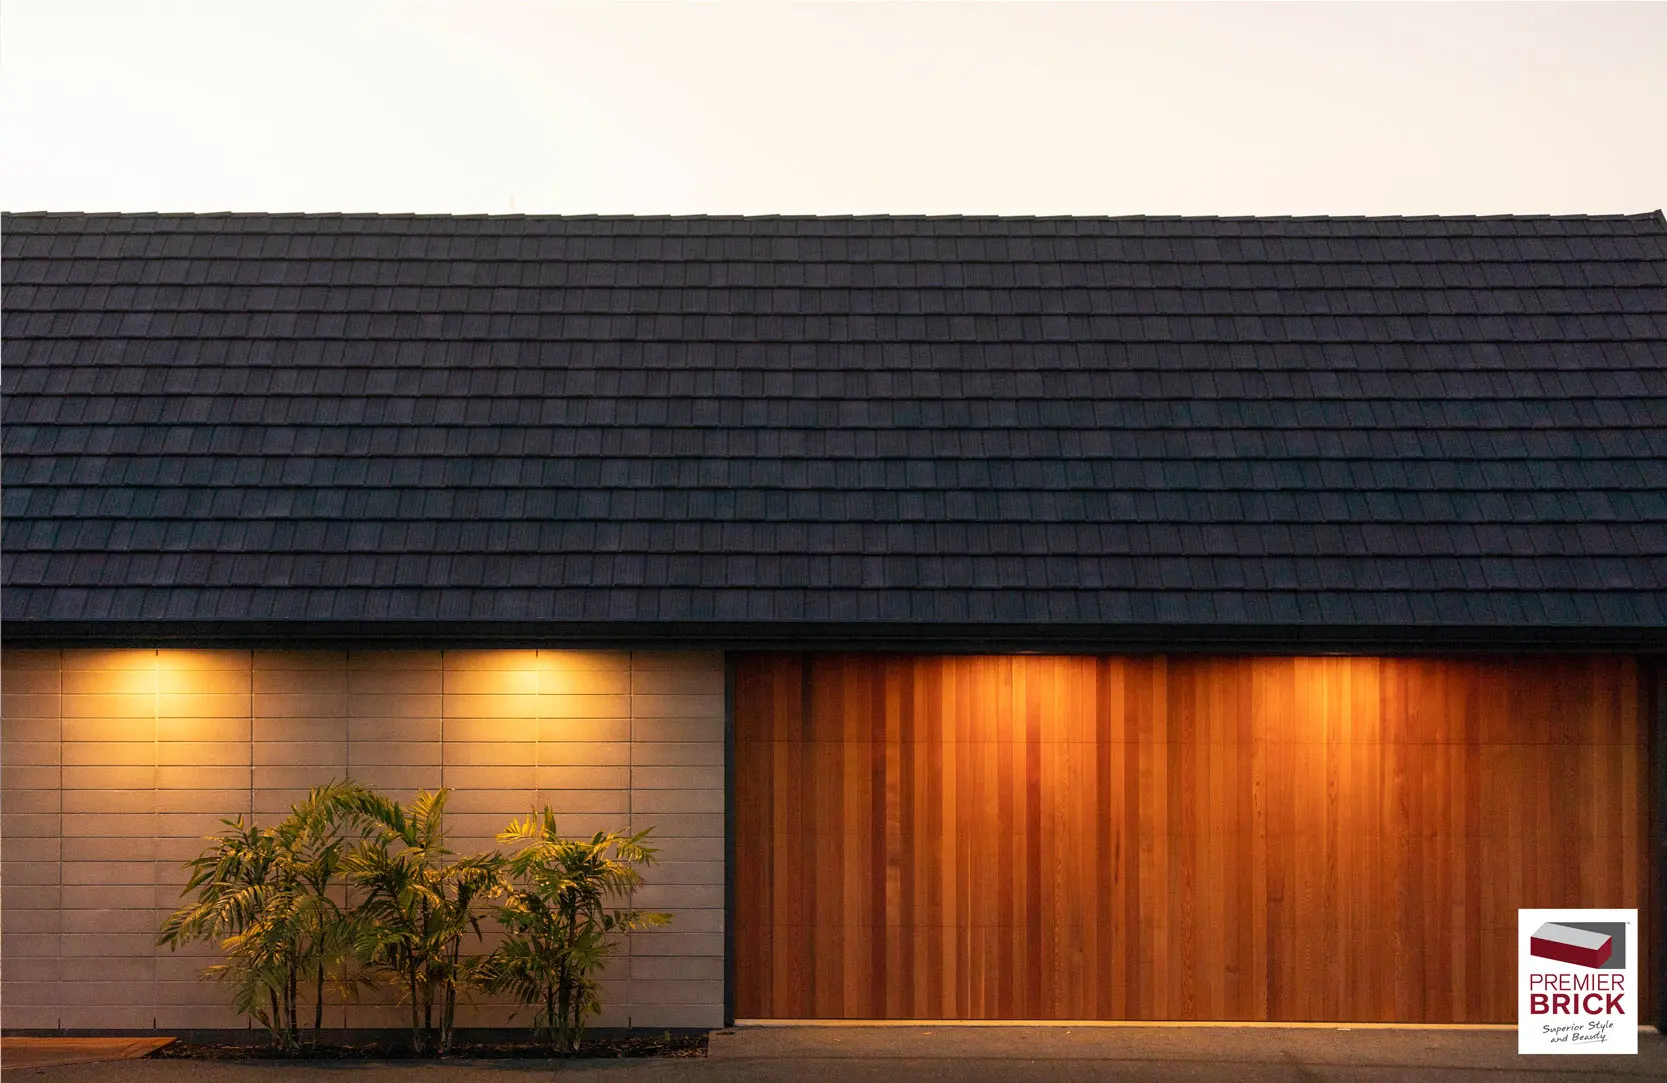
But what truly makes Iron Stone shine is how it looks when paired with our charcoal bagged mortar. This combination creates a subtle contrast that enhances the depth and texture of the brickwork, resulting in a finish that’s both sophisticated and bold.
Important Laying Notes
To get the best results with Iron Stone, it must be laid using our charcoal mortar. Why?
Using charcoal mortar helps:
✅ Reduce the risk of mortar staining on the face of the brick
✅ Ensure a consistent and clean finish
✅ Make the bricklayer’s job easier and more efficient
It’s a smart choice that sets your build up for long-term success.
What About Efflorescence?
You might notice, in some cases, a white or lighter stain appearing on the brick or mortar after laying. This is called efflorescence—a completely natural phenomenon where salts migrate to the surface as moisture evaporates.
Here’s what you need to know:
- It’s not a fault or defect in the brick or mortar
- In many cases, it’s barely visible or never appears at all
- If it does show up, it usually weathers away over time
- You can choose to gently scrub or wash it off if desired
Efflorescence is a normal part of the curing and drying process, especially with masonry products, and has no impact on the structural integrity or long-term appearance of your brickwork.
How to Remove Efflorescence
🧼 Simple and safe ways to clean:
- Wait until the bricks are completely dry
- Sweep the area with a dry, stiff-bristled broom
- For stubborn spots, apply a vinegar and water solution (1 part vinegar to 10 parts water), scrub gently, and rinse
- Avoid high-pressure washing, which may drive salts deeper into the surface
Colour Pairing Suggestions
🎨 Popular Colour Combinations with Iron Stone:
- Roof: Ebony, Ironsand, Grey Friars
- Joinery: Matt Black, Arctic White, or Silver Pearl
- Cladding Accents: Cedar, black vertical shiplap, or dark-stained timber
- Landscaping: Concrete pavers, basalt stones, dark mulch, or white pebble contrast
Designer’s Insight:
“Iron Stone creates a bold yet refined base palette. Pair it with natural textures for warmth, or bold contrast for a modern edge.”
Ongoing Maintenance Tips
🏠 Keep your Iron Stone looking sharp for years:
- Gently hose your brickwork every 6–12 months to remove dust, dirt, and pollen
- Avoid using harsh chemicals or pressure washers
- Inspect mortar joints every 2–3 years and re-point if needed
- Position garden beds and irrigation systems to prevent direct water spray on the bricks
Final Thoughts
Iron Stone is one of our most eye-catching and popular choices for a reason. With its rich grey tones and smooth finish, it offers a beautiful backdrop for a wide range of home styles. And when laid with our charcoal bagged mortar, you get a combination that’s hard to beat.
If you’re considering Iron Stone for your next project, or have any questions about laying and maintenance, our team is here to help.
Need Help? We’re Here for You!
If you’re unsure about how to deal with efflorescence, please call us on 0800 22 22 98 to speak with one of our expert brick consultants. Or email sales@premier-group.co.nz along with some photos of your home, so we can give you the best possible advice.
We’re also available for a video call on WhatsApp, so you can take one of us on a virtual tour of your home for fast and easy advice!
When in doubt, please reach out!
FAQs
Q: Can Iron Stone be used in coastal areas?
A: Yes! It performs well in coastal environments when laid with the correct mortar and proper techniques.
Q: Will the colour of the brick change over time?
A: No, the base colour is permanent. Any white staining you may see is temporary efflorescence and will fade or can be cleaned.
Q: Can I use standard grey mortar instead of charcoal?
A: No this is not an option. Use the Premier bagged charcoal mortar to reduce the risk of staining and to maintain the intended aesthetic.
❤️ Customer Feedback
“We chose Iron Stone with charcoal mortar and couldn’t be happier. It gave our home a modern edge with just the right amount of warmth. The team at Premier helped us through every step—so grateful!”
— Amanda & James, New Plymouth
Written by Bernard Powell – Brick Consultant
Premier Group NZ
Thinking of limewashing your brick home? Whether you’re going for timeless elegance, rustic charm, or a soft Mediterranean vibe, limewash is an incredible way to enhance your Premier Brick and transform the look of your home.
This guide has everything you need—what limewash is, why it’s amazing, how to apply it, maintain it, and where to get it right here in New Zealand.
🧱 What is Limewashed Brick?
Limewashed brick is created by applying a thin coat of slaked lime and water to the surface of brick. Unlike paint, limewash penetrates porous brick and mortar and chemically bonds with the surface through a process called carbonation, giving it a soft, chalky finish that’s breathable and natural.
Think: European farmhouse, Tuscan villa, or modern rustic retreat.
✨ Why Choose Limewash?
Here’s why homeowners and designers are loving it:
✅ Breathable – Won’t trap moisture like paint
✅ Eco-Friendly – Made from natural lime and water
✅ Antimicrobial – Naturally resists mould and bacteria
✅ Beautifully Aged Look – Develops character over time
✅ Easily Customisable – Apply sheer or solid, distress or recoat
✅ Easy Touch-ups – Blends well for future refreshes
⚖️ Limewash vs Paint: Pros & Cons
| Feature | Limewash | Paint |
| Look | Soft, matte, natural | Opaque, more artificial |
| Breathability | Yes (great for old homes) | No (can trap moisture) |
| Durability | 5–7 years, touch-up friendly | 10+ years, harder to touch up |
| Application Surface | Needs raw, porous brick | Can go over most surfaces |
| Maintenance | Light & easy | More involved |
| Cost | Lower for DIY, moderate with pros | Moderate to high depending on paint |
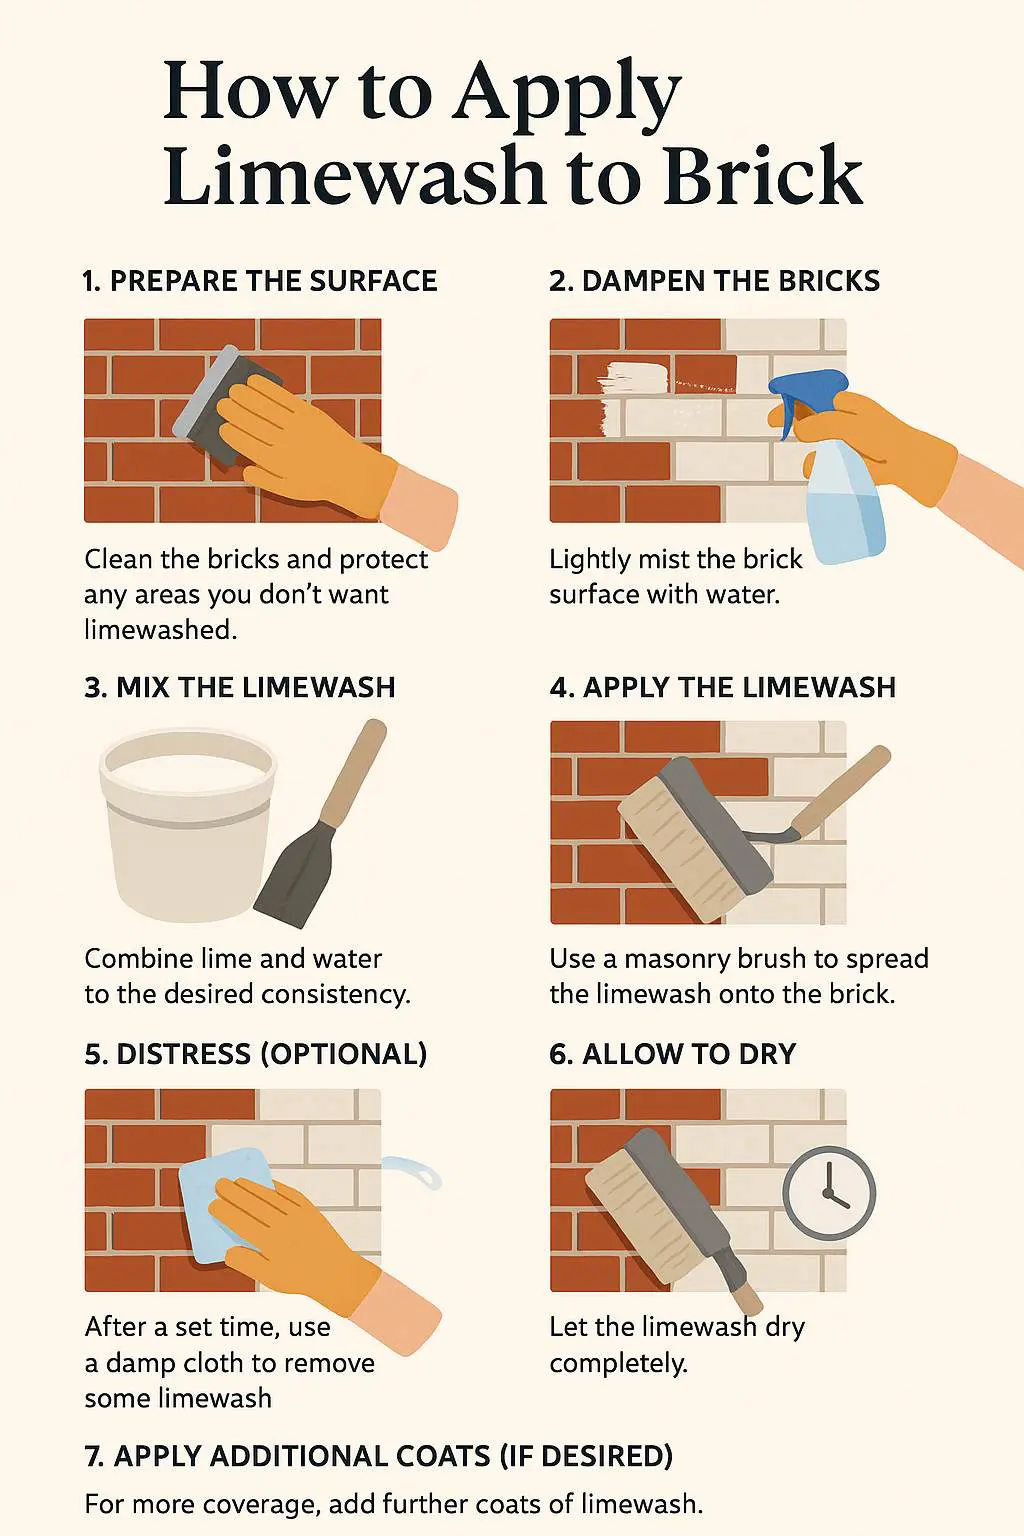
🛠️ How to Apply Limewash to Premier Brick (Step-by-Step)
1️ Prepare the Surface
- Clean the bricks with water and a brush—remove dirt, grease, and debris.
- Ensure the bricks are unsealed and porous (limewash won’t stick to painted or sealed surfaces).
- Cover nearby surfaces with plastic drop cloths and tape.
2️ Dampen the Bricks
- Mist with a spray bottle or hose—this slows the drying so the limewash penetrates evenly and doesn’t crack.
3️ Mix the Limewash
- Pre-mixed (e.g. Porter’s, Romabio): Follow product instructions for dilution.
- DIY Mix: 1 part hydrated lime (builders lime) to 1.5 parts water. Adjust for desired thickness.
- Stir well—aim for milk-like consistency.
4️ Apply the Limewash
- Use a masonry brush (not a roller) and work in sections.
- Apply with light, crisscross strokes—don’t over-brush.
- Keep a wet edge to avoid lap marks.
5️ Optional Distressing
- After 10–60 minutes (when slightly tacky), use a damp sponge or cloth to remove some limewash for that worn, rustic look.
6️ Let It Dry
- Fully cures over 2–3 days.
- It will lighten as it dries—don’t panic if it looks darker at first!
7️ Add More Coats (Optional)
- Want more coverage? Add a second coat once the first is dry. You can go from transparent to full whiteout depending on your vision.
👷 Should You DIY or Hire a Pro?
✅ DIY is great if:
- You’re tackling a small area (like a fireplace or garden wall).
- You enjoy hands-on weekend projects.
- You like the idea of a wabi-sabi, slightly imperfect finish.
👷♂️ Hire a pro if:
- You’re doing a full exterior or large space.
- You want an even, clean application.
- Your home is high-set or needs scaffolding.
Who can apply limewash?
- ✅ Painting Contractors (check if they’ve done limewash before)
- ✅ Special Finishers (e.g. Special Finishes NZ)
- ✅ Heritage Restoration Experts
Tip: Ask for photos of previous limewash work and request a test patch before they start the full job.
🛍️ Where to Buy Limewash in New Zealand
Here are your best options locally:
🖌️ Porter’s Paints NZ
- Offers Original Lime Wash and Interno Lime Wash
- Classic European-style finish
- Available in various natural tones
🖌️ Special Finishes NZ
- Offers Mediterranean Limewash
- Tinted options available (think terracotta, stone, ivory)
🖌️ Dulux Trade Centres
- Stock Porter’s range at select locations
🖌️ Guthrie Bowron
- Can special-order limewash products
🧱 Important: Make sure your bricks from Premier Brick are unsealed and porous. Limewash won’t stick to sealed or glazed surfaces.
🧼 How to Maintain Limewashed Bricks
✅ Do:
- Gently hose off dust or cobwebs
- Use soft brushes—no pressure washing
- Keep some product for future touch-ups
- Spot refresh faded areas every few years
❌ Don’t:
- Use harsh detergents or chemical cleaners
- Worry if it weathers a bit—it adds character!
- Paint over it (you’ll lose the breathable beauty of limewash)
Optional: Apply a breathable sealer (like Romabio Mineral Shield) in high-rain or south-facing areas for extra durability.
📸 Limewash Brick Inspiration
Here’s what limewashed brick can look like:
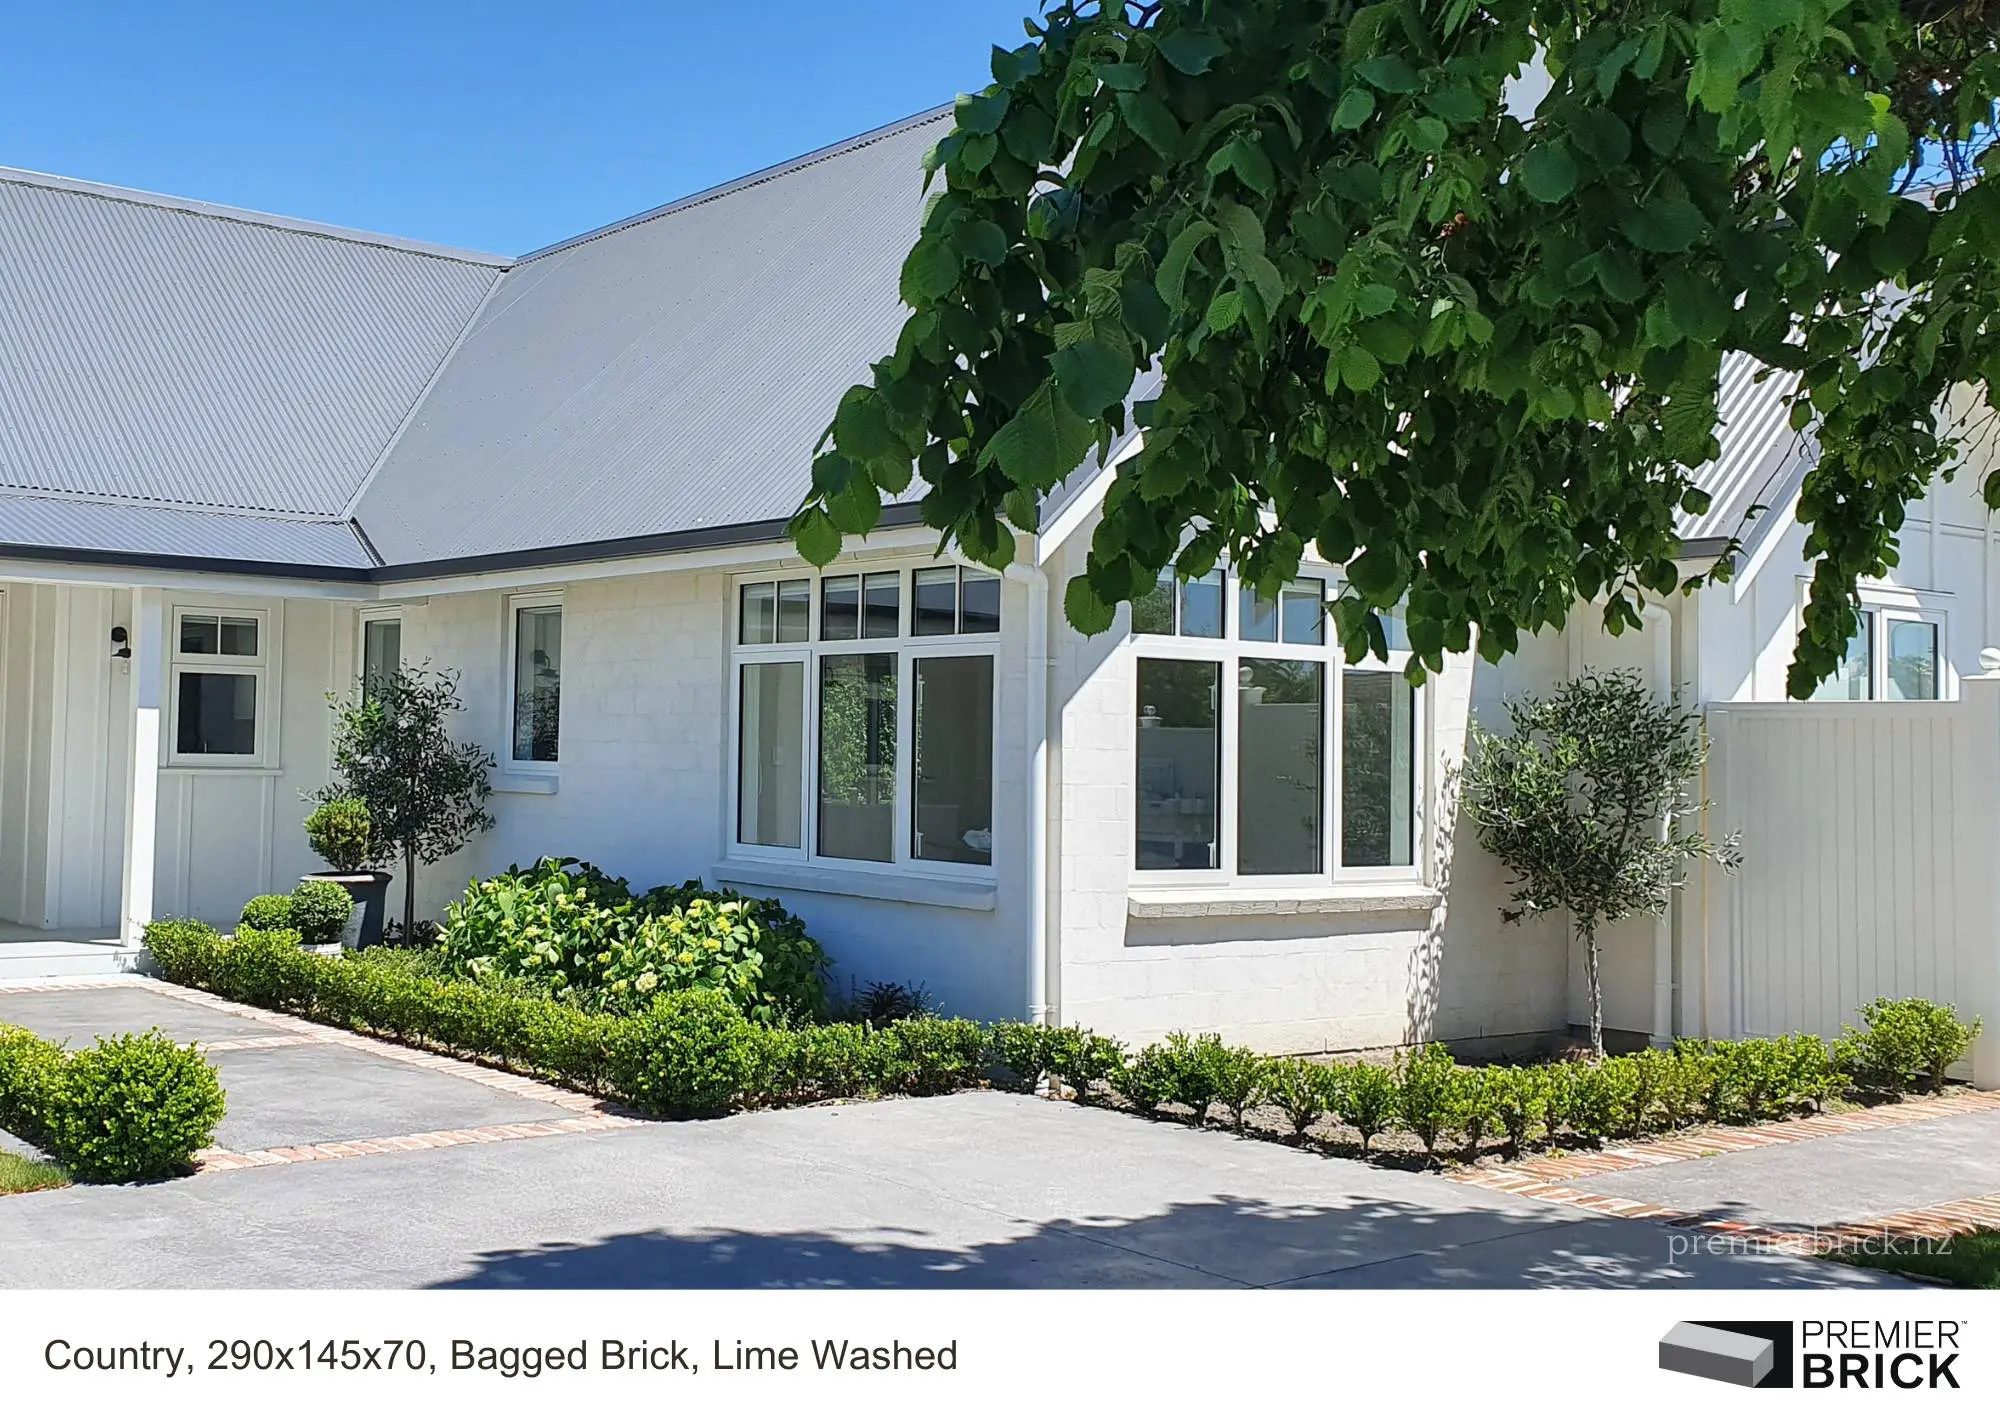
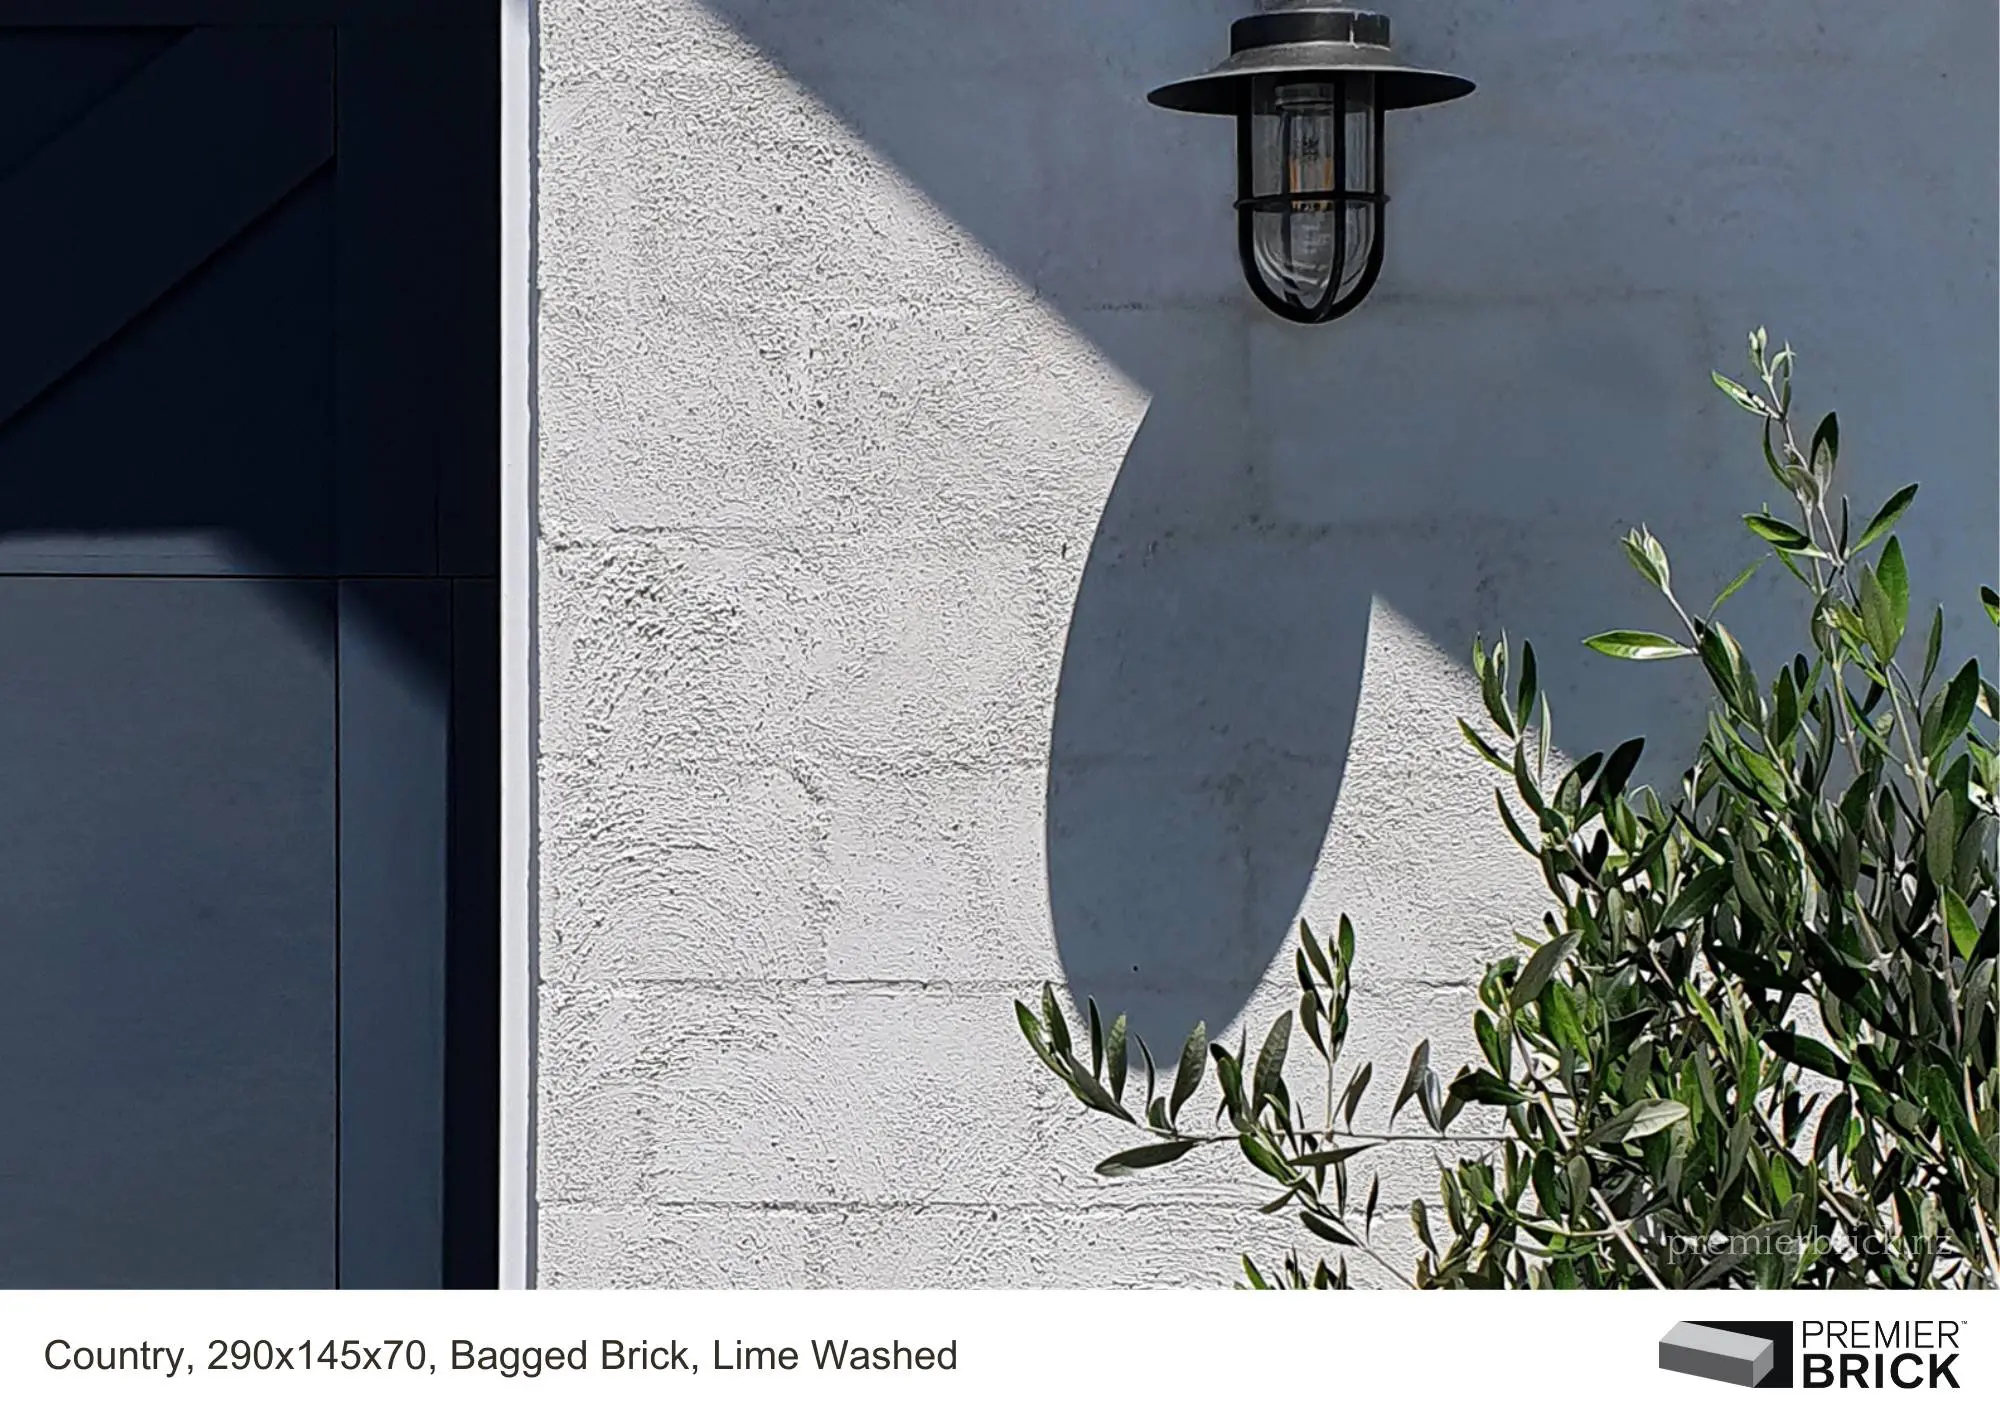
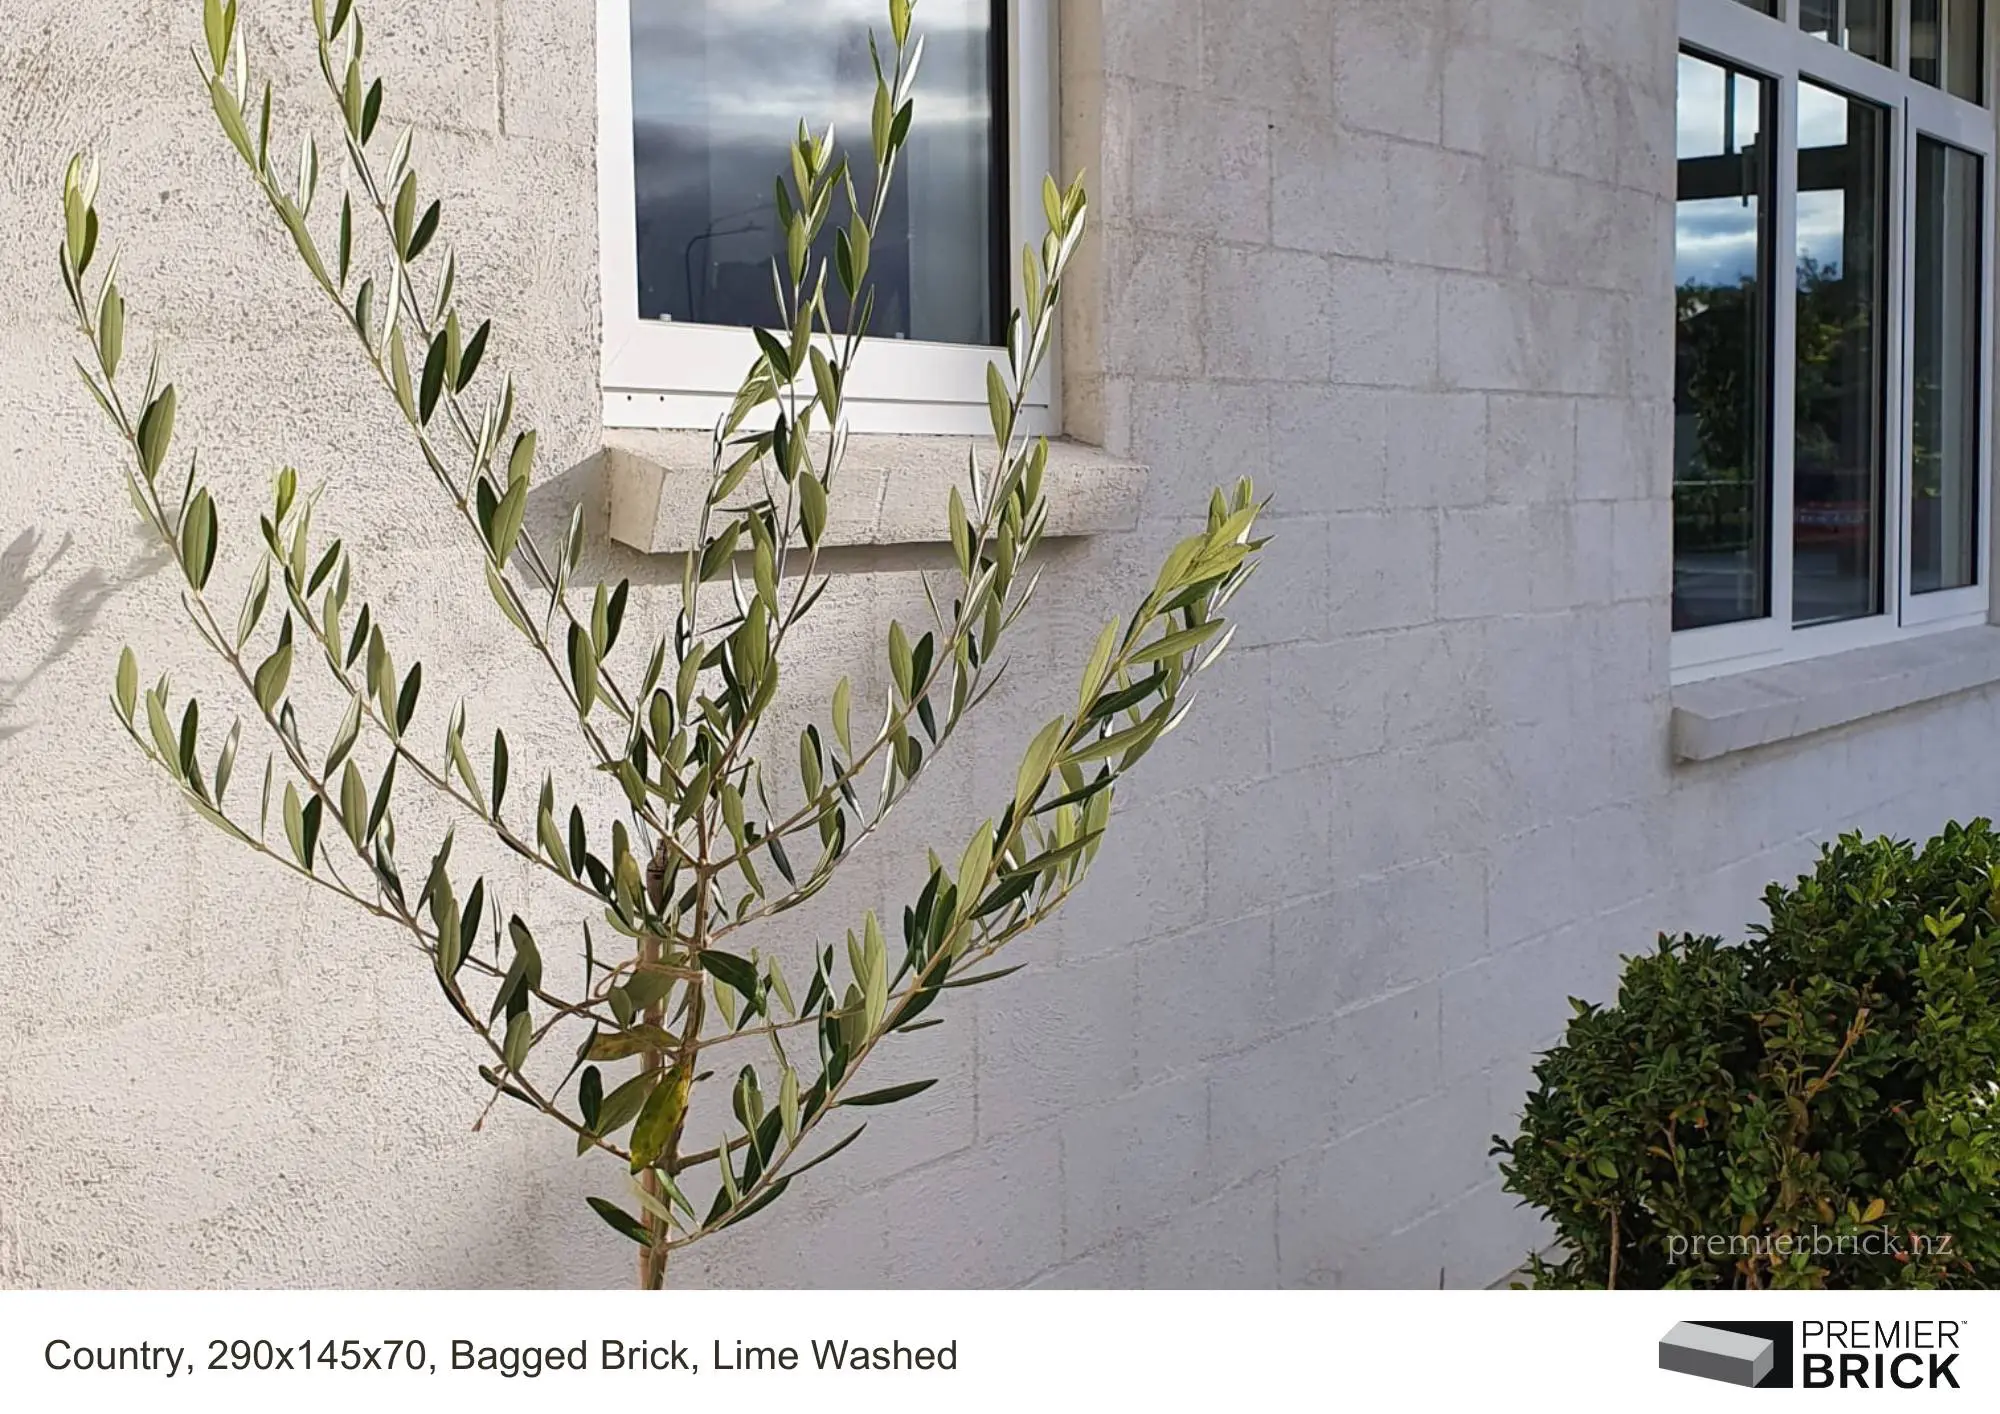
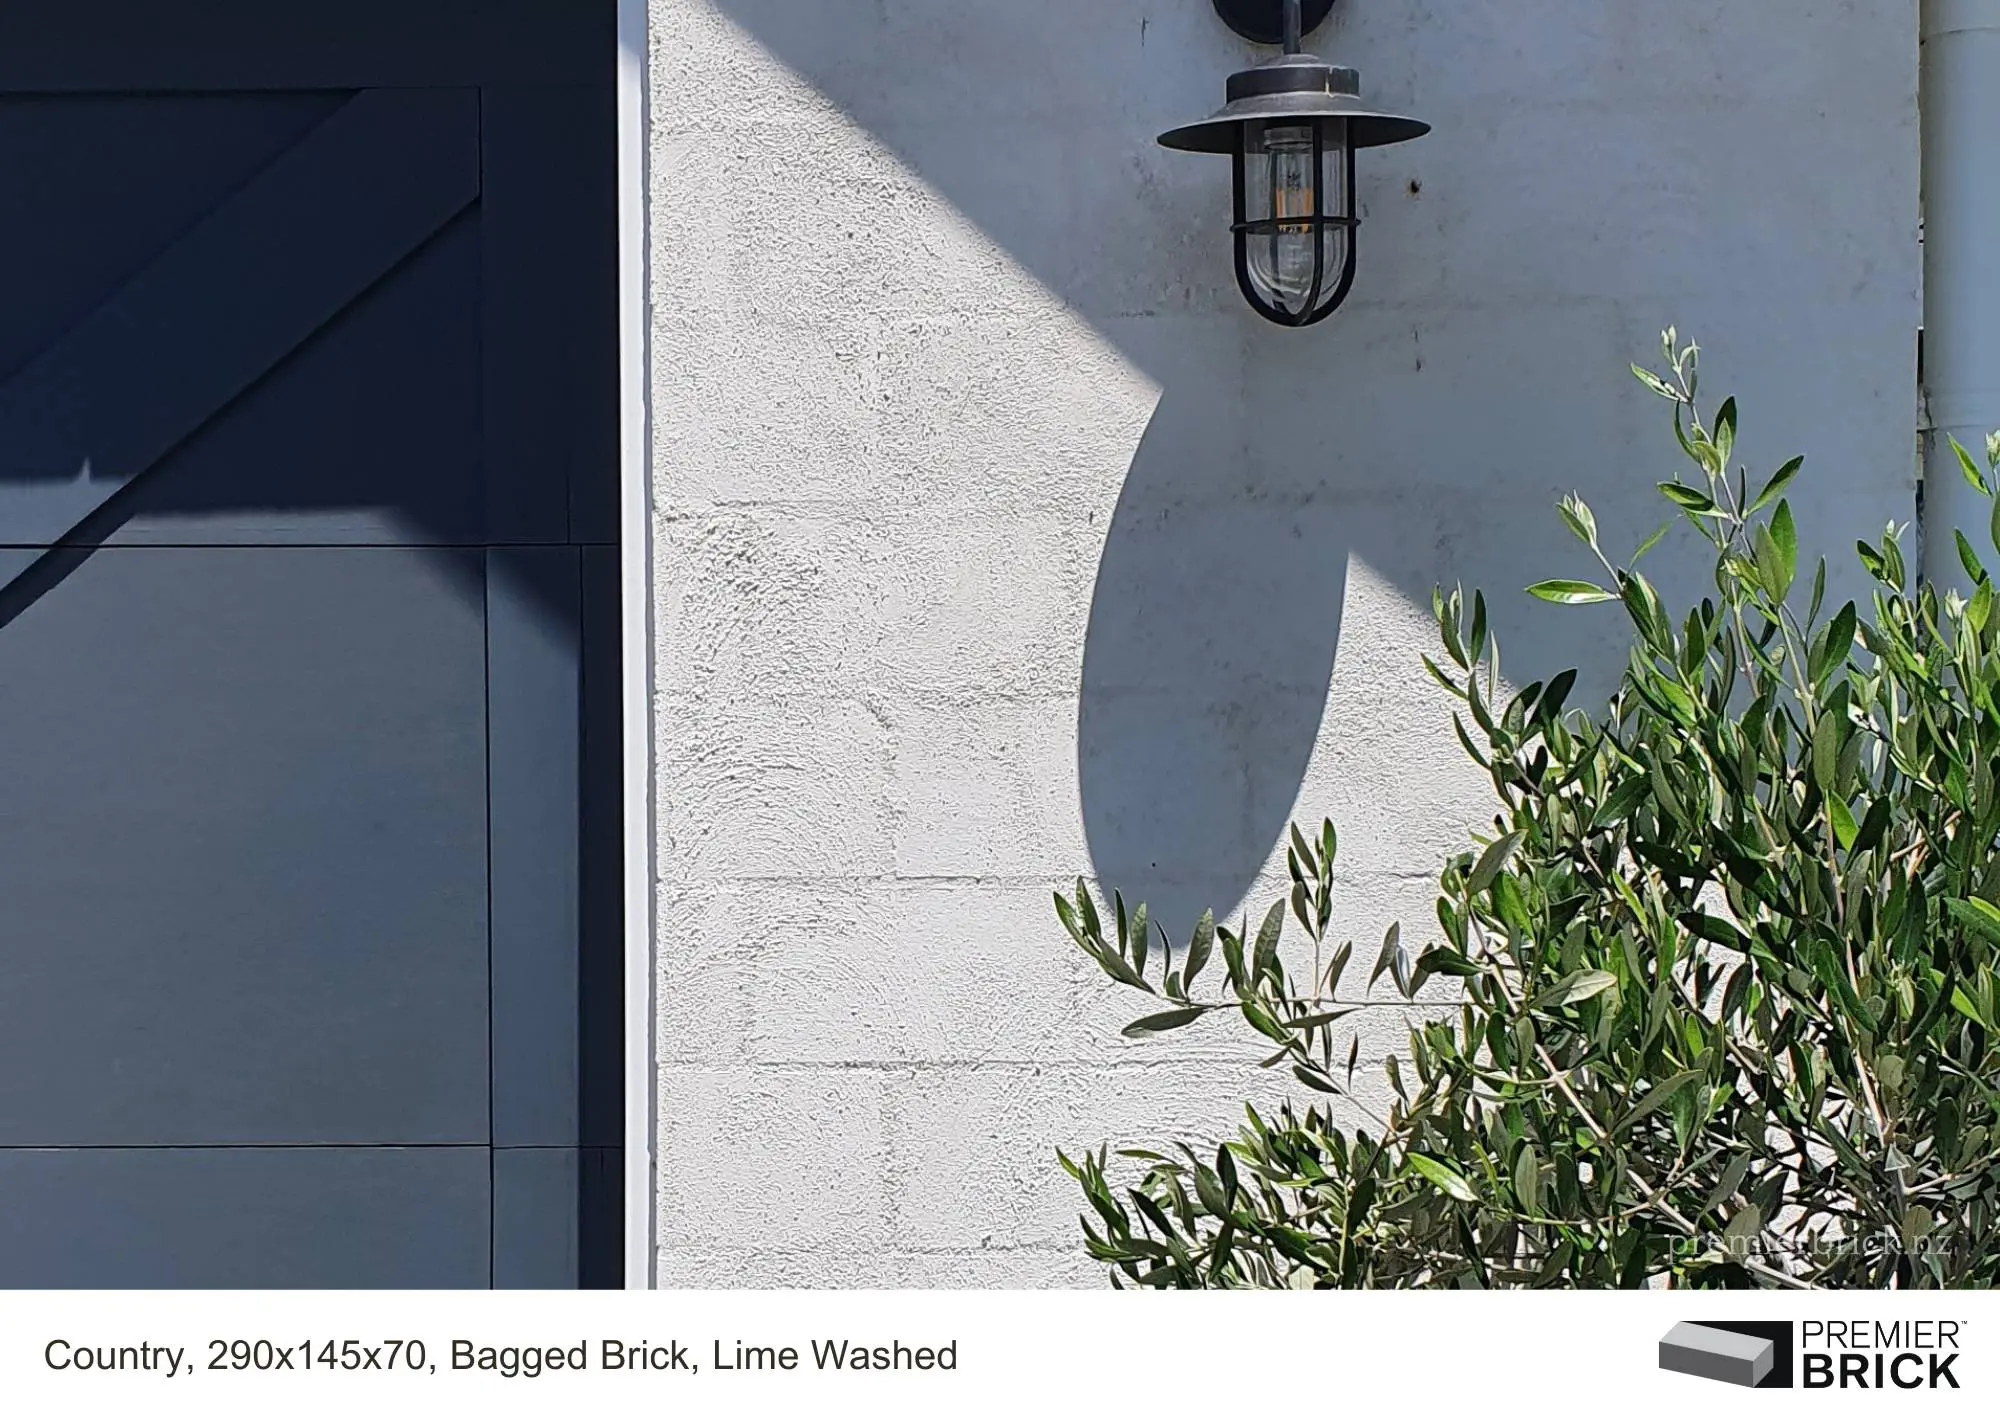
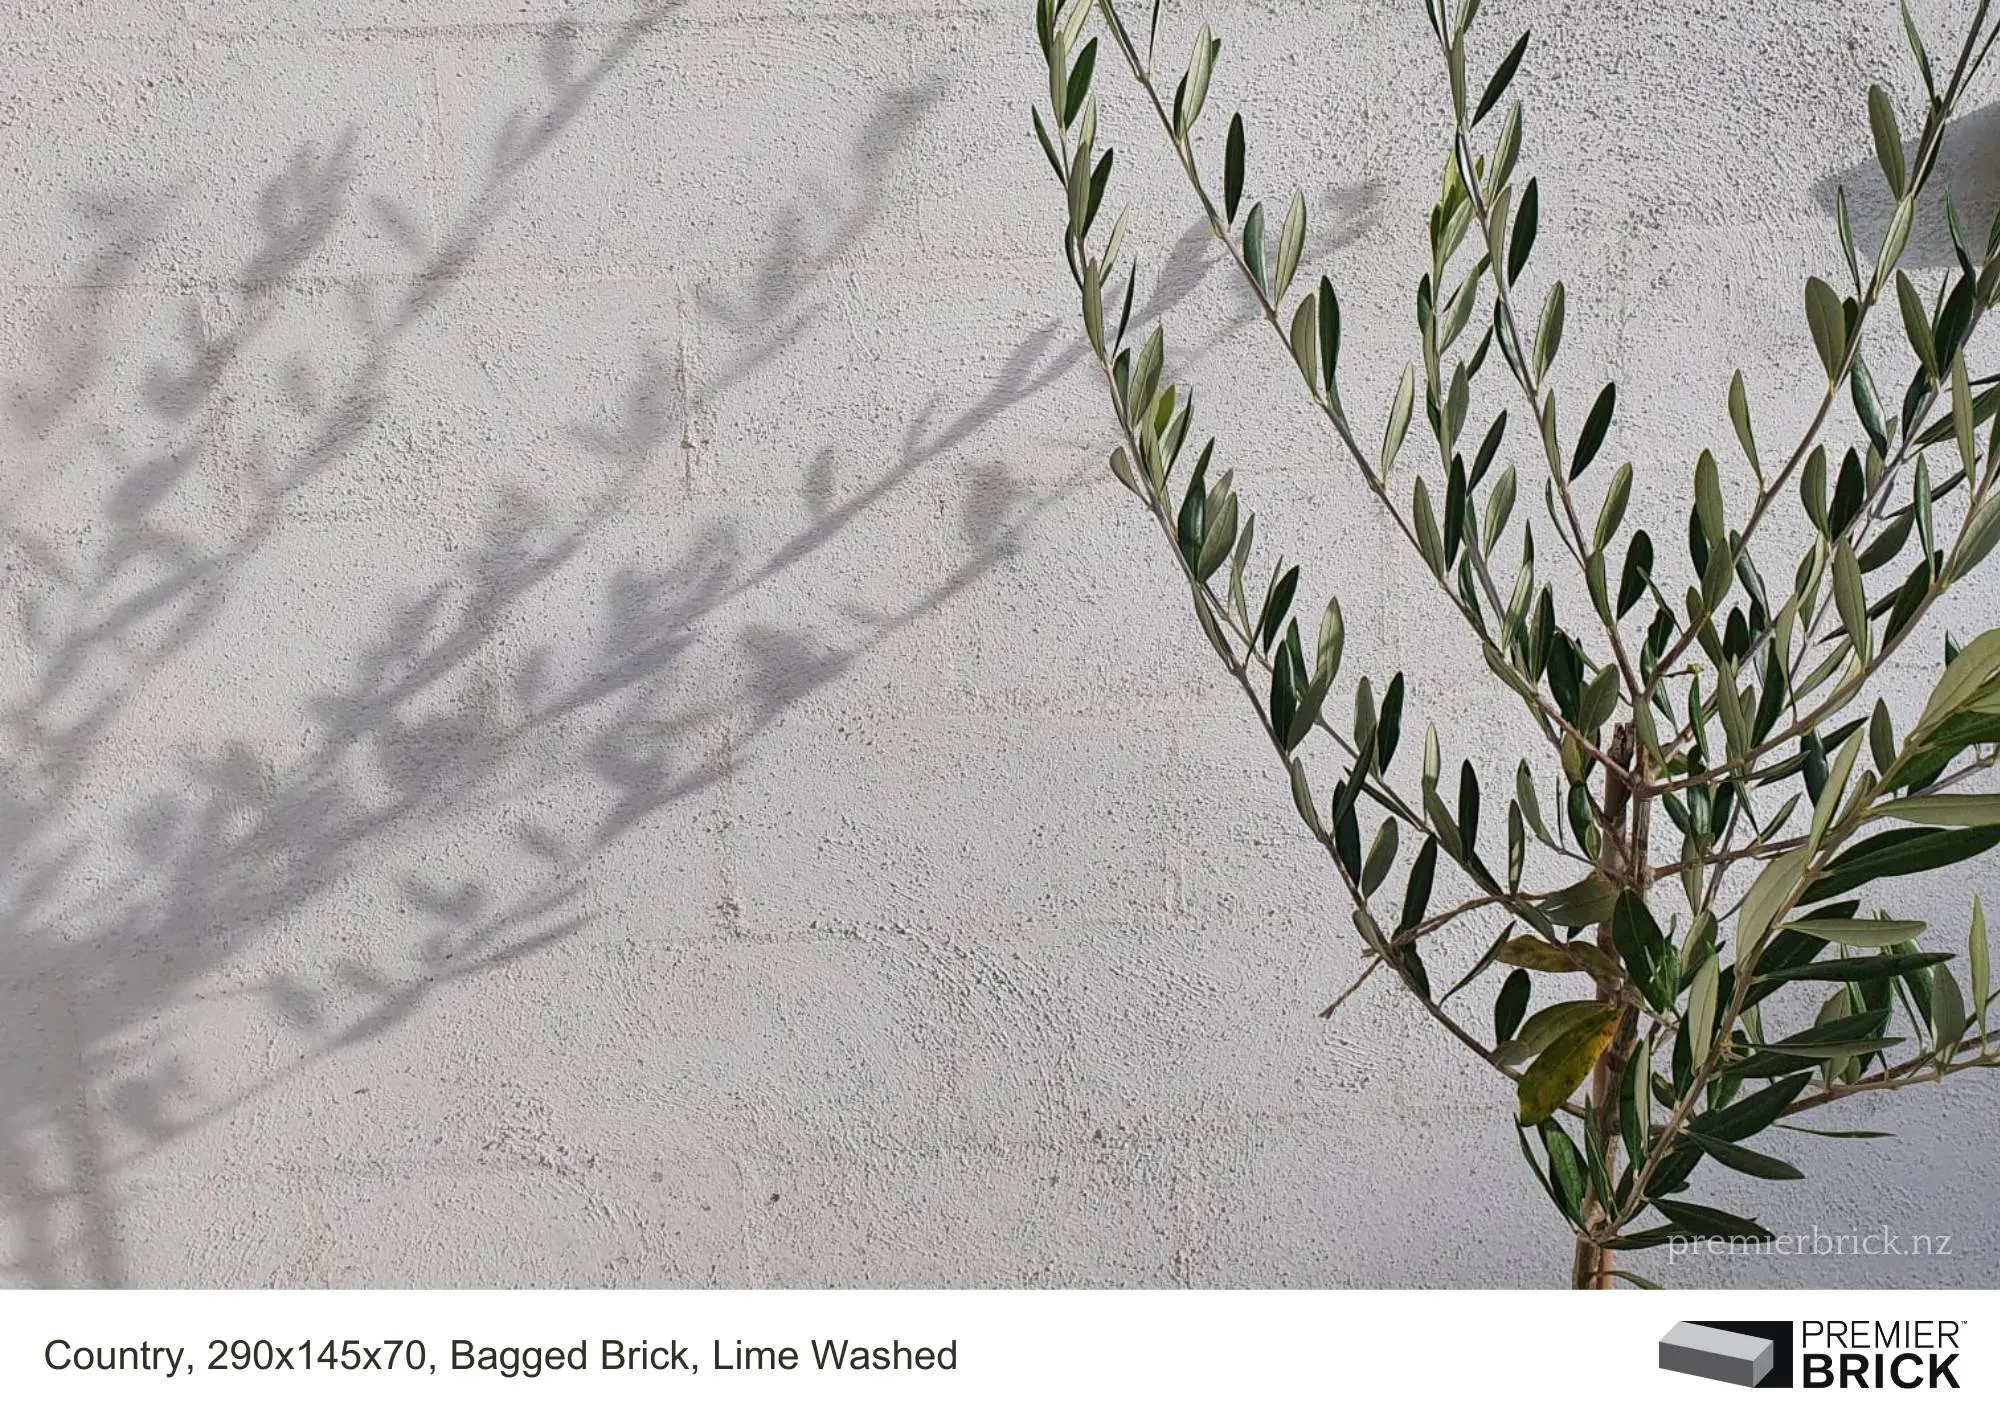
Want to see how it could look on your Premier Brick home? We can help you test it!
🏁 Final Thoughts
Limewashing is a stunning way to elevate your brick surfaces with natural texture, elegance, and charm. Whether you’re refreshing a feature wall or reimagining your home’s whole exterior, limewash is a low-maintenance, high-impact finish you’ll love for years.
💬 Have Questions or Want a Limewash Sample?
Contact us at Premier Brick and we’ll help you find the perfect limewash look for your home.
Written by Bernard Powell – Brick Consultant at Premier Brick
That White Powder on Your Bricks: What It Is and How to Stop It!
Ever noticed a weird white powder creeping across your bricks, concrete, or pavers? You’re not alone. That chalky residue is called efflorescence, and while it’s not a structural nightmare, it is a sign that something’s up with moisture in your walls or walkways. The good news? You can deal with it—and stop it from coming back!
What Is Efflorescence?
Efflorescence is a white, powdery, or crystalline deposit that appears on the surface of materials like concrete, brick, stone, or masonry. It is caused by water moving through a porous material and carrying dissolved salts to the surface. Once the water evaporates, the salts are left behind, creating the visible white residue.
The Science Behind Efflorescence
The process of efflorescence begins at the molecular level. Water, often containing dissolved carbon dioxide, infiltrates porous materials and dissolves mineral salts present in the material or surrounding environment. These salts include calcium carbonate, sodium sulfate, potassium carbonate, and magnesium sulfate.
When the water reaches the surface and evaporates, the dissolved salts crystallize, leaving behind the characteristic white deposits. This process is accelerated in humid environments and can be exacerbated by factors like temperature fluctuations and pressure differentials that push moisture through the material.
Causes of Efflorescence:
✅ Moisture Penetration – Water enters the material through rain, groundwater, or condensation.
✅ Soluble Salts – The material contains salts that dissolve in water, often sourced from cement, mortar, or surrounding soil.
✅ Evaporation & Capillary Action – Water moves to the surface through capillary action, bringing dissolved salts with it. As the water evaporates, the salts crystallize and become visible.
✅ Temperature & Humidity Fluctuations – Changes in environmental conditions can drive moisture movement and accelerate efflorescence formation.
🚨 Common Misconceptions:
❌ “It’s mould!” Nope. Efflorescence is salt-based, not organic.
❌ “It means my walls are crumbling.” Not necessarily. It’s often just a cosmetic issue—but it does mean moisture is present, which could lead to bigger problems if ignored.
❌ “I can just paint over it.” Nice try, but moisture will push through and ruin the paint job. Fix the root cause first!
Why Should You Care?
Sure, efflorescence isn’t dangerous, but it can:
✅ Make your home or business look neglected and run-down.
✅ Lower curb appeal when selling a house.
✅ Indicate water issues that could worsen over time.
✅ Affect historic or commercial buildings if left unchecked.
How to Get Rid of Efflorescence
Ready to say goodbye to that unsightly white residue? Here’s your battle plan:
1️⃣ Dry Brush It Off – Use a stiff-bristled brush to remove loose deposits. Easy win!
2️⃣ Rinse with Vinegar & Water – A 1:1 mix of white vinegar and water dissolves light efflorescence.
3️⃣ Pressure Wash (Carefully!) – A low-pressure setting can blast away deposits, but don’t overdo it or you’ll damage the surface.
4️⃣ Use a Commercial Cleaner – If it’s stubborn, specialized efflorescence removers can help.
5️⃣ Premier Acid Wash (Last Resort!) – ⚠️ Do NOT attempt to use Premier Acid Wash without contacting us first for proper instructions! Improper use can damage your surfaces or pose safety risks. Reach out to us before proceeding.
💡 Pro Tip: Always test a small, hidden area first before going full force with any cleaning method!
📢 Before attempting to remove efflorescence, contact us for more information. We can also recommend trusted professionals to help you get the job done right!
How to Prevent Efflorescence from Coming Back
Efflorescence is like a bad habit—it’ll keep showing up unless you cut off the source! Here’s how:
✅ Fix Water Issues – Improve drainage, fix leaks, and keep gutters clear.
✅ Seal It Up – Use a breathable masonry sealer to prevent moisture infiltration.
✅ Use Quality Materials – Low-salt bricks, concrete, and mortar reduce the chance of efflorescence.
✅ Improve Ventilation – If it’s inside, make sure airflow is keeping things dry.
✅ Proper Curing – Allow new masonry to dry completely before exposing it to moisture.
DIY or Call a Pro?
How do you know if you can tackle this yourself or if you need an expert? Here’s a quick guide:
🛠 DIY Fix:
✅ Light efflorescence that brushes off easily
✅ Small patches in dry areas
✅ No cracks, leaks, or major water damage
🚨 Call a Pro:
❌ Efflorescence keeps coming back despite cleaning
❌ Large areas affected
❌ Water damage, cracks, or mold present
❌ Structural concerns in walls or foundation
📢 Not sure what to do? Reach out to us for expert advice and recommendations on professional services!
Final Thoughts: Don’t Ignore the Signs!
Efflorescence might just be a cosmetic nuisance, but it’s also a warning sign from your building: “Hey, there’s moisture here!” Pay attention, fix the underlying issue, and you’ll keep your home, business, or historic building looking sharp for years to come.
Have you battled efflorescence before? What worked for you? Drop a comment below and let’s compare notes! 💬👇
Written by Bernard Powell – Brick Consultant
Premier Brick NZ
Spacing is now properly formatted while keeping everything else intact. Let me know if you need any other refinements!
At Premier Brick we are always seeking to educate and inform our clients better and faster and at a deeper level!
Dark coloured bricks have definitely been on trend in recent years but in our view they are much more trouble than they are worth!
Sure, there are some great looking homes out there with black and Charcoal brick but for every nice looking house there seem to be 9 shockers!
In the below article I lay out some of the problems and challenges that you are likely to encounter if you choose to go down this route.
Black and charcoal-coloured bricks have become a major trend in modern architecture. They create a sleek, bold, and high-contrast look that many designers and homeowners love. But while they look incredible in a showroom or a freshly built display home, the reality of maintaining black and charcoal bricks is far more challenging than most people realize.
From efflorescence and staining to dust buildup, scratches, and mortar inconsistencies, these bricks have some serious drawbacks that can make them a maintenance nightmare. If you’re thinking about going for a dark brick exterior, here’s what you need to know before making a decision you might regret.
1️. Higher Installation Costs & Limited Availability
Black and charcoal bricks are often considered a premium product, making them more expensive than standard red or tan bricks. Some brick manufacturers don’t stock them in large quantities, leading to potential supply chain issues and longer wait times.
These bricks require more careful handling during transport and installation to avoid marks and scratches, which further increases costs and slows down the building process.
2️. Longer Curing Time for Mortar Joints
Because black bricks absorb so much heat, the mortar can dry too quickly in hot weather, which can lead to cracking, shrinkage, and weaker joints. If laid in cooler weather, they hold moisture longer, increasing efflorescence risk.
3️. They Can Look Dated Over Time
While trendy now, black bricks might not age well. Architectural styles shift, and what looks ultra-modern today may look harsh or uninviting in a decade.
4️. They Absorb Heat Like Crazy
Darker colours absorb far more heat than lighter ones, and black bricks are no exception. On a hot day, black bricks can reach scorching temperatures, radiating heat into the home and making indoor spaces uncomfortably warm.
🔥 Higher cooling costs – Expect to run your air conditioning more often, leading to increased energy bills.
🔥 Temperature swings – Even in cooler climates, black bricks hold onto heat for longer, impacting indoor comfort.
🔥 Surface burns – On extremely hot days, black bricks can become dangerously hot to the touch, posing a safety risk for kids and pets.
5️. They Show Efflorescence Worse Than Any Other Brick Colour
One of the biggest issues with black and charcoal bricks is how badly they show efflorescence—the unsightly white, powdery residue that appears on brickwork.
Efflorescence occurs when moisture in the bricks and mortar carries dissolved salts to the surface. When the water evaporates, it leaves behind a chalky white deposit, which stands out dramatically on dark bricks.
This problem is often caused by:
💧 Moisture in the mortar joints – New brickwork contains excess water, which draws salts to the surface as it evaporates.
💧 Groundwater absorption – Poor drainage or improper sealing can lead to bricks pulling up moisture from the soil.
💧 Rain and humidity exposure – Water washing through the brickwork can react with minerals inside, creating more efflorescence.
While efflorescence is not structurally damaging, it’s an aesthetic nightmare that can require constant cleaning, chemical treatments, or sealing to manage. And unfortunately, it often keeps coming back unless the moisture issue is fully resolved.
6️. They Highlight Magnesium and Iron Bleed Stains
In addition to efflorescence, black bricks are also notorious for showing magnesium and iron bleed stains, which can be even harder to remove.
🟠 Magnesium Staining – This appears as milky white or grey streaks, often in areas where water exposure is high. It’s caused by magnesium-rich water reacting with the brick surface, leaving behind a stubborn, cloudy residue.
🟠 Iron Bleed (Rust Stains) – Many bricks naturally contain iron. When moisture interacts with iron particles in the brick or the mortar, rust-coloured stains can appear. This is especially common near mortar joints, weep holes, or anywhere metal components (like ties and fasteners) are present.
These stains can be extremely difficult to remove, often requiring acidic cleaners or special treatments. Unfortunately, aggressive cleaning methods can also damage the brick surface, making future staining even worse.
7️. They Show Cobwebs, Dust, and Grime More Than Other Bricks
One of the unexpected downsides of black and charcoal bricks is how badly they attract and highlight dust, cobwebs, and grime.
🕸️ Cobwebs become highly visible – Spiders love textured surfaces, and dark bricks provide the perfect backdrop for cobwebs to stand out. What might be invisible on a lighter-coloured brick sticks out like a sore thumb on black bricks.
🌬️ Dust buildup is obvious – In dry, windy areas, black bricks quickly develop a layer of dust, dulling their sleek appearance. Unlike lighter bricks, which can disguise some of this buildup, dark bricks make every speck of dust visible.
🌧️ Water stains and streaks appear more pronounced – Rain and water runoff can leave noticeable streaks, making regular cleaning essential.
8️. Poor Performance in Cold Climates
🌡️ Black bricks expand and contract more in extreme temperatures, leading to cracks and long-term structural issues.
🌨️ Freeze-thaw cycles cause spalling, where water trapped in bricks freezes, expands, and causes them to flake apart.
Are Black and Charcoal Bricks Worth It?
While black bricks make a bold design statement, they come with serious drawbacks, including:
❌ High heat absorption
❌ Extreme visibility of efflorescence, stains, and scuff marks
❌ Dust, cobweb, and water streaking issues
❌ Difficult maintenance and cleaning
❌ Potential long-term fading and aging concerns
❌ Higher handling and installation costs due to marking and scratching risks
Alternatives to Consider
✅ Darker-toned bricks with a textured surface
✅ Mid-tone grey bricks with dark accents
✅ High-quality UV-resistant coatings
Would you still choose black bricks, or do these challenges change your mind? Let us know in the comments below! ⬇️
Written by Bernard Powell – Brick Consultant
Premier Group NZ
This is a great question and one that we get asked a lot!
So, because our mission is to help great Kiwis to build beautiful, distinctive and timeless homes we love to give as much helpful info away as we possibly can!
I have now invested 22 years of my life in the building and landscaping sector and here are some of my observations:
Brick can be an excellent choice for cladding your new home, but whether it’s the “best” option depends on several factors, including your budget, design preferences, climate, and maintenance expectations. Here’s a detailed breakdown of the pros and cons of using brick cladding:
Advantages of Brick Cladding
- Durability: Bricks are highly durable and can last for decades, even centuries, with minimal maintenance.
- Thermal Insulation: Bricks provide good thermal mass, helping to regulate indoor temperatures and improve energy efficiency.
- Low Maintenance: Unlike some materials, brick requires little upkeep. Occasional cleaning and repointing (renewing mortar) are typically sufficient.
- Fire Resistance: Bricks are non-combustible, adding a layer of safety to your home.
- Aesthetic Appeal: Brick cladding offers a classic, timeless look and is available in various colors, textures, and finishes to suit different styles.
- Sound Insulation: The density of brick helps reduce noise pollution, making it a good choice for homes in busy areas.
- Eco-Friendly Options: Bricks can be made from natural materials and are often recyclable.
Disadvantages of Brick Cladding
- Cost: Brick can be more expensive upfront than other cladding materials like vinyl or fiber cement.
- Weight: Brick is heavy and may require a stronger foundation, increasing construction costs.
- Limited Design Flexibility: While bricks come in various styles, they might not suit ultra-modern or highly customized designs as well as some other materials.
- Installation Time: Laying bricks is labor-intensive and can take longer than other cladding methods.
- Weather Considerations: In areas with extreme freeze-thaw cycles, bricks may crack or spall over time.
Factors to Consider
- Climate: Brick is ideal for temperate climates but may need additional insulation in very cold regions.
- Budget: If cost is a primary concern, alternatives like weatherboard, vinyl, or fiber cement may be more affordable.
- Aesthetic Goals: If you’re aiming for a modern or minimalist design, you might consider alternatives like metal panels, render, or timber.
Alternative Cladding Options
- Weatherboard (Timber or Composite): Offers a natural look and is lightweight but requires more maintenance.
- Metal Cladding: Modern and durable, often used in contemporary designs.
- Fiber Cement: Affordable, versatile, and available in a range of finishes.
- Stone Veneer: Mimics the appearance of stone but is lighter and often more cost-effective.
- Stucco or Render: Clean and versatile, works well for Mediterranean-style or contemporary homes.
Here are the disadvantages of common alternative cladding options compared to brick:
1. Weatherboard Cladding (Timber or Composite)
Disadvantages:
- High Maintenance: Timber requires regular painting, staining, or sealing to protect against weather and pests.
- Susceptible to Damage: Can be prone to warping, cracking, or rot in damp or extreme weather conditions.
- Fire Risk: Timber is flammable unless treated, which can increase fire hazards.
- Cost Over Time: The ongoing maintenance costs can add up over the lifespan of the home.
- Composite Issues: While composite weatherboards are lower maintenance, they may not have the same aesthetic charm as natural timber and can fade over time.
2. Metal Cladding (Steel or Aluminum)
Disadvantages:
- Cost: Premium metal cladding materials like zinc or copper can be expensive.
- Noise: Metal can amplify noise from rain, hail, or other impacts unless properly insulated.
- Thermal Conductivity: Metal absorbs heat quickly, which can make homes hotter in summer unless combined with excellent insulation.
- Corrosion Risk: In coastal areas, exposure to salty air can lead to rust or corrosion if the metal isn’t treated properly.
- Aesthetic Suitability: Some people feel metal cladding looks too industrial or modern for certain home styles.
3. Fiber Cement Cladding
Disadvantages:
- Brittle Nature: Fiber cement is prone to cracking if mishandled or subjected to significant impact.
- Installation Challenges: It’s heavier than some alternatives, requiring skilled labor for proper installation.
- Moisture Sensitivity: While resistant to rot, poorly installed fiber cement can allow water ingress, causing hidden damage.
- Limited Insulation: Fiber cement itself doesn’t provide much thermal or sound insulation.
- Dust Hazards: Cutting fiber cement panels produces silica dust, which is hazardous to health if not managed properly.
4. Stone Veneer Cladding
Disadvantages:
- Cost: High-quality stone veneer can be expensive, both for materials and installation.
- Weight: Though lighter than natural stone, stone veneer is still heavier than other cladding options, potentially requiring structural reinforcement.
- Durability: While robust, stone veneer can chip or crack if exposed to heavy impacts or extreme weather.
- Authenticity: Some feel stone veneer lacks the depth and authenticity of natural stone.
- Moisture Traps: Improper installation can lead to water getting trapped behind the veneer, causing mold or structural issues.
5. Stucco or Render
Disadvantages:
- Cracking: Stucco is prone to cracking over time due to foundation settling or temperature fluctuations.
- Moisture Problems: If not properly sealed, water can seep into the stucco, leading to mold or damage underneath.
- Maintenance: Needs periodic repainting and resealing to maintain appearance and durability.
- Labor Intensive: Proper installation and finishing require skilled labor, which can increase costs.
- Limited Resistance: Stucco is not ideal in areas with heavy rainfall, as prolonged moisture exposure can degrade the material.
6. Vinyl Cladding
Disadvantages:
- Aesthetic Limitations: While available in various colors, vinyl can look less premium than other materials.
- Durability: Susceptible to cracking, warping, or melting under extreme heat or impact.
- Environmental Concerns: Vinyl is made from plastic, which raises questions about sustainability and recyclability.
- Color Fading: Prolonged sun exposure can cause vinyl to fade over time, and it cannot be repainted easily.
- Low Insulation: Vinyl offers little in terms of thermal or acoustic insulation without additional layers.

Conclusion:
Brick is a fantastic choice if durability, low maintenance, and timeless appeal are top priorities. However, if cost, weight, or design flexibility are more critical for your project, exploring other cladding materials might be worthwhile.
Written by Bernard Powell, Brick Consultant at Premier Group NZ
When it comes to building your dream home, every detail matters. From the layout of your living space to the materials you choose, creating a home that exudes style, durability, and personality is no small feat. For Kiwi homeowners who prioritize street appeal, quality craftsmanship, and supporting local businesses, Premier Brick is the standout choice. Here’s why.
- Transform Your Home with Stunning Street Appeal
Your home’s exterior is the first impression it makes. Premier Brick offers a wide range of textures, colors, and finishes to suit any architectural style, from sleek modern builds to charming heritage-inspired homes. The bricks’ refined edges and consistent sizing make for a flawless finish, ensuring your home stands out as a masterpiece of design and craftsmanship.
- Built to Last: Unmatched Quality and Durability
Premier Brick isn’t just about aesthetics—it’s about crafting bricks that last for generations. Backed by an industry-leading 100-year warranty, Premier Bricks are manufactured using cutting-edge techniques and premium materials to ensure they withstand New Zealand’s diverse weather conditions. Whether it’s the intense summer heat, coastal breezes, or frosty winter mornings, these bricks maintain their structural integrity and vibrant appearance year after year.
- Luxury for Less: Premier Quality at Affordable Prices
Investing in Premier Brick is an investment in your home’s value. Its longevity, timeless beauty, and local craftsmanship ensure that your property remains a sought-after asset for years to come. Plus, the durability of Premier Brick means fewer repairs and replacements, saving you money in the long run. Premier Brick is a premier, luxury cladding option offered at everyday affordable pricing. Thanks to our lean obsession, we can provide discerning Kiwis with a luxury look at literally half the price of similar alternatives in the market!
- Proudly NZ-Made: Supporting Kiwis and Local Craftsmanship
There’s something special about choosing products made right here in New Zealand. Premier Brick takes pride in being 100% NZ-made, supporting local industries and reducing the environmental impact associated with importing materials. Every dollar spent on Premier Brick supports hardworking Kiwis, from the skilled manufacturers who craft each brick to the suppliers and distributors who bring them to market. Unlike our largest competitors, who import all their bricks from overseas, Premier Brick keeps your money circulating within New Zealand, strengthening our economy rather than weakening it.
- Exclusive Brick Sizes: Where Form Meets Function
One of the standout features of Premier Brick is our exclusive brick sizes, which are unique to us and offer unparalleled design versatility. Many of our larger bricks function more as architectural stone cladding than traditional bricks, providing a sophisticated, modern aesthetic that elevates any home. These larger sizes allow for bold, striking designs while maintaining the durability and quality that Premier Brick is known for. Whether you’re aiming for sleek minimalism or a grand architectural statement, our bricks provide the perfect solution.
- Design Without Limits: Endless Customization Options
Every homeowner’s vision is unique, and Premier Brick offers a stunning array of customization options to bring your dream home to life. From sleek monochromatic palettes to earthy tones that blend harmoniously with New Zealand’s natural landscapes, the design possibilities are endless. With Premier Brick, your home can be as individual as you are.
- Eco-Friendly Excellence: A Greener Choice for Your Home
Sustainability matters, and Premier Brick is committed to minimizing its environmental footprint. The manufacturing process incorporates energy-efficient technologies and responsibly sourced materials, ensuring that each brick aligns with eco-conscious building practices. In stark contrast, our competitors rely on overseas shipping, which significantly increases their carbon footprint due to the extensive transport involved. Choosing Premier Brick means choosing a greener, more sustainable future for New Zealand.
- Lean Thinking: The Ultimate Planet-Saving System
Lean is more than just an operational philosophy—it’s the ultimate planet-saving system. By focusing on eliminating waste and maximizing efficiency, lean practices inherently reduce resource consumption and environmental impact. At Premier Brick, we view lean as the ultimate green vehicle, enabling us to create high-quality products while minimizing our carbon footprint. This commitment to lean operations not only benefits our customers but also contributes to a healthier planet, making it a win-win for everyone involved.
- Efficiency Obsessed: World-Leading Lean Operations
At Premier Brick, we’re not just committed to quality—we’re obsessed with efficiency and reducing waste across every facet of our company. Each week, we make between 100 and 200 improvements, cementing our status as a world leader in lean operations. Our dedication to lean principles goes beyond our own walls; we actively teach and train companies from around the globe on how to build a lean culture within their organizations. This relentless drive for continuous improvement not only reduces waste but also ensures that every brick we produce reflects our commitment to excellence and sustainability.
- Effortless Elegance: Low-Maintenance Brilliance
Unlike other cladding options, Premier Brick requires minimal upkeep. Its natural resilience to wear and tear means you’ll spend less time worrying about repairs and more time enjoying your home. A simple wash every now and then is enough to keep your home looking pristine.
- Trusted by Industry Experts: Builders and Architects Choose Premier
Premier Brick’s reputation extends beyond homeowners. Leading builders and architects across New Zealand trust Premier Brick for their projects because of its proven performance and aesthetic appeal. When industry experts choose Premier Brick, you can rest assured that your home is built on a foundation of excellence.
Why Discerning Kiwi Homeowners Choose Premier Brick
Premier Brick is proud to have the most Google reviews and testimonials in our industry, and we are the only company in our field to boast a 5-star Google review rating, thanks to our exceptional quality and service. Don’t just take our word for it—check out what our delighted clients are saying! Visit our Google Reviews and Testimonials page to see why so many Kiwis trust us to bring their dream homes to life. While you’re at it, don’t miss our helpful guide on how to choose your cladding to ensure you make the best decision for your home! For those who value real quality, sustainability, and supporting NZ-made products, Premier Brick is a clear choice. It’s not just a building material—it’s a statement of style, integrity, and care for the environment. Backed by our unparalleled 100-year warranty, Premier Brick offers you peace of mind that your investment will stand the test of time. Every dollar you spend supports hardworking Kiwis, ensuring a stronger local economy and a brighter future for our communities. Unlike imported bricks that weaken our economy and burden the planet with excessive shipping emissions, Premier Brick is a choice that aligns with your values. Our world-leading lean operations further demonstrate our commitment to innovation, waste reduction, and sharing expertise to inspire businesses worldwide. With Premier Brick, you’re not just creating a home; you’re creating a legacy.
If you’re ready to elevate your home’s street appeal and invest in unparalleled quality, explore Premier Brick’s range today. Join countless Kiwis who have trusted Premier Brick to turn their vision into reality—because your home deserves nothing but the best.
Written by Bernard Powell, Brick Consultant at Premier Group NZ
Before local brickmaking took root, New Zealand heavily relied on imported bricks, primarily from England and Europe. These bricks played a foundational role in early colonial architecture and infrastructure, shaping the aesthetic and functional aspects of New Zealand’s burgeoning settlements.
The Import of Bricks: A Colonial Necessity
When European settlers arrived in New Zealand in the early 19th century, they brought with them their architectural traditions. Bricks were a cornerstone of these traditions, prized for their durability, fire resistance, and aesthetic appeal. However, the settlers quickly realized that local brick production was challenging due to the lack of established kilns, skilled brickmakers, and suitable clay deposits in many areas.
To meet the growing demand, bricks were imported from England, where the Industrial Revolution had made brickmaking a well-established and efficient industry. British bricks were abundant, relatively inexpensive (due to large-scale production), and easily transported as ballast in ships. Bricks from Europe, particularly Belgium and Holland, were also imported for their distinctive styles and textures, which added variety to early New Zealand construction.
Characteristics of Imported Bricks
The bricks imported from England and Europe often had unique features:
– British Bricks:
– Made using uniform molds and fired in advanced kilns, resulting in consistent shapes and sizes.
– Often bore makers’ marks, which can still be found on some surviving examples in New Zealand today.
– Typically red or yellow due to the high iron content in English clay.
– European Bricks:
– Featured diverse colors, including shades of cream and brown, depending on the clay composition and firing techniques.
– Some showcased decorative finishes, reflecting the artistic styles of their regions of origin.
Key Uses of Imported Bricks
Imported bricks were used extensively in the construction of:
1. Missionary Buildings:
– Early Christian missions at places like Kerikeri and Rangihoua required durable materials. Imported bricks were used in their churches, schools, and residential structures.
2. Government and Commercial Buildings:
– Structures in towns like Russell (Kororāreka), Auckland, and Wellington prominently featured bricks brought from overseas, lending these settlements a sense of permanence and prestige.
3. Harbor Infrastructure:
– Ports and harbors, such as those in Lyttelton and Dunedin, utilized imported bricks for wharves and warehouses.
Notable Early Brick Structures
Some of New Zealand’s earliest brick structures were built with imported materials:
– The Stone Store at Kerikeri (1832): Although predominantly made of stone, this historic structure incorporated imported bricks in its chimneys and other details.
– St. Paul’s Church, Auckland (1841): One of New Zealand’s first churches built with imported bricks, demonstrating the settlers’ reliance on foreign materials.
Transition to Local Production
By the mid-19th century, as settlement expanded and local resources were developed, New Zealand began producing its own bricks. However, imported bricks didn’t disappear entirely. High-quality bricks continued to be shipped in for specialized projects, particularly for high-profile buildings and decorative purposes.
Legacy of Imported Bricks
Imported bricks remain an integral part of New Zealand’s architectural heritage. Many early brick buildings, some of which still stand today, owe their existence to these foreign-made materials. Archaeological finds at historic sites often include fragments of imported bricks, helping researchers trace the global connections of early New Zealand. These bricks tell a story not only of architecture but also of trade, migration, and the challenges of establishing a new colony in a distant land.
Today, the legacy of imported bricks is celebrated through conservation efforts and historical research, offering a glimpse into the early days of New Zealand’s built environment and the European influences that shaped it.
Written by Bernard Powell founder of Premier Group NZ