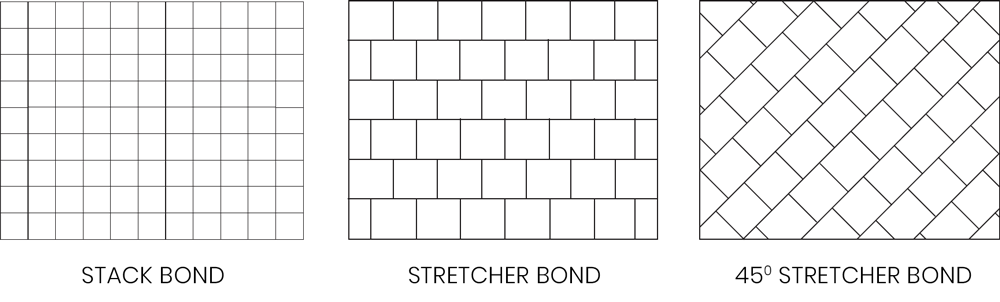
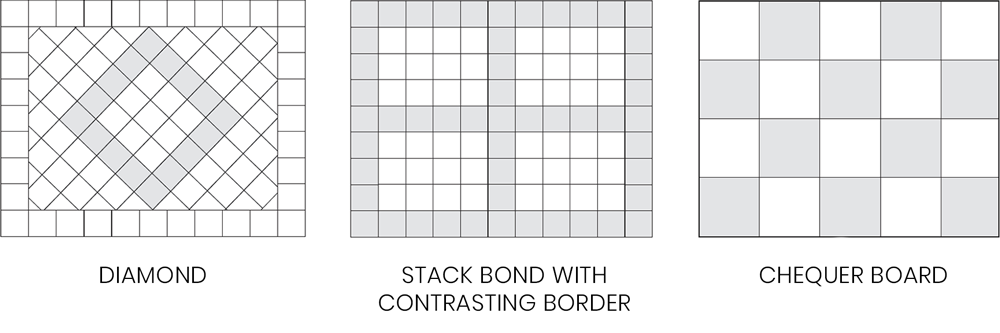
FOR SQUARE PAVERS ONLY
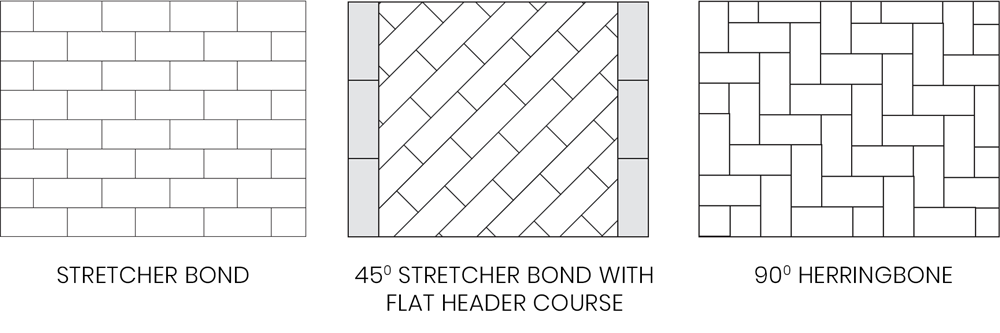
FOR RECTANGULAR PAVERS ONLY
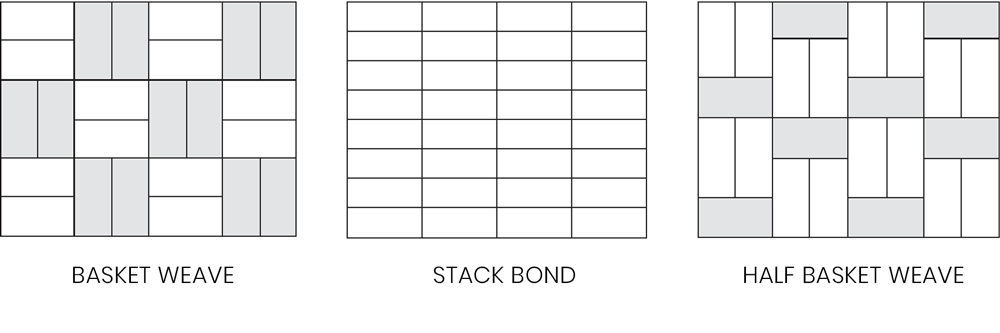
SPECIAL DESIGNS FOR ROMANI AND MILANO PAVERS ONLY (ITALIA RANGE)
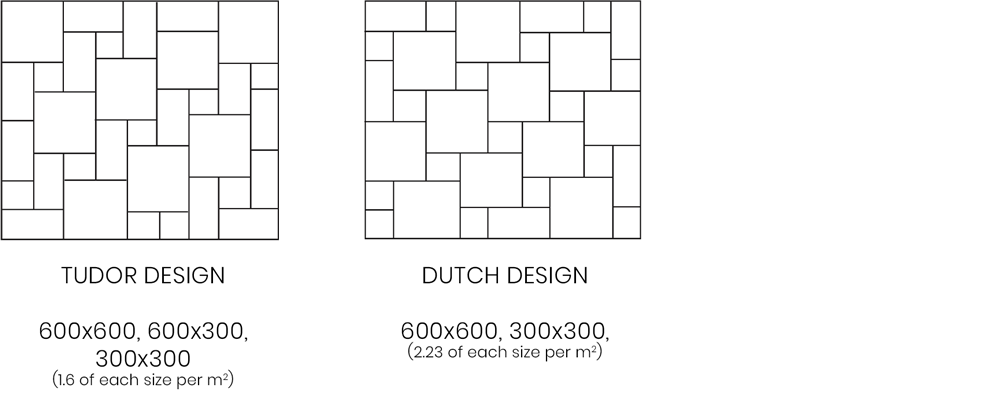
STEP 1.
Measure your area to be paved to determine the quantity of pavers required. This area is simply calculated by length (m) x width (m) = area (m²) for basic square or rectangle spaces (m=meters).
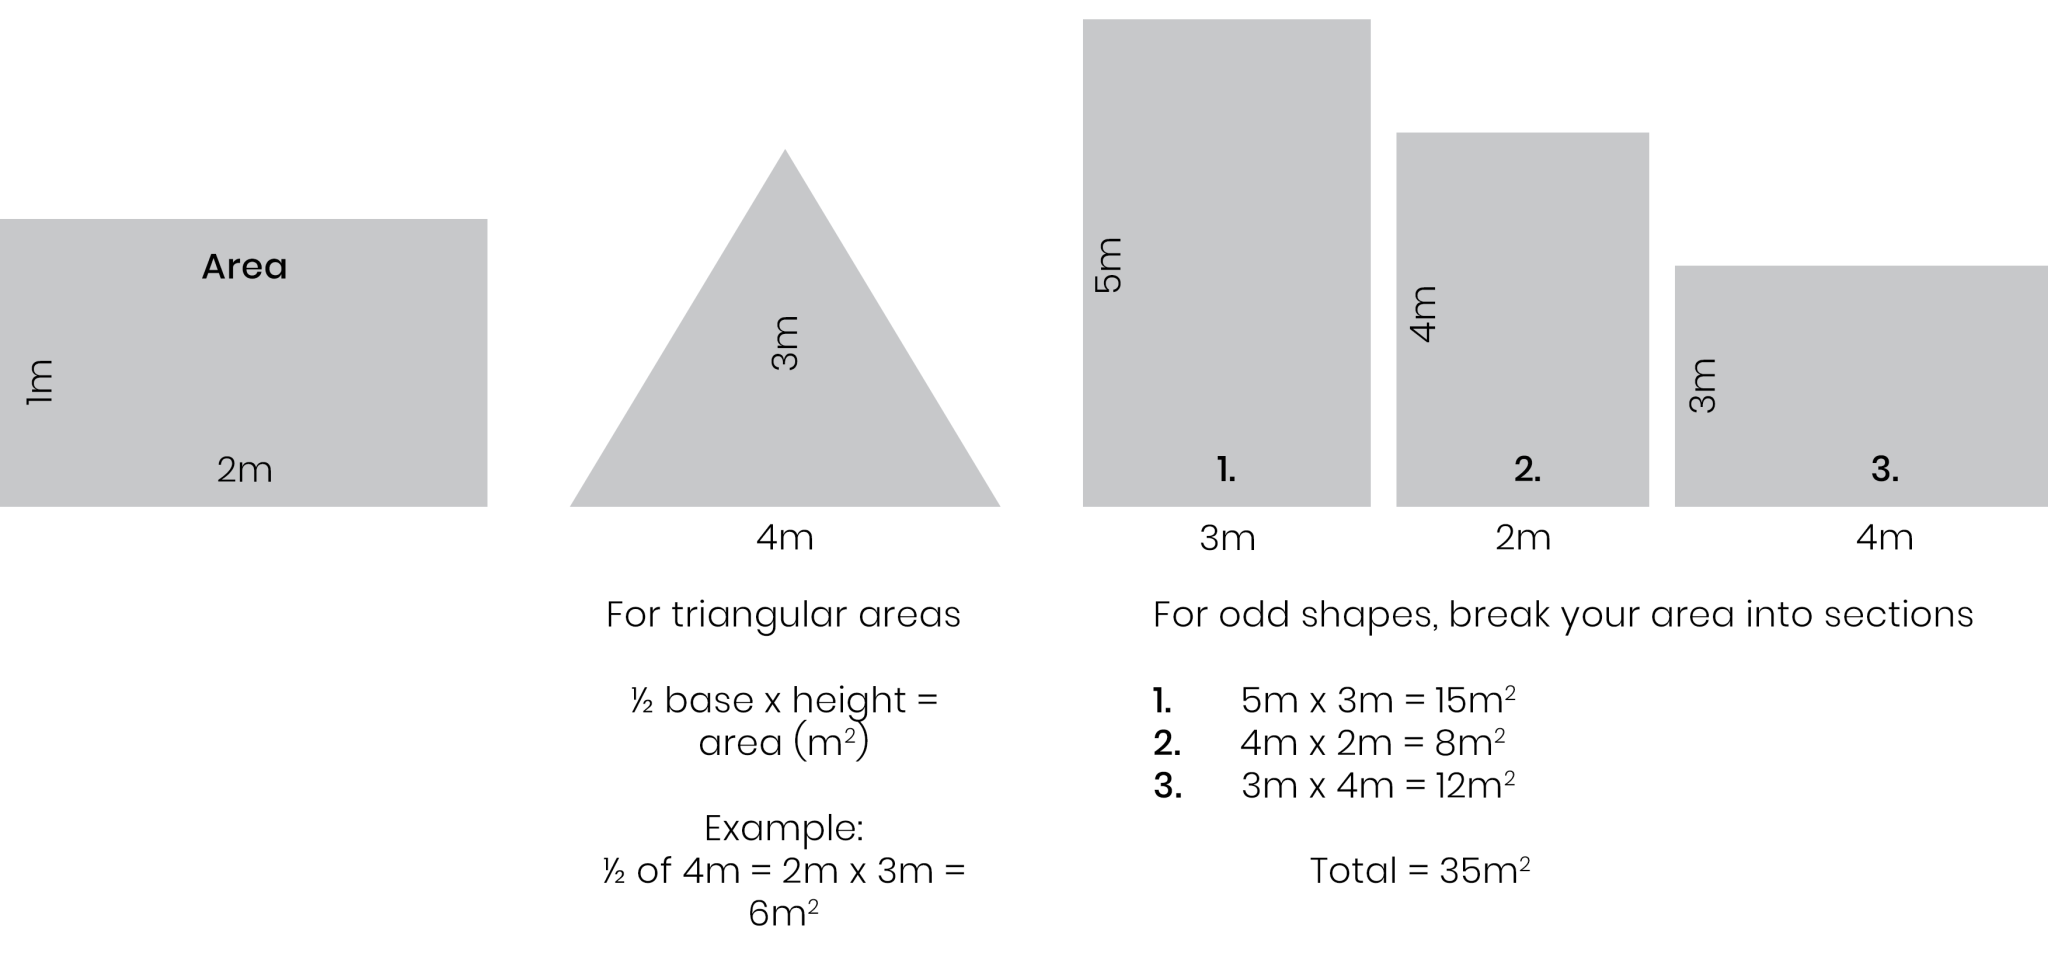
STEP 2.
Select the paver size that you prefer. Your choice will depend on the look you wish to achieve. Also, check out our ‘GENERAL TIPS’ below.
STEP 3.
Select a colour that complements your area, home and surroundings.
STEP 4.
Choose to D.I.Y (DO IT YOURSELF) or hire a professional contractor. Check HOW TO LAY YOUR WETCAST PAVERS for a basic guide to laying your Premier Pavers (Italia Range).
TO LOCATE YOUR NEAREST STORE SIMPLY CALL 0800 22 22 98 OR FIND IT HERE STOCKISTS
General Tips
TIP 1.
Select pavers that match internal floor coverings to ensure the transition from indoor-out is subtle and blends with your decoration style.
TIP 2.
If paving around pools or building steps, choose from our bullnose range to create a smooth finish.
TIP 3.
Combining large and small format pavers can add textural qualities for a more distinctive space.
TIP 4.
When paving a small space, keep the design simple and use a neutral coloured, large-format paver to create a sense of space.
TIP 5.
Large format pavers, such as 450 x 450mm speed up the laying process.
TIP 6.
Lighter coloured pavers make a shady area seem much brighter and warmer.
TIP 7.
Darker colours add contrast and interest to your outdoor areas.
Your driveway…
Why use block paving?
- Beautiful
- Practical
- Incredibly durable
- Can make the house easier to sell
Remember the cost of the paving is only a small proportion of the total cost when you have your driveway professionally installed
Make it special and unique
- Circles
- Octants
- Feature-banding
- Security posts
- Lighting
Your patios and paths…
WHAT SHOULD I CHOOSE?
Flagstones are ideal for: Patios • Terraces • Paths
They can look beautiful indoors too: Conservatories • Hallways • Kitchens
WHAT ELSE IS AVAILABLE?
Premier can make your garden as individual as your are!
TRY: • Circles • Octants • Decorative edgings • Bands of colour
IS IT EXPENSIVE?
The Premier range is the widest available, so you’re sure to find something that’s just right for you – and your budget. Generally, the majority of the costs involved are in site preparation and installation which will be a constant whatever product range you choose, so if your perfect paving is slightly more expensive, the cost of the project increases by only a modest amount
Your walling…
WHY SHOULD I CONSIDER WALLING?
- Privacy and shielding
- Barbecues for entertaining
- Raised beds for planting
- Ponds for tranquillity
- Brick walls give a traditional look
- Not all walls need mortar
Gardens
- Learn where the sun goes so you can site your patio and plants to best advantage
- Your lifestyle can influence your design
- A level garden makes a patio easy to lay
- Sloped gardens let you create interesting step features and terraces
- The sizes and laying patterns of the paving dictate whether the final look is formal or random
- Explore texture, colour and pattern to lend character to your garden or driveway and to suit y our home.
- Circles, Octants, Walling, Edgings, Water Features,
- Stepping Stones, Paths and Lighting can all enhance your design
- Decorative aggregates are effective mulches in borders and can add interesting textures
Driveways
- Use colours that complement, or contrast with the surrounds
- Choose the right materials: Block paving is perfect for driveways (garden paving products in this brochure are not suitable)
- Remember the drainage! Kerb blocks will help keep your driveway free of puddles
- Circles, Octants, Walling, Edging and Lighting can all enhance your design
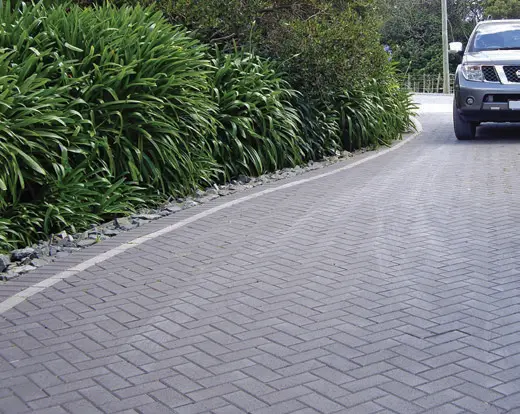
Who’s going to do the work?
You can choose to DIY using the instructions and the videos on our website. OR you can contact us for a list of approved installers in your area who can come to your site to quote and install for you.
A stylish landscape/garden does not have to be expensive, but to make the best use of the space available, you need to plan the layout carefully.
- INSPIRATION! Select pavers that match internal floor coverings to ensure the transition from indoor-out is subtle and blends with your decoration style.
- STYLE! Choose your style or landscape e.g: Formal with straight lines or informal with curving lines. Do you prefer an NZ native look? English formal look? Tropical look? – use your books and magazines for ideas.
- ESSENTIAL FEATURES! Driveway, patio, paths, clothesline. When designing, consider things like: views, shade, access, sunshine, wind, slopes, drainage, security and privacy.
- EXTRA FEATURES CONSIDER THINGS LIKE vegetable garden, fruit trees, irrigation, garden lighting, BBQ area, pool, garden shed, compost bins, children’s playground, pets, raised planters, walls, pergolas, outdoor fire, water features, etc.
- SITE PLAN! Using a pencil on the grid provided, carefully draw a site plan of y our property showing all existing features that you want to keep e.g. house, garage, trees, etc. Use a scale of 1:100 e.g. each square on the grid = 1m².
- IDENTIFY! IDENTIFY AND MARK THESE 6 AREAS ON YOUR PLAN: 1. Entrance way 2. Driveway 3. Parking 4. Patio 5. Service area (clothesline/bins) 6. Lawn areas.

- DESIGN! This may take a while and you won’t get it the right first time – so please be patient! Make sure you have an eraser handy! Design in the essential features first e.g: 1. Driveway 2. Patio and Paths 3. Walls and fences 4. Clothesline area – and then design in your gardens, trees and lawn areas. Lastly, add in any extra features you want.
- ACTION LIST! From your plan – create an installation action list in order of priority. In order to successfully complete your project – you must install all hardscape (pavers etc) products first and softscape (gardens etc) last. This is because the hardscape products provide the “skeleton” of your landscape and the softscape provides the “flesh”.
- INSTALL! This is the really exciting part! Order your PREMIER products from your local DIY store or call us on 0800 22 22 98 to organize the delivery for you. You can DIY or choose a Premier approved installer to do the work for you.
- ENJOY! Pop the champagne, relax and enjoy your beautiful landscape.
The helpful guide to creating your own beautiful landscape

Taking a drive around town will reveal yards that look the same. Sure some may have beautifully manicured lawns and others may not but the overall look is the same, green grass, trees and flowers. If you’re longing to make your yard stand out from the acres of sameness adding some decorative rocks and stones will do the trick.
The addition of landscaping rocks will give your yard a style and character that most homeowners would love to have but don’t know where to start. The first step to adding some personality to your landscaping is to remove some of the grass. If you aren’t using your front lawn there’s no point in maintaining it and this will make your landscape unique.
Use a shovel or if you have access to one, use a tiller to break up the ground. Pull the rocks out of your way –these are not the kind of rocks we’ll be using for this landscaping project ?
While you’re digging, decide whether or not you have the proper drainage for your plants and flowers, if not, now would be a good time to add the appropriate irrigation system.
One addition that you can add to your front yard landscaping is to add a walkway. Having your guests use the driveway or worse, the grass, to get to your door is not the effect you’re after so think about adding a walkway. This addition will keep guests from tracking in dirt and other debris in to your home too.
One popular effect for a stone walkway is to stagger rocks all along the walk to your door. Make certain that when you do the final install your rocks are secure and they don’t move when they are walked on. To keep the rocks in place remove four to five inches of soil beneath each rock that you lay. Add a thin layer of gravel beneath the stone. This will keep your rocks and stones in place to ensure safety and stability.
When planning the walkway try to add interest by adding curves to your design. This will give your work a more distinctive yet informal look. Add smaller trees and shrubs top provide structure for your new walkway. And add some color with some easy to care for perennials. Perennials work well with a rock landscape because they are easy to care for yet they add beauty and color to the project.
Once the main plantings are in, you can start to add some smaller greens and flowers. You can add some greens in between the rocks in your walkway to fill in the gaps. Some people suggest that instead of using mulch to maintain the manicured look use river rock between the flowers. Both would work well it’s just a matter of taste and budget.
Now for the finishing touch –add some climbing vines that will wrap up and around your railing and front porch. Hanging plants can be hung from the roof of you porch or you can create a trellis for the vines and the planters. This will give it the finished look of a Tuscan garden. Decorative rocks are the final touch for this easy to do project and you’ll have a front yard that neighbors will envy for years.
There are many reasons why you should incorporate landscaping stones into your landscaping design. The main one however is for beauty, pure esthetic beauty. For a landscaping design to look perfect it needs to have layer and this can be a hard thing to achieve without the use of landscaping stones.
landscaping stones are not the only way to give your yard depth but they are the easiest way. You could try to change the slop of your yard. You could dig lower sports and build up higher ones but this could take forever and you would have to know a lot about landscaping to try to tackle a job like that. Just think of the trouble you could get into with the drainage issues if you were to make a mistake! No, it is far easier to simply use landscaping stones to bring some depth to your yard.
You can use landscaping stones to accent certain portions of your yard, you can even plant some plants in these landscaping stones. They look great round the patio and the fence and you can even get colored landscaping stones to bring more color into your yard. This kind of color is especially nice to have in winter when everything is so bare and cold looking. The fact of the matter is that you can transform the whole look of your yard with the simple use of landscaping stones. They are like jewelry only for the yard.
There are many different kinds of landscaping stones and they come in all shapes and sized. The landscaping stones that are right for you will depend on the effect that you are trying to create with your yard. And different parts of the yard might require different sized landscaping stones. You can get a wide variety of colors for your landscaping stones and in some cases you may want to mix a couple of colors together to create a whole new and interesting look.
If you are planning to overhaul your yard this year then you need to start looking into using landscaping stones in your design. These will bring the whole yard together and if they are used right will add balance and harmony to your entire garden.
You can get landscaping stones at your local gardening center and even some home building stores will carry them. Shop around and find the landscaping stones that suit your home and your needs best before you make a purchase.
When it comes to designing outdoor spaces, take it one stepping stone at a time.
Start-Up Front
If you’re wondering where to start a landscape transformation, look no farther than your front yard. It’s the first thing that you see driving up to your house, and you can wow guests before they even enter your home. Just remember that curb appeal is important, but no matter how pretty your landscape is, it needs to be functional.
Hardscape First
Do all of your hardscaping projects before you set out any plants. Hardscaping can include a porch, sidewalk, driveway, parking areas, decks, fencing, patios and arbor. These projects usually involve construction, which can compact your soil or damage turf and plantings, so it’s important to complete any heavy work before plantings begin.
Toil In the Soil
When it is time to garden, amend your soil by adding organic matter such as finely shredded pine bark, peat moss, mushroom compost or leaf mold before setting out plants. Loose, fertile soil will encourage root growth on new plantings and allow them to become established quickly. Clearly define your turf and bed lines. First use a garden hose to lay out your bed lines then use orange spray paint to mark the lines.
Plant Next to Your House
Your foundation planting should embrace your house and not cover it. Low-growing shrubs or groundcovers should be planted in front of low windows and porches. Larger rounded shrubs or small trees work well planted on the corners of your home. These larger plants will frame up your house and help soften the box-like structure. Remember to create a small bed in your front yard for annual color. Flowers will add instant charm.
Move to the Back
Your backyard should be an outdoor living area to enjoy. If you need privacy, install wooden fencing or large shrubs around the perimeter to create walls. Decks and patios make great sitting or dining areas when the weather’s appropriate and they create a nice overflow for guests during parties.
Gather Around the Fire
Grilling stations or outdoor kitchens can be used to cook your meals and not heat up the kitchen. Fire pits and outdoor fireplaces are very popular and allow you to enjoy your yard even when there’s a little chill in the air. Both of these options make for easy entertaining or fun family activity.
Wants and Needs
Consider your options and the space you will need. If you have a sunny backyard you might consider putting in a kitchen garden where you can grow a few herbs or vegetables. Just be sure the area you choose receives several hours of sun. Do you need a children’s play area? If so, position it where you can see it from your deck or patio to keep a watchful eye on the young ones.
A Little on the Side
Side yards are often narrow strips that are rarely seen. They can be a good place to house your utilitarian needs. Garbage cans, firewood, storage and garden sheds often work well tucked into your side yard. If you have dogs it might be a good place to install a dog run. You’ll probably need a walkway on at least one side of your house so you can easily navigate from the front of the house to the backyard.
Choosing the Right Plants
Before planting anything, study your landscape. See where the sun rises and sets. Some plants love the morning sun but will not tolerate the western sun. Consult with a local garden center about the plants that you intend to use and know their needs. Plants that need full suns such as herbs, vegetables, roses, and many bedding plants require five or more hours of sunlight, so make sure to design your areas appropriately.
How Big?
Know a tree or shrub’s ultimate size before you put it in the ground. A small yard is not a good place for trees such as river birch, red maples, sugar maple, oaks or magnolia. Trees such as Japanese maples, crepe myrtles and redbud would be better suited for little landscapes. Avoid planting brittle trees such as river birch or silver maples next to your house or close to parking areas to avoid damage from falling limbs.
Plant Shapes and Textures
Add some design elements to your landscape by playing off the shape and texture of plants. Use fine-textured plants that have small leaves or needles next to bold-textured plants that have large leaves. Upright linear growing plants can be positioned next to round or low-growing plants to create interest.
Finishing Touches
Adding containers, hanging baskets and window boxes is a great way to incorporate a little more color into a landscape. A large planter or grouping of containers placed by your front door will create an inviting entrance. If you have several planters use a common plant or color in each of them for repetition and continuity. Too many colors combined together can become chaotic looking.
Incorporating Your Personality
Add your personal touches to your garden. You can do this with garden art, statues, water features, a birdhouse or architectural fragments. Use low-voltage night lighting to highlight these items, but also position lights along walkways to make maneuvering after dark easy and saf
Maintenance
To keep a beautiful landscape it must be maintained. Keep new plantings watered and mulched. Mulch makes a landscape look finished but it also helps soil retain moisture and keeps weeds in check. Work on your landscape but also enjoy it. Your outdoor areas should be an extension of your home. A beautiful and functional landscape makes your house more appealing and will increase its value.
Article from: (diynetwork.com)